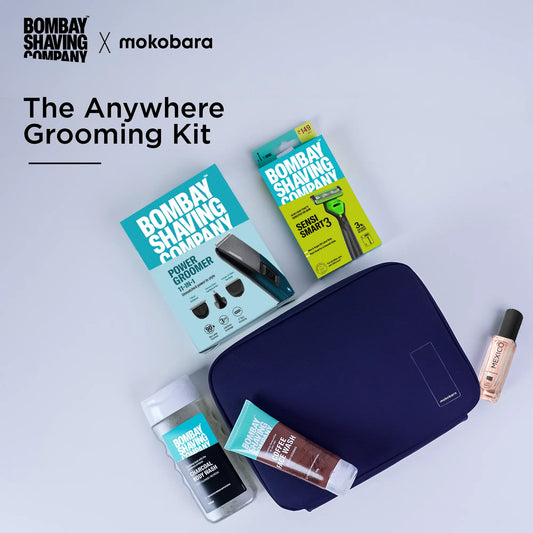
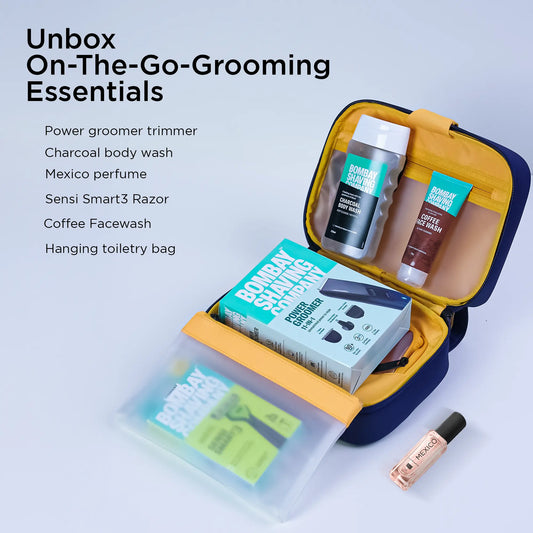
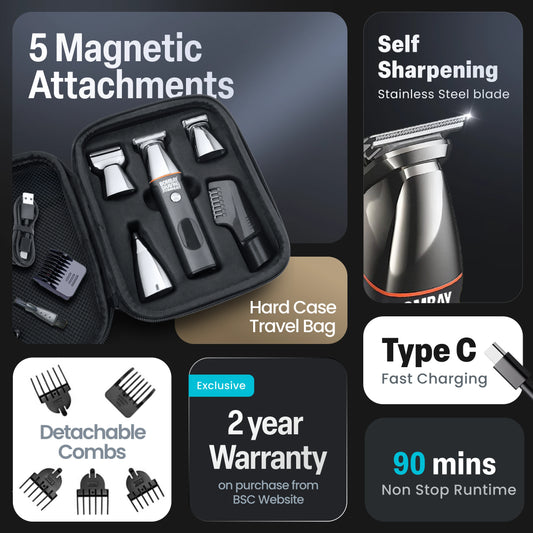
window.flitsObjects && void 0!==window.flitsObjects||(window.flitsObjects={});
window.flitsObjects.global = {
partialCustomerHash: '58b68168bcbc9e6e5828a9433d0223bd23d435a9dbac04f70878f8957f01c804',
customerHash: '58b68168bcbc9e6e5828a9433d0223bd23d435a9dbac04f70878f8957f01c804',
shop_name: 'Bombay Shaving Company',
token: '9b4d4de12733ecfaacdb7d524276d3e5',
base_url: '/apps/flits/api/1/25763',
proxy_name: 'flits',
app_id: 1,
shop_id: 25763,
shop_token: '9b4d4de12733ecfaacdb7d524276d3e5',
chandle: 'flits_products_handle',
recent_handle: "flits_recently_products",
cemail: "flits_customer_email",
customJsURL:"https://cdn.shopify.com/extensions/269c798b-a99b-49e0-974a-9cb3e65387f4/flits-50/assets/flits_custom.js",
shop_currency: 'INR',
shopCountryName: 'India',
defualtCountry: 'US',
money_format: '₹{{amount_no_decimals}}',
money_format_replace: { moneyReplaceRegex:/((\,00)|(\.00))$/g, replaceTo: ''},
Metafields: {"APP_ID":"1","APP_NAMESPACE":"Flits","APP_PROXY":"flits","APP_SETTINGS_UPDATED":"1744802811","CREDIT_DISPLAY_ON":"cart","ENABLED_FEATURES_FOR_ONLINE_STORE":{"status":true,"cdnURL":"https:\/\/cdn.getflits.com","features":[]},"GET_RULES_FOR_GUEST_CUSTOMERS":{"rules":{"all_rules_data":[{"rule_id":5,"is_fixed":0,"credits":1500,"column_value":"1:-1","module_on":"cart","tab_to_append":"flits_spent_rules","relation":"between","avails":[],"is_default_rule":true,"is_earned":false},{"rule_id":11,"is_fixed":1,"credits":5000,"column_value":"-1","module_on":"referrer_friend","tab_to_append":"flits_earning_rules","relation":"==","avails":[],"is_default_rule":true,"is_earned":false}]}},"IS_ADVANCE_DASHBOARD_ENABLE":1,"IS_ADVANCE_DASHBOARD_PAID":1,"IS_AMAZON_ENABLE":0,"is_cart_code_automatic":"1","IS_FACEBOOK_ENABLE":0,"IS_GOOGLE_ENABLE":0,"IS_HOW_TO_EARN_CREDIT_DISPLAY":1,"IS_ORDER_CONTACT_US_ENABLE":0,"IS_ORDER_TRACKING_PAID":1,"is_recently_view_enable":1,"IS_REFER_PROGRAM_ON":0,"IS_REORDER_ENABLE":1,"IS_SOCIAL_LOGIN_ENABLE":0,"IS_SOCIAL_LOGIN_PAID":0,"is_store_credit_enable":0,"IS_STORE_CREDIT_PAID":1,"IS_TRACK_TURTLE_ENABLE":0,"IS_TWITTER_ENABLE":0,"IS_WISHLIST_ENABLE":1,"IS_WISHLIST_PAID":1,"MULTILANGUAGE_CONTENT_en_134264586394":{"flits":{"icons":{"close_icon":{"type":"url","code":"","url":"https:\/\/cdn.getflits.com\/icons\/default\/close-icon.svg"},"continue_icon":{"type":"url","code":"","url":"https:\/\/cdn.getflits.com\/icons\/default\/continue-icon.svg"},"edit_icon":{"type":"url","code":"","url":"https:\/\/cdn.getflits.com\/icons\/default\/edit-icon.svg"},"email_icon":{"type":"code","code":"\u003csvg xmlns='http:\/\/www.w3.org\/2000\/svg' width='16' height='14' viewBox='0 0 16 14' fill='none'\u003e \u003cpath d='M2.50016 1.1665H13.8335C14.6127 1.1665 15.2502 1.804 15.2502 2.58317V11.0832C15.2502 11.8623 14.6127 12.4998 13.8335 12.4998H2.50016C1.721 12.4998 1.0835 11.8623 1.0835 11.0832V2.58317C1.0835 1.804 1.721 1.1665 2.50016 1.1665Z' stroke='#4A4A4A' stroke-width='1.25' stroke-linecap='round' stroke-linejoin='round'\/\u003e \u003cpath d='M15.2502 2.58301L8.16683 7.54134L1.0835 2.58301' stroke='#4A4A4A' stroke-width='1.25' stroke-linecap='round' stroke-linejoin='round'\/\u003e \u003c\/svg\u003e","url":"https:\/\/cdn.getflits.com\/icons\/default\/email-icon.svg"},"phone_icon":{"type":"url","code":"","url":"https:\/\/cdn.getflits.com\/icons\/default\/phone-icon.svg"}},"general":{"greeting":"Hello","morning":"Good Morning","afternoon":"Good Afternoon","evening":"Good Evening","cant_add_more_quantity":"You have reached the maximum limit. You cannot add any more items.","cart_updated":"Some items are no longer available. Your cart has been updated.","getting_customer_details":"Getting\/Syncing Customer Details","something_went_wrong":"Something went wrong. Please try again."},"navigation":{"profile":"My Profile","delivery_address":"Delivery Address","my_orders":"My Orders","appstle_subscription":"My Subscription","top_ordered_products":"Top Ordered Products","wishlist":"My Wishlist","recently_viewed_products":"Recently Viewed","store_credit":"My Credits","how_to_manage_credit":"How To Manage Credits","how_to_earn_credit":"How To Earn","how_to_spend_credit":"How To Spend","from_admin":"From Store Owner","refer_friend":"Refer Friend","change_password":"Change Password","log_out":"Log Out"},"profile_page":{"first_name":"First Name","last_name":"Last Name","email":"Email","contact_number":"Contact Number","birthdate":"Birthdate","gender":"Gender","male":"Male","female":"Female","other":"Other","edit_button":"Edit","cancel_button":"Cancel","save_button":"Save","invalid_email":"Email is not valid","invalid_email_domain":"Email contains an invalid domain name","email_already_taken":"This email is already in use. Please enter a different email address.","invalid_contact_number":"Contact number is not valid","contact_number_already_taken":"This contact number is already in use. Please enter a different contact number.","save_details":"Saving profile details...","saved_successfully":"Profile updated successfully"},"address_page":{"add_new_address":"Add New Address","first_name":"First Name","last_name":"Last Name","address1":"Address Line 1","address2":"Address Line 2","company":"Company","zip":"Postal\/Zip Code","contact_number":"Contact Number","city":"City","country":"Country","province":"Province","mark_as_default_checkbox":"Mark as Default Address","cancel_button":"Cancel","save_button":"Save","first_name_is_long":"First name is too long (maximum is 255 characters)","last_name_is_long":"Last name is too long (maximum is 255 characters)","address1_is_long":"Address Line 1 is too long (maximum is 255 characters)","address2_is_long":"Address Line 2 is too long (maximum is 255 characters)","company_name_is_long":"Company name is too long (maximum is 255 characters)","city_is_long":"City is too long (maximum is 255 characters)","zip_is_long":"Zip is too long (maximum is 255 characters)","invalid_contact_number":"Contact number is not valid","address_already_taken":"This address already exists.","country_invalid":"Country is not valid","adding_new_address":"Adding New Address...","address_added_successfully":"Delivery address added successfully","default_address_label":"Default","mark_as_default_button":"Mark as Default","edit_button":"Edit","edit_address":"Edit Address","updating_address":"Updating Address...","address_updated_successfully":"Delivery address updated successfully","delete_button":"Delete","delete_confirmation_message":"Are you sure you want to delete this address?","yes":"Yes","no":"No","deleting_address":"Deleting Address...","address_deleted_successfully":"Address deleted successfully"},"order_page":{"blank_screen_line_1_html":"You haven't placed any orders yet.\u003cbr\u003eWe can't wait to have you as a customer.","blank_screen_line_2_html":"Take a look at our products here","order_date":"Date","order_date_format":"%B %d %Y","order_number":"Order","total_items":"Total Items","payment_status":"Payment","show_order_details":"View Order","hide_order_details":"Hide Order","reorder":"Re-order","product_unavailable":"Unavailable","sold_out":"Sold Out","some_products_unavailable":"Some of the products are unavailable","one_product_unavailable":"One of the products is unavailable","some_products_sold_out":"Some of the products are sold out","one_product_sold_out":"One of the products is sold out.","cost_breakup":"Cost Breakup","subtotal":"Sub Total","discount_code":"Discount","shipping_and_handling":"Shipping Cost","grand_total":"Grand Total","address":"Address","shipping_address":"Shipping Address","billing_address":"Billing Address","cancel_at":"Cancelled at","fulfillment_status":"Fulfillment Status","payment_type":"Payment Type"},"order_contact_us":{"contact_us_button":"Contact Us","form_title":"Contact Us","header_text":"Your satisfaction is our top priority","customer_name_label":"Customer Name","first_name_label":"First Name","first_name_placeholder":"James","last_name_label":"Last Name","last_name_placeholder":"Grey","email_label":"Email","email_placeholder":"abc@xyz.com","email_required_warning":"Email is required","invalid_email_warning":"Please enter a valid email address","contact_number_label":"Contact Number","contact_number_placeholder":"1234567890","invalid_contact_number_warning":"Please enter a valid contact number","reason_label":"Reason to Contact","select_any_reason":"Select a Reason","order_cancel_related_reason":"Cancel Order","order_and_shipping_related_reason":"Order\/Shipping","return_and_exchange_related_reason":"Return\/Exchange","product_related_reason":"Product","price_related_reason":"Price","other_reason":"Other","reason_required_warning":"Please select a reason","message_label":"Message","message_placeholder":"Hello Support Team, when can I expect my order?","message_required_warning":"Message is required","attachment_link_label":"Attachment Link","attachment_link_placeholder":"You can upload files on your drive and paste the link here.","invalid_attachment_link_warning":"Please enter a valid attachment link","order_number_label":"Order Number","order_name_label":"Order Name","order_date_label":"Order Date","order_total_price_label":"Order Total Price","order_fulfillment_status_label":"Order Fulfillment Status","order_payment_status_label":"Order Payment Status","order_link_label":"View Order in Shopify","customer_link_label":"View Customer in Shopify","submit_button":"Submit","success_button":"OK","success_message_line_1":"Your request has been submitted.","success_message_line_2":"You will receive a reply in the email address which you have submitted in the query form.","success_message_line_3":"Thank you for contacting us.","already_contacted_message":"You have contacted us last on {{ date_time }}"},"top_ordered_products_page":{"blank_screen_line_1_html":"There are no top ordered products to display.\u003cbr\u003eWe are pretty sure that a few products\u003cbr\u003efrom our fantastic collection\u003cbr\u003ewill make it to your top products.","search_placeholder":"Search product here","search_product_not_found":"No product\/s found","filter":"Filter","sort_by":"Sort By","none":"None","sort_by_price_low_to_high":"Sort by price (Low to High)","sort_by_price_high_to_low":"Sort by price (High to Low)","number_of_order_low_to_high":"Number of order (Low to High)","number_of_order_high_to_low":"Number of order (High to Low)","last_30_days":"Last 30 days","last_60_days":"Last 60 days","number_of_order":"Total quantity ordered till now"},"wishlisted_product_page":{"blank_screen_line_1_html":"Your wish is our command but\u003cbr\u003eyou haven’t wishlisted any products.","blank_screen_line_2_html":"You can wishlist products\u003cbr\u003eand buy them later","add_to_wishlist_button":"Add to Wishlist","remove_from_wishlist_button":"Added to Wishlist","product_added_to_wishlist":"Product has been added to your wishlist","product_remove_from_wishlist":"Product removed from your wishlist","what_is_your_email":"What's Your Email?","email_placeholder":"Email address","create_account_through":"Please create account\/login through {{ customer_email }} email","view_your_wishlist_message":"You can view your wishlist by creating account or logging-in an existing account.","login":"Login","register":"Register"},"recently_viewed_product_page":{"blank_screen_line_1_html":"Looks like you haven’t checked out\u003cbr\u003eany of our products recently.\u003cbr\u003eWe have a vast collection of quality products.","blank_screen_line_2_html":"So why wait? Check out our products."},"credit_page":{"blank_screen_line_1_html":"You are missing out on taking advantage of\u003cbr\u003eour Reward Program.","blank_screen_line_2_html":"So why wait? Start shopping our products to start earning rewards.","header_line_html":"Save Money \u003cstrong\u003eThrough Rewards\u003c\/strong\u003e","chart1_header":"Credit infosphere","earned_credit":"Earned Credit","how_to_earn":"How to Earn?","spent_credit":"Spent Credit","how_to_spend":"How to Spend?","current_credit":"Current Credit","credit_activity":"Recent Transactions","time":"Date","reason_for_credit":"Credit Reason","credit":"CR\/DR","balance":"Balance","registration_credit":"Registration Credit","subscribe_credit":"Subscribe Credit","first_order_credit":"First Order Credit","spent_in_order":"Spent in {{ order_number }} order","spent_in_order_through_pos":"Spent in {{ order_number }} order through POS","loyal_customer":"Loyal Customer","repeat_customer":"Repeat Customer","fault_in_product":"Fault in product","canceled_order_first_time_by_customer":"Canceled order first time by customer","delay_in_delivery_time":"Delay in delivery time"},"how_to_earn_credit_page":{"header_line_html":"Earn More \u003cstrong\u003eSpend More\u003c\/strong\u003e","chart1_header":"Your Earned Credit","no_rule_found":"The store has not set up any rules yet","register_credit_rule_title":"Register credit","register_credit_rule_description":"Register and get {{ credit }} credit.","subscribe_credit_rule_title":"Subscriber credit","subscribe_credit_rule_description":"Subscribe and get {{ credit }} credit.","subscribed_successfully":"Hurray! You will recieve subscriber credit in a short while.","specific_order_credit_rule_title":"Credit on specific order","specific_order_credit_rule_description":"Earn {{ credit }} credit on your order number {{ order_count }}","specific_order_and_next_orders_credit_rule_title":"Credit on order number {{ order_count }} and next orders","specific_order_and_next_orders_credit_rule_description":"You can earn {{ credit }} credit on order number {{ order_count }} and next orders {{ order_count+1 }}, {{ order_count+2 }}..... {{ order_count+n }}","birthdate_credit_rule_title":"Birthday credit*","add_birthdate":"Add your Birthdate","birthdate_credit_rule_description_1":"Share your birthdate with us to get {{ credit }} credit on your birthday.","birthdate_credit_rule_description_2":"{{ days }} day\/s left for a birthday reward of {{ credit }} credit.","birthdate_credit_rule_description_3":"*You can avail this credit only once in a year.","monthly_credit_rule_title":"Monthly credit","monthly_credit_rule_description":"You will get {{ credit }} credit on {{ date }} of every month.","special_day_credit_rule_title":"Bonus day credit","special_day_credit_rule_description":"Get special day credit on {{ date }}","product_review_credit_rule_title":"Product review credit","product_review_credit_rule_description":"Write a product review and get {{ credit }} credit.","product_tag_credit_rule_title":"Credit for specific product collection","product_tag_credit_rule_description":"Buy product\/s with (any tag) {{ tag }} and get {{ credit }} credit.","wishlisted_product_credit_rule_title":"Wishlisted product credit","wishlisted_product_credit_rule_description":"You can earn {{ credit }} credit when you add product\/s in wishlist.","unlock_fixed_credit":"Unlock {{ credit }}","unlock_some_percentage_credit":"Unlock {{ credit }} cashback","rule_not_applicable":"*Not Applicable","why_rule_not_applicable_description":"Rule may have been set up on a later date.","total_earned_credit_by_rule":"Total earn credit till date: {{ credit }}","subscribing_email":"Your request to receive a mail subscription from the store is being accepted."},"how_to_spend_credit_page":{"header_line_html":"Spend More \u003cstrong\u003eSave More\u003c\/strong\u003e","chart1_header":"Your Total Savings","chart2_header":"Your Current Credit","still_you_have_remaining_credit":"You have {{ credit }} credit remaining","no_rule_found":"The store has not set up any rules yet","select_cart_value":"Click on the circles to check the amount of credit you can spend based on cart value.","spend_credit_on_cart_rule_title":"Spend on cart","spend_credit_on_cart_rule_description_1":"Your cart value is between {{ min_cart_value }}-{{ max_cart_value }}. Congratulations you are eligible to use {{ credit }} credit.","spend_credit_on_cart_rule_description_2":"Your cart value is between {{ min_cart_value }}-{{ max_cart_value }}. Congratulations you are eligible to use {{ credit }} of cart value as credit.","spend_credit_on_cart_rule_description_3":"Your cart value is {{ min_cart_value }} (or more). Congratulations you can use {{ credit }} credit.","spend_credit_on_cart_rule_description_4":"Your cart value is {{ min_cart_value }} (or more). Congratulations you are eligible to use {{ credit }} of cart value as credit.","spend_credit_on_shipping_rule_title":"Free Shipping","spend_credit_on_shipping_rule_description":"You can use your credit on shipping charges.","how_to_spend_credit_header":"How to Spend Credit?","how_to_spend_credit_step_1":"Add product to the cart","how_to_spend_credit_step_2":"Choose available credit to spend on your order","how_to_spend_credit_step_3":"Proceed to checkout"},"refer_friend_page":{"popup_greetings":"Welcome Newcomer","popup_message":"You were referred by {{ inviter_name }}. Please help us in giving you credit by signing up here.","refer_program_how_it_work_title":"How it works","refer_program_how_it_work_step_1":"Share your referral link","refer_program_how_it_work_step_2":"When your friend signs-up","refer_program_how_it_work_step_3":"You get rewarded","chart1_header":"Your Earned Credit","unlock_referral_rewards":"Unlock your referral Rewards","total_referral":"Total Referrals","copy":"Copy","referral_link_copied":"Link Copied","share_referral_link_title":"Share referral link via","facebook_share":"Share","whatsapp_share":"Share","share":"Share","referral_program_invitation_message":"You can earn credit for creating an account with {{ shop_name }}. Use this link and get rewarded : {{ link }}","blank_screen_line_1_html":"You have no referrals so far.\u003cbr\u003eYou can earn rewards by referring our store to your friends.\u003cbr\u003eCopy the above link and share it with your friends or","blank_screen_line_2_html":"Share the link directly via WhatsApp and Facebook.","referrer_credit_rule_title":"Referral Program","referrer_credit_rule_description":"Invite your friends and get {{ credit }} credit when they sign up.","referee_credit_rule_title":"Referral Program","referee_credit_rule_description":"When your friends accept the invitation, they will get {{ credit }} credit.","credit_on_number_of_referrals_rule_title":"Credit on numbers of referrals","credit_on_number_of_referrals_rule_description":"When you reach {{ referral_count }} referrals you get {{ credit }} credit.","referrals_specific_order_credit_rule_title":"Credit on specific order by referee","referrals_specific_order_credit_rule_description":"You can earn {{ credit }} credit on your referee's order number {{ order_count }}.","referrals_specific_order_and_next_orders_credit_rule_title":"Credit on referee's order number {{ order_count }} and next orders","referrals_specific_order_and_next_orders_credit_rule_description":"You can earn {{ credit }} credit on referee's order number {{ order_count }} and next orders {{ order_count+1 }}, {{ order_count+2 }}... {{ order_count+n }}","credit_on_referrals_total_spent_amount_rule_title":"Credit after referral's total spent amount","credit_on_referrals_total_spent_amount_rule_description":"You can earn {{ credit }} credit when your referral's total spent amount is {{ total_spent_amount }} or more.","credit_activity":"Referral History","earned_credit":"Earned Credit","referral_customer_name":"Referred To","referral_customer_email":"Referral's Email","credit":"Credit","time":"Referred Since","you_are_referred_by":"Referred by","customer_deleted":"Customer Deleted"},"from_admin_page":{"header_line_html":"From Store Owner"},"update_password_page":{"header_line_html":"Update your password for","new_password":"New Password","new_password_placeholder":"Enter New Password","confirm_new_password":"Confirm New Password","confirm_password_placeholder":"Confirm New Password","update_password_button":"Update Password","password_empty_message":"The password is empty","password_hint_message":"Password must be between 6 to 40 characters","password_not_match":"Passwords didn't match. Try again.","updating_password":"Updating password...","password_updated_successfully":"Your password for account {{ email }} has been successfully updated"},"buttons":{"back":"Back","shop_now":"View Products","add_to_cart":"Add to Cart","sold_out":"Sold Out","previous":"Previous","next":"Next","product_unavailable_text":"Currently Unavailable"},"months":{"january":"January","february":"February","march":"March","april":"April","may":"May","june":"June","july":"July","august":"August","september":"September","october":"October","november":"November","december":"December"},"social_login_page":{"facebook":"Facebook","google":"Google","twitter":"Twitter","amazon":"Amazon","loading_message":"Logging you in"},"cart_page":{"adding_items_to_cart":"Adding items to cart...","select_credit_option":"Select option to use store credit","credit_cart_percentage":"You can use {{ credit }} credit out of {{ total_credit }}.","free_shipping":"You can get free shipping","applying_credit_message":"Applying credit please wait","credit_applied":"Store Credit Applied"},"invoice":{"invoice_title":"INVOICE","invoice_no":"Invoice","payment_method":"Payment Method","order_no":"Order","issue_date":"Issue Date","order_date":"Order Date","billing_address_title":"Bill To","no_billing_address":"No billing address provided","shipping_address_title":"Ship To","no_shipping_address":"No shipping address provided","money_format":"{{ symbol }}{{ amount }}","item_title":"Item","item_quantity":"Quantity","item_price":"Unit Price","item_discount":"Discount","item_tax_rate":"Tax Rate","item_tax_type":"Tax Type","item_tax_amount":"Tax Amount","item_total":"Total","subtotal":"Sub Total","shipping_discount":"Shipping Discount","shipping_cost":"Shipping Cost","tax":"Tax","grand_total":"Grand Total","you_saved":"You Saved","amount_in_words":"Amount in words","for_store_name":"For {{ store_name }}","authorised_signatory":"Authorised Signatory","greeting_line1":"Thank You","greeting_line2":"We hope you enjoy your purchase.","email":"Email","phone":"Phone no","fax":"Fax","page_no":"Page {{ current_page }} of {{ total_page }}","zero":"Zero","one":"One","two":"Two","three":"Three","four":"Four","five":"Five","six":"Six","seven":"Seven","eight":"Eight","nine":"Nine","ten":"Ten","eleven":"Eleven","twelve":"Twelve","thirteen":"Thirteen","fourteen":"Fourteen","fifteen":"Fifteen","sixteen":"Sixteen","seventeen":"Seventeen","eighteen":"Eighteen","nineteen":"Nineteen","twenty":"Twenty","thirty":"Thirty","forty":"Forty","fifty":"Fifty","sixty":"Sixty","seventy":"Seventy","eighty":"Eighty","ninety":"Ninety","hundred":"Hundred","thousand":"Thousand","million":"Million","billion":"Billion","trillion":"Trillion","zero_only":"Zero only","only":"only","and":"and","invoice_is_generating":"Generating invoice...","saving_invoice":"Saving invoice"},"order_status_page":{"total_earned_credit_on_order":"Congratulations! You have earned {{ credit }} credit on this purchase.","earned_credit_on_order_number":"You earned {{ credit }} credit for this order.","earned_credit_on_product_tag":"You earned {{ credit }} credit by purchasing from {{ tag }} collection.","total_credit_balance":"Your total credit balance is {{ credit }}.","shop_more_to_earn_credit_html":"Want to earn more credits and save big bucks? Then dive into our collection and shop more!","shop_more_to_spent_credit_html":"Still have credits left? Shop more to utilise them all."},"custom_fields":{"file_type_invalid_error_message":"Please check file type and try again","file_size_exceed_error_message":"File size exceeds 1MB, please resize and upload"},"otp_login":{"global":{"errors":{"first_name_required":"Please enter your first name to continue","last_name_required":"Please enter your last name to continue","email_invalid":"Please enter a valid email address to continue","email_required":"Please enter a valid email address to continue","phone_invalid":"Please enter a valid phone number to continue","phone_required":"Please enter a valid phone number to continue","something_wrong":"Something went wrong! Please try again.","otp_verify_sucess":"OTP verified successfully","otp_sent_sucess":"OTP sent successfully","invalid_otp":"The OTP you entered did not match. Please double check and try again","email_already_exists":"Email already exists, please try with another email","phone_already_exists":"Phone number already exists, please try with another phone number","email_already_exists_with_phone":"Email already exists with phone number {{ phone }} ","phone_already_exists_with_email":"Phone number already exists with email {{ email }} ","ip_block_error":"It appears that there have been multiple tries for OTP. Please try again in a few minutes."},"label":{"first_name":"First Name","last_name":"Last Name","email":"Email","phone":"Phone Number"},"placeholder":{"first_name":"First Name","last_name":"Last Name","email":"Email","phone":"Phone Number"}},"login":{"page_title":"Login With OTP","page_sub_head_email":"Please enter your email address","page_sub_head_phone":"Please enter your 10 digit mobile number","otp_hint_phone":"A 6 digit OTP will be sent to your phone number","otp_hint_email":"A 6 digit OTP will be sent to your email address","change_login_btn_phone":"Phone","change_login_btn_email":"Email","continue":"Request OTP","or_login_using":"Sign-in with"},"otp_verify":{"page_title":"Please enter OTP for verification","page_sub_head":"Please enter the code sent to","next_step_btn":"Verify to proceed","resend_otp_title":"Didn't receive the OTP? Resend in ","resend_otp_btn":"Resend OTP","resend_otp_sucess_msg":"Resend OTP successfully"},"account_deatils":{"page_title":"Profile Details","page_sub_head":"Hello! we just need a few more details","submit_btn":"Update and sign-in","verify_email_error":"We need to verify the email address entered above. Please click verify email to receive an OTP","verify_phone_error":"We need to verify the phone number entered above. Please click verify phone to receive an OTP","verify_phone_text":"Verify Phone","verify_email_text":"Verify Email","enter_otp_text":"Please verify your account by submitting the OTP","otp_sent_to_text":"OTP sent to"}},"checkout":{"apply_btn_text":"Apply","credit_dropdown_label":"Select option to use credit","credit_dropdown_first_option":"Select option to use credit","credit_cart_percentage":"You can use {{ credit }} credit out of {{ total_credit }}.","credit_dropdown_not_selected":"Please select credit option","credit_checkbox_not_selected":"Please select credit checkbox to apply credit","something_went-wrong":"Something went wrong! Please try again."}}},"MULTILANGUAGE_CONTENT_en_134284083354":{"flits":{"icons":{"close_icon":{"type":"url","code":"","url":"https:\/\/cdn.getflits.com\/icons\/default\/close-icon.svg"},"continue_icon":{"type":"url","code":"","url":"https:\/\/cdn.getflits.com\/icons\/default\/continue-icon.svg"},"edit_icon":{"type":"url","code":"","url":"https:\/\/cdn.getflits.com\/icons\/default\/edit-icon.svg"},"email_icon":{"type":"code","code":"\u003csvg xmlns='http:\/\/www.w3.org\/2000\/svg' width='16' height='14' viewBox='0 0 16 14' fill='none'\u003e \u003cpath d='M2.50016 1.1665H13.8335C14.6127 1.1665 15.2502 1.804 15.2502 2.58317V11.0832C15.2502 11.8623 14.6127 12.4998 13.8335 12.4998H2.50016C1.721 12.4998 1.0835 11.8623 1.0835 11.0832V2.58317C1.0835 1.804 1.721 1.1665 2.50016 1.1665Z' stroke='#4A4A4A' stroke-width='1.25' stroke-linecap='round' stroke-linejoin='round'\/\u003e \u003cpath d='M15.2502 2.58301L8.16683 7.54134L1.0835 2.58301' stroke='#4A4A4A' stroke-width='1.25' stroke-linecap='round' stroke-linejoin='round'\/\u003e \u003c\/svg\u003e","url":"https:\/\/cdn.getflits.com\/icons\/default\/email-icon.svg"},"phone_icon":{"type":"url","code":"","url":"https:\/\/cdn.getflits.com\/icons\/default\/phone-icon.svg"}},"general":{"greeting":"Hello","morning":"Good Morning","afternoon":"Good Afternoon","evening":"Good Evening","cant_add_more_quantity":"You have reached the maximum limit. You cannot add any more items.","cart_updated":"Some items are no longer available. Your cart has been updated.","getting_customer_details":"Getting\/Syncing Customer Details","something_went_wrong":"Something went wrong. Please try again."},"navigation":{"profile":"My Profile","delivery_address":"Delivery Address","my_orders":"My Orders","appstle_subscription":"My Subscription","top_ordered_products":"Top Ordered Products","wishlist":"My Wishlist","recently_viewed_products":"Recently Viewed","store_credit":"My Credits","how_to_manage_credit":"How To Manage Credits","how_to_earn_credit":"How To Earn","how_to_spend_credit":"How To Spend","from_admin":"From Store Owner","refer_friend":"Refer Friend","change_password":"Change Password","log_out":"Log Out"},"profile_page":{"first_name":"First Name","last_name":"Last Name","email":"Email","contact_number":"Contact Number","birthdate":"Birthdate","gender":"Gender","male":"Male","female":"Female","other":"Other","edit_button":"Edit","cancel_button":"Cancel","save_button":"Save","invalid_email":"Email is not valid","invalid_email_domain":"Email contains an invalid domain name","email_already_taken":"This email is already in use. Please enter a different email address.","invalid_contact_number":"Contact number is not valid","contact_number_already_taken":"This contact number is already in use. Please enter a different contact number.","save_details":"Saving profile details...","saved_successfully":"Profile updated successfully"},"address_page":{"add_new_address":"Add New Address","first_name":"First Name","last_name":"Last Name","address1":"Address Line 1","address2":"Address Line 2","company":"Company","zip":"Postal\/Zip Code","contact_number":"Contact Number","city":"City","country":"Country","province":"Province","mark_as_default_checkbox":"Mark as Default Address","cancel_button":"Cancel","save_button":"Save","first_name_is_long":"First name is too long (maximum is 255 characters)","last_name_is_long":"Last name is too long (maximum is 255 characters)","address1_is_long":"Address Line 1 is too long (maximum is 255 characters)","address2_is_long":"Address Line 2 is too long (maximum is 255 characters)","company_name_is_long":"Company name is too long (maximum is 255 characters)","city_is_long":"City is too long (maximum is 255 characters)","zip_is_long":"Zip is too long (maximum is 255 characters)","invalid_contact_number":"Contact number is not valid","address_already_taken":"This address already exists.","country_invalid":"Country is not valid","adding_new_address":"Adding New Address...","address_added_successfully":"Delivery address added successfully","default_address_label":"Default","mark_as_default_button":"Mark as Default","edit_button":"Edit","edit_address":"Edit Address","updating_address":"Updating Address...","address_updated_successfully":"Delivery address updated successfully","delete_button":"Delete","delete_confirmation_message":"Are you sure you want to delete this address?","yes":"Yes","no":"No","deleting_address":"Deleting Address...","address_deleted_successfully":"Address deleted successfully"},"order_page":{"blank_screen_line_1_html":"You haven't placed any orders yet.\u003cbr\u003eWe can't wait to have you as a customer.","blank_screen_line_2_html":"Take a look at our products here","order_date":"Date","order_date_format":"%B %d %Y","order_number":"Order","total_items":"Total Items","payment_status":"Payment","show_order_details":"View Order","hide_order_details":"Hide Order","reorder":"Re-order","product_unavailable":"Unavailable","sold_out":"Sold Out","some_products_unavailable":"Some of the products are unavailable","one_product_unavailable":"One of the products is unavailable","some_products_sold_out":"Some of the products are sold out","one_product_sold_out":"One of the products is sold out.","cost_breakup":"Cost Breakup","subtotal":"Sub Total","discount_code":"Discount","shipping_and_handling":"Shipping Cost","grand_total":"Grand Total","address":"Address","shipping_address":"Shipping Address","billing_address":"Billing Address","cancel_at":"Cancelled at","fulfillment_status":"Fulfillment Status","payment_type":"Payment Type"},"order_contact_us":{"contact_us_button":"Contact Us","form_title":"Contact Us","header_text":"Your satisfaction is our top priority","customer_name_label":"Customer Name","first_name_label":"First Name","first_name_placeholder":"James","last_name_label":"Last Name","last_name_placeholder":"Grey","email_label":"Email","email_placeholder":"abc@xyz.com","email_required_warning":"Email is required","invalid_email_warning":"Please enter a valid email address","contact_number_label":"Contact Number","contact_number_placeholder":"1234567890","invalid_contact_number_warning":"Please enter a valid contact number","reason_label":"Reason to Contact","select_any_reason":"Select a Reason","order_cancel_related_reason":"Cancel Order","order_and_shipping_related_reason":"Order\/Shipping","return_and_exchange_related_reason":"Return\/Exchange","product_related_reason":"Product","price_related_reason":"Price","other_reason":"Other","reason_required_warning":"Please select a reason","message_label":"Message","message_placeholder":"Hello Support Team, when can I expect my order?","message_required_warning":"Message is required","attachment_link_label":"Attachment Link","attachment_link_placeholder":"You can upload files on your drive and paste the link here.","invalid_attachment_link_warning":"Please enter a valid attachment link","order_number_label":"Order Number","order_name_label":"Order Name","order_date_label":"Order Date","order_total_price_label":"Order Total Price","order_fulfillment_status_label":"Order Fulfillment Status","order_payment_status_label":"Order Payment Status","order_link_label":"View Order in Shopify","customer_link_label":"View Customer in Shopify","submit_button":"Submit","success_button":"OK","success_message_line_1":"Your request has been submitted.","success_message_line_2":"You will receive a reply in the email address which you have submitted in the query form.","success_message_line_3":"Thank you for contacting us.","already_contacted_message":"You have contacted us last on {{ date_time }}"},"top_ordered_products_page":{"blank_screen_line_1_html":"There are no top ordered products to display.\u003cbr\u003eWe are pretty sure that a few products\u003cbr\u003efrom our fantastic collection\u003cbr\u003ewill make it to your top products.","search_placeholder":"Search product here","search_product_not_found":"No product\/s found","filter":"Filter","sort_by":"Sort By","none":"None","sort_by_price_low_to_high":"Sort by price (Low to High)","sort_by_price_high_to_low":"Sort by price (High to Low)","number_of_order_low_to_high":"Number of order (Low to High)","number_of_order_high_to_low":"Number of order (High to Low)","last_30_days":"Last 30 days","last_60_days":"Last 60 days","number_of_order":"Total quantity ordered till now"},"wishlisted_product_page":{"blank_screen_line_1_html":"Your wish is our command but\u003cbr\u003eyou haven’t wishlisted any products.","blank_screen_line_2_html":"You can wishlist products\u003cbr\u003eand buy them later","add_to_wishlist_button":"Add to Wishlist","remove_from_wishlist_button":"Added to Wishlist","product_added_to_wishlist":"Product has been added to your wishlist","product_remove_from_wishlist":"Product removed from your wishlist","what_is_your_email":"What's Your Email?","email_placeholder":"Email address","create_account_through":"Please create account\/login through {{ customer_email }} email","view_your_wishlist_message":"You can view your wishlist by creating account or logging-in an existing account.","login":"Login","register":"Register"},"recently_viewed_product_page":{"blank_screen_line_1_html":"Looks like you haven’t checked out\u003cbr\u003eany of our products recently.\u003cbr\u003eWe have a vast collection of quality products.","blank_screen_line_2_html":"So why wait? Check out our products."},"credit_page":{"blank_screen_line_1_html":"You are missing out on taking advantage of\u003cbr\u003eour Reward Program.","blank_screen_line_2_html":"So why wait? Start shopping our products to start earning rewards.","header_line_html":"Save Money \u003cstrong\u003eThrough Rewards\u003c\/strong\u003e","chart1_header":"Credit infosphere","earned_credit":"Earned Credit","how_to_earn":"How to Earn?","spent_credit":"Spent Credit","how_to_spend":"How to Spend?","current_credit":"Current Credit","credit_activity":"Recent Transactions","time":"Date","reason_for_credit":"Credit Reason","credit":"CR\/DR","balance":"Balance","registration_credit":"Registration Credit","subscribe_credit":"Subscribe Credit","first_order_credit":"First Order Credit","spent_in_order":"Spent in {{ order_number }} order","spent_in_order_through_pos":"Spent in {{ order_number }} order through POS","loyal_customer":"Loyal Customer","repeat_customer":"Repeat Customer","fault_in_product":"Fault in product","canceled_order_first_time_by_customer":"Canceled order first time by customer","delay_in_delivery_time":"Delay in delivery time"},"how_to_earn_credit_page":{"header_line_html":"Earn More \u003cstrong\u003eSpend More\u003c\/strong\u003e","chart1_header":"Your Earned Credit","no_rule_found":"The store has not set up any rules yet","register_credit_rule_title":"Register credit","register_credit_rule_description":"Register and get {{ credit }} credit.","subscribe_credit_rule_title":"Subscriber credit","subscribe_credit_rule_description":"Subscribe and get {{ credit }} credit.","subscribed_successfully":"Hurray! You will recieve subscriber credit in a short while.","specific_order_credit_rule_title":"Credit on specific order","specific_order_credit_rule_description":"Earn {{ credit }} credit on your order number {{ order_count }}","specific_order_and_next_orders_credit_rule_title":"Credit on order number {{ order_count }} and next orders","specific_order_and_next_orders_credit_rule_description":"You can earn {{ credit }} credit on order number {{ order_count }} and next orders {{ order_count+1 }}, {{ order_count+2 }}..... {{ order_count+n }}","birthdate_credit_rule_title":"Birthday credit*","add_birthdate":"Add your Birthdate","birthdate_credit_rule_description_1":"Share your birthdate with us to get {{ credit }} credit on your birthday.","birthdate_credit_rule_description_2":"{{ days }} day\/s left for a birthday reward of {{ credit }} credit.","birthdate_credit_rule_description_3":"*You can avail this credit only once in a year.","monthly_credit_rule_title":"Monthly credit","monthly_credit_rule_description":"You will get {{ credit }} credit on {{ date }} of every month.","special_day_credit_rule_title":"Bonus day credit","special_day_credit_rule_description":"Get special day credit on {{ date }}","product_review_credit_rule_title":"Product review credit","product_review_credit_rule_description":"Write a product review and get {{ credit }} credit.","product_tag_credit_rule_title":"Credit for specific product collection","product_tag_credit_rule_description":"Buy product\/s with (any tag) {{ tag }} and get {{ credit }} credit.","wishlisted_product_credit_rule_title":"Wishlisted product credit","wishlisted_product_credit_rule_description":"You can earn {{ credit }} credit when you add product\/s in wishlist.","unlock_fixed_credit":"Unlock {{ credit }}","unlock_some_percentage_credit":"Unlock {{ credit }} cashback","rule_not_applicable":"*Not Applicable","why_rule_not_applicable_description":"Rule may have been set up on a later date.","total_earned_credit_by_rule":"Total earn credit till date: {{ credit }}","subscribing_email":"Your request to receive a mail subscription from the store is being accepted."},"how_to_spend_credit_page":{"header_line_html":"Spend More \u003cstrong\u003eSave More\u003c\/strong\u003e","chart1_header":"Your Total Savings","chart2_header":"Your Current Credit","still_you_have_remaining_credit":"You have {{ credit }} credit remaining","no_rule_found":"The store has not set up any rules yet","select_cart_value":"Click on the circles to check the amount of credit you can spend based on cart value.","spend_credit_on_cart_rule_title":"Spend on cart","spend_credit_on_cart_rule_description_1":"Your cart value is between {{ min_cart_value }}-{{ max_cart_value }}. Congratulations you are eligible to use {{ credit }} credit.","spend_credit_on_cart_rule_description_2":"Your cart value is between {{ min_cart_value }}-{{ max_cart_value }}. Congratulations you are eligible to use {{ credit }} of cart value as credit.","spend_credit_on_cart_rule_description_3":"Your cart value is {{ min_cart_value }} (or more). Congratulations you can use {{ credit }} credit.","spend_credit_on_cart_rule_description_4":"Your cart value is {{ min_cart_value }} (or more). Congratulations you are eligible to use {{ credit }} of cart value as credit.","spend_credit_on_shipping_rule_title":"Free Shipping","spend_credit_on_shipping_rule_description":"You can use your credit on shipping charges.","how_to_spend_credit_header":"How to Spend Credit?","how_to_spend_credit_step_1":"Add product to the cart","how_to_spend_credit_step_2":"Choose available credit to spend on your order","how_to_spend_credit_step_3":"Proceed to checkout"},"refer_friend_page":{"popup_greetings":"Welcome Newcomer","popup_message":"You were referred by {{ inviter_name }}. Please help us in giving you credit by signing up here.","refer_program_how_it_work_title":"How it works","refer_program_how_it_work_step_1":"Share your referral link","refer_program_how_it_work_step_2":"When your friend signs-up","refer_program_how_it_work_step_3":"You get rewarded","chart1_header":"Your Earned Credit","unlock_referral_rewards":"Unlock your referral Rewards","total_referral":"Total Referrals","copy":"Copy","referral_link_copied":"Link Copied","share_referral_link_title":"Share referral link via","facebook_share":"Share","whatsapp_share":"Share","share":"Share","referral_program_invitation_message":"You can earn credit for creating an account with {{ shop_name }}. Use this link and get rewarded : {{ link }}","blank_screen_line_1_html":"You have no referrals so far.\u003cbr\u003eYou can earn rewards by referring our store to your friends.\u003cbr\u003eCopy the above link and share it with your friends or","blank_screen_line_2_html":"Share the link directly via WhatsApp and Facebook.","referrer_credit_rule_title":"Referral Program","referrer_credit_rule_description":"Invite your friends and get {{ credit }} credit when they sign up.","referee_credit_rule_title":"Referral Program","referee_credit_rule_description":"When your friends accept the invitation, they will get {{ credit }} credit.","credit_on_number_of_referrals_rule_title":"Credit on numbers of referrals","credit_on_number_of_referrals_rule_description":"When you reach {{ referral_count }} referrals you get {{ credit }} credit.","referrals_specific_order_credit_rule_title":"Credit on specific order by referee","referrals_specific_order_credit_rule_description":"You can earn {{ credit }} credit on your referee's order number {{ order_count }}.","referrals_specific_order_and_next_orders_credit_rule_title":"Credit on referee's order number {{ order_count }} and next orders","referrals_specific_order_and_next_orders_credit_rule_description":"You can earn {{ credit }} credit on referee's order number {{ order_count }} and next orders {{ order_count+1 }}, {{ order_count+2 }}... {{ order_count+n }}","credit_on_referrals_total_spent_amount_rule_title":"Credit after referral's total spent amount","credit_on_referrals_total_spent_amount_rule_description":"You can earn {{ credit }} credit when your referral's total spent amount is {{ total_spent_amount }} or more.","credit_activity":"Referral History","earned_credit":"Earned Credit","referral_customer_name":"Referred To","referral_customer_email":"Referral's Email","credit":"Credit","time":"Referred Since","you_are_referred_by":"Referred by","customer_deleted":"Customer Deleted"},"from_admin_page":{"header_line_html":"From Store Owner"},"update_password_page":{"header_line_html":"Update your password for","new_password":"New Password","new_password_placeholder":"Enter New Password","confirm_new_password":"Confirm New Password","confirm_password_placeholder":"Confirm New Password","update_password_button":"Update Password","password_empty_message":"The password is empty","password_hint_message":"Password must be between 6 to 40 characters","password_not_match":"Passwords didn't match. Try again.","updating_password":"Updating password...","password_updated_successfully":"Your password for account {{ email }} has been successfully updated"},"buttons":{"back":"Back","shop_now":"View Products","add_to_cart":"Add to Cart","sold_out":"Sold Out","previous":"Previous","next":"Next","product_unavailable_text":"Currently Unavailable"},"months":{"january":"January","february":"February","march":"March","april":"April","may":"May","june":"June","july":"July","august":"August","september":"September","october":"October","november":"November","december":"December"},"social_login_page":{"facebook":"Facebook","google":"Google","twitter":"Twitter","amazon":"Amazon","loading_message":"Logging you in"},"cart_page":{"adding_items_to_cart":"Adding items to cart...","select_credit_option":"Select option to use store credit","credit_cart_percentage":"You can use {{ credit }} credit out of {{ total_credit }}.","free_shipping":"You can get free shipping","applying_credit_message":"Applying credit please wait","credit_applied":"Store Credit Applied"},"invoice":{"invoice_title":"INVOICE","invoice_no":"Invoice","payment_method":"Payment Method","order_no":"Order","issue_date":"Issue Date","order_date":"Order Date","billing_address_title":"Bill To","no_billing_address":"No billing address provided","shipping_address_title":"Ship To","no_shipping_address":"No shipping address provided","money_format":"{{ symbol }}{{ amount }}","item_title":"Item","item_quantity":"Quantity","item_price":"Unit Price","item_discount":"Discount","item_tax_rate":"Tax Rate","item_tax_type":"Tax Type","item_tax_amount":"Tax Amount","item_total":"Total","subtotal":"Sub Total","shipping_discount":"Shipping Discount","shipping_cost":"Shipping Cost","tax":"Tax","grand_total":"Grand Total","you_saved":"You Saved","amount_in_words":"Amount in words","for_store_name":"For {{ store_name }}","authorised_signatory":"Authorised Signatory","greeting_line1":"Thank You","greeting_line2":"We hope you enjoy your purchase.","email":"Email","phone":"Phone no","fax":"Fax","page_no":"Page {{ current_page }} of {{ total_page }}","zero":"Zero","one":"One","two":"Two","three":"Three","four":"Four","five":"Five","six":"Six","seven":"Seven","eight":"Eight","nine":"Nine","ten":"Ten","eleven":"Eleven","twelve":"Twelve","thirteen":"Thirteen","fourteen":"Fourteen","fifteen":"Fifteen","sixteen":"Sixteen","seventeen":"Seventeen","eighteen":"Eighteen","nineteen":"Nineteen","twenty":"Twenty","thirty":"Thirty","forty":"Forty","fifty":"Fifty","sixty":"Sixty","seventy":"Seventy","eighty":"Eighty","ninety":"Ninety","hundred":"Hundred","thousand":"Thousand","million":"Million","billion":"Billion","trillion":"Trillion","zero_only":"Zero only","only":"only","and":"and","invoice_is_generating":"Generating invoice...","saving_invoice":"Saving invoice"},"order_status_page":{"total_earned_credit_on_order":"Congratulations! You have earned {{ credit }} credit on this purchase.","earned_credit_on_order_number":"You earned {{ credit }} credit for this order.","earned_credit_on_product_tag":"You earned {{ credit }} credit by purchasing from {{ tag }} collection.","total_credit_balance":"Your total credit balance is {{ credit }}.","shop_more_to_earn_credit_html":"Want to earn more credits and save big bucks? Then dive into our collection and shop more!","shop_more_to_spent_credit_html":"Still have credits left? Shop more to utilise them all."},"custom_fields":{"file_type_invalid_error_message":"Please check file type and try again","file_size_exceed_error_message":"File size exceeds 1MB, please resize and upload"},"otp_login":{"global":{"errors":{"first_name_required":"Please enter your first name to continue","last_name_required":"Please enter your last name to continue","email_invalid":"Please enter a valid email address to continue","email_required":"Please enter a valid email address to continue","phone_invalid":"Please enter a valid phone number to continue","phone_required":"Please enter a valid phone number to continue","something_wrong":"Something went wrong! Please try again.","otp_verify_sucess":"OTP verified successfully","otp_sent_sucess":"OTP sent successfully","invalid_otp":"The OTP you entered did not match. Please double check and try again","email_already_exists":"Email already exists, please try with another email","phone_already_exists":"Phone number already exists, please try with another phone number","email_already_exists_with_phone":"Email already exists with phone number {{ phone }} ","phone_already_exists_with_email":"Phone number already exists with email {{ email }} ","ip_block_error":"It appears that there have been multiple tries for OTP. Please try again in a few minutes."},"label":{"first_name":"First Name","last_name":"Last Name","email":"Email","phone":"Phone Number"},"placeholder":{"first_name":"First Name","last_name":"Last Name","email":"Email","phone":"Phone Number"}},"login":{"page_title":"Login With OTP","page_sub_head_email":"Please enter your email address","page_sub_head_phone":"Please enter your 10 digit mobile number","otp_hint_phone":"A 6 digit OTP will be sent to your phone number","otp_hint_email":"A 6 digit OTP will be sent to your email address","change_login_btn_phone":"Phone","change_login_btn_email":"Email","continue":"Request OTP","or_login_using":"Sign-in with"},"otp_verify":{"page_title":"Please enter OTP for verification","page_sub_head":"Please enter the code sent to","next_step_btn":"Verify to proceed","resend_otp_title":"Didn't receive the OTP? Resend in ","resend_otp_btn":"Resend OTP","resend_otp_sucess_msg":"Resend OTP successfully"},"account_deatils":{"page_title":"Profile Details","page_sub_head":"Hello! we just need a few more details","submit_btn":"Update and sign-in","verify_email_error":"We need to verify the email address entered above. Please click verify email to receive an OTP","verify_phone_error":"We need to verify the phone number entered above. Please click verify phone to receive an OTP","verify_phone_text":"Verify Phone","verify_email_text":"Verify Email","enter_otp_text":"Please verify your account by submitting the OTP","otp_sent_to_text":"OTP sent to"}},"checkout":{"apply_btn_text":"Apply","credit_dropdown_label":"Select option to use credit","credit_dropdown_first_option":"Select option to use credit","credit_cart_percentage":"You can use {{ credit }} credit out of {{ total_credit }}.","credit_dropdown_not_selected":"Please select credit option","credit_checkbox_not_selected":"Please select credit checkbox to apply credit","something_went-wrong":"Something went wrong! Please try again."}}},"ORDER_STATUS_PAGE":{"isStoreCreditEnable":1},"SHOP_ID":"25763","SHOP_TOKEN":"9b4d4de12733ecfaacdb7d524276d3e5","THEME_SETTINGS_122125451418":{"status":false,"message":"Code is not installed"},"THEME_SETTINGS_128084377754":{"status":false,"message":"Code is not installed"},"THEME_SETTINGS_128241238170":{"status":false,"message":"Code is not installed"},"THEME_SETTINGS_128272138394":{"status":false,"message":"Code is not installed"},"THEME_SETTINGS_128433815706":{"status":false,"message":"Code is not installed"},"THEME_SETTINGS_128465272986":{"status":false,"message":"Code is not installed"},"THEME_SETTINGS_128674529434":{"status":false,"message":"Code is not installed"},"THEME_SETTINGS_128740163738":{"status":false,"message":"Code is not installed"},"THEME_SETTINGS_128740196506":{"status":false,"message":"Code is not installed"},"THEME_SETTINGS_128841089178":{"status":false,"message":"Code is not installed"},"THEME_SETTINGS_128925892762":{"status":false,"message":"Code is not installed"},"THEME_SETTINGS_131177709722":{"status":false,"message":"Code is not installed"},"THEME_SETTINGS_131785457818":{"status":false,"message":"Code is not installed"},"THEME_SETTINGS_132073848986":{"status":false,"message":"Code is not installed"},"THEME_SETTINGS_132096262298":{"status":false,"message":"Code is not installed"},"THEME_SETTINGS_132168384666":{"status":false,"message":"Code is not installed"},"THEME_SETTINGS_132314693786":{"status":false,"message":"Code is not installed"},"THEME_SETTINGS_132362469530":{"status":false,"message":"Code is not installed"},"THEME_SETTINGS_132363878554":{"status":false,"message":"Code is not installed"},"THEME_SETTINGS_132453105818":{"status":false,"message":"Code is not installed"},"THEME_SETTINGS_132461265050":{"status":true,"data":{"accountSettings":{"template":1,"isCustomized":false,"colorSettings":{"navigationBGColor":"rgb(13, 94, 168)","navigationTextColor":"rgb(255, 255, 255)","navigationBorderColor":"rgb(13, 94, 168)","contentBGColor":"rgb(255, 255, 255, 0)","contentTextColor":"rgb(0, 0, 0)","primaryButtonBGColor":"rgb(13, 94, 168)","primaryButtonTextColor":"rgb(255, 255, 255)","secondaryButtonBGColor":"rgb(13, 94, 168)","secondaryButtonTextColor":"rgb(13, 94, 168)","badgeBGColor":"rgb(13, 94, 168)","badgeTextColor":"rgb(255, 255, 255)","linkColor":"rgb(13, 94, 168)"},"isAccountPageInJSON":true,"sections":["main-customers-account"],"codeVersion":"2.1.5","themeStoreId":null},"microfront_remotes":{"pages_template":{"404":[{"component":"storeFrontCreditUsage","renderType":"remote"}],"article":[{"component":"storeFrontCreditUsage","renderType":"remote"}],"blog":[{"component":"storeFrontCreditUsage","renderType":"remote"}],"captcha":[{"component":"storeFrontCreditUsage","renderType":"remote"}],"cart":[{"component":"storeFrontCreditUsage","renderType":"remote"}],"collection":[{"component":"storeFrontCreditUsage","renderType":"remote"},{"component":"storeFrontWishListCollection","renderType":"remote"}],"list-collections":[{"component":"storeFrontCreditUsage","renderType":"remote"}],"customers\/account":[{"component":"storeFrontNavigation","renderType":"remote"},{"component":"storeFrontCreditUsage","renderType":"remote"}],"customers\/activate_account":[{"component":"storeFrontCreditUsage","renderType":"remote"}],"customers\/addresses":[{"component":"storeFrontCreditUsage","renderType":"remote"}],"customers\/login":[{"component":"storeFrontSocialLogin","renderType":"remote"}],"customers\/order":[{"component":"storeFrontCreditUsage","renderType":"remote"}],"customers\/register":[{"component":"storeFrontSocialLogin","renderType":"remote"},{"component":"storeFrontReferFriendRegisterPage","renderType":"remote"},{"component":"storeFrontRegisterPageCustomFields","renderType":"remote"}],"customers\/reset_password":[{"component":"storeFrontCreditUsage","renderType":"remote"}],"gift_card":[{"component":"storeFrontCreditUsage","renderType":"remote"}],"index":[{"component":"storeFrontCreditUsage","renderType":"remote"}],"metaobject":[{"component":"storeFrontCreditUsage","renderType":"remote"}],"page":[{"component":"storeFrontCreditUsage","renderType":"remote"}],"password":[{"component":"storeFrontCreditUsage","renderType":"remote"}],"policy":[{"component":"storeFrontCreditUsage","renderType":"remote"}],"product":[{"component":"storeFrontWishList","renderType":"remote"},{"component":"storeFrontRecentlyViewedProductPage","renderType":"remote"},{"component":"storeFrontCreditUsage","renderType":"remote"}],"search":[{"component":"storeFrontCreditUsage","renderType":"remote"}]},"remotes":{"storeFrontNavigation":{"remoteUrl":"defaultURL","moduleToLoad":".\/storeFrontNavigation","remoteName":"storeFrontNavigation","localRoute":"storeFrontNavigation","skeletonToLoad":"SkeletonNavigation","states":[]},"storeFrontRegisterPageCustomFields":{"remoteUrl":"defaultURL","moduleToLoad":".\/storeFrontRegisterPageCustomFields","remoteName":"storeFrontMyProfile","localRoute":"storeFrontMyProfile","required":["IS_CUSTOM_FIELDS_ENABLE"]},"storeFrontMyProfile":{"remoteUrl":"defaultURL","moduleToLoad":".\/storeFrontMyProfile","remoteName":"storeFrontMyProfile","localRoute":"storeFrontMyProfile","skeletonToLoad":"LoadingWithOutShadow","jsonTemplate":[{"component":"MyProfileForm","renderType":"local"}]},"storeFrontChangePassword":{"remoteUrl":"defaultURL","moduleToLoad":".\/storeFrontChangePassword","remoteName":"storeFrontChangePassword","localRoute":"storeFrontChangePassword","skeletonToLoad":"LoadingWithOutShadow","jsonTemplate":[{"component":"ChangePasswordFormComponent","renderType":"local"}]},"storeFrontWishList":{"remoteUrl":"defaultURL","moduleToLoad":".\/storeFrontWishList","remoteName":"storeFrontWishList","localRoute":"storeFrontWishList","required":["IS_WISHLIST_ENABLE","IS_WISHLIST_PAID"]},"storeFrontWishListCollection":{"remoteUrl":"defaultURL","moduleToLoad":".\/storeFrontWishListCollection","remoteName":"storeFrontWishList","localRoute":"storeFrontWishListCollection","required":["IS_WISHLIST_ENABLE","IS_WISHLIST_PAID"]},"storeFrontWishListPage":{"remoteUrl":"defaultURL","moduleToLoad":".\/storeFrontWishListPage","remoteName":"storeFrontWishList","localRoute":"storeFrontWishListPage","skeletonToLoad":"Loading","jsonTemplate":[],"required":["IS_WISHLIST_ENABLE","IS_WISHLIST_PAID"]},"storeFrontCreditUsage":{"remoteUrl":"defaultURL","moduleToLoad":".\/storeFrontCreditUsage","remoteName":"storeFrontCredit","localRoute":"storeFrontCreditUsage","required":["IS_STORE_CREDIT_PAID","is_store_credit_enable"],"requiredArray":[["IS_STORE_CREDIT_PAID","is_store_credit_enable"],["IS_REFUND_CREDIT_ENABLE"]],"jsonTemplate":[]},"storeFrontSocialLogin":{"remoteUrl":"defaultURL","moduleToLoad":".\/storeFrontSocialLogin","remoteName":"storeFrontSocialLogin","localRoute":"storeFrontSocialLogin","jsonTemplate":[],"required":["IS_SOCIAL_LOGIN_PAID","IS_SOCIAL_LOGIN_ENABLE"]},"storeFrontReferFriendRegisterPage":{"remoteUrl":"defaultURL","moduleToLoad":".\/storeFrontReferFriendRegisterPage","remoteName":"storeFrontReferFriend","localRoute":"storeFrontReferFriendRegisterPage","required":["IS_REFER_PROGRAM_ON","IS_STORE_CREDIT_PAID","is_store_credit_enable"]},"storeFrontReferFriend":{"remoteUrl":"defaultURL","moduleToLoad":".\/storeFrontReferFriend","remoteName":"storeFrontReferFriend","localRoute":"storeFrontReferFriend","skeletonToLoad":"Loading","required":["IS_STORE_CREDIT_PAID","IS_REFER_PROGRAM_ON","is_store_credit_enable"]},"storeFrontHowToManageCredit":{"remoteUrl":"defaultURL","moduleToLoad":".\/storeFrontHowToManageCredit","remoteName":"storeFrontHowToManageCredit","localRoute":"storeFrontHowToManageCredit","skeletonToLoad":"Loading","required":["is_store_credit_enable","IS_HOW_TO_EARN_CREDIT_DISPLAY","IS_STORE_CREDIT_PAID"],"jsonTemplate":[{"component":"HowToEarn","name":"edit","label":"flits.navigation.how_to_earn_credit","type":"button"},{"component":"HowToSpent","name":"edit","label":"flits.navigation.how_to_spend_credit","type":"button"},{"component":"FromStoreOwner","name":"edit","label":"flits.navigation.from_admin","type":"button"}]},"storeFrontCredit":{"remoteUrl":"defaultURL","moduleToLoad":".\/storeFrontCredit","remoteName":"storeFrontCredit","localRoute":"storeFrontCredit","skeletonToLoad":"Loading","required":["IS_STORE_CREDIT_PAID","is_store_credit_enable"]},"storeFrontOrder":{"remoteUrl":"defaultURL","moduleToLoad":".\/storeFrontOrder","remoteName":"storeFrontOrder","localRoute":"storeFrontOrder","skeletonToLoad":"Loading"},"storeFrontDeliveryAddress":{"remoteUrl":"defaultURL","moduleToLoad":".\/storeFrontDeliveryAddress","remoteName":"storeFrontDeliveryAddress","localRoute":"storeFrontDeliveryAddress","skeletonToLoad":"LoadingWithOutShadow"},"storeFrontRecentlyViewedProducts":{"remoteUrl":"defaultURL","moduleToLoad":".\/storeFrontRecentlyViewedProducts","remoteName":"storeFrontRecentlyViewedProducts","localRoute":"storeFrontRecentlyViewedProducts","skeletonToLoad":"Loading","required":["is_recently_view_enable"]},"storeFrontRecentlyViewedProductPage":{"remoteUrl":"defaultURL","moduleToLoad":".\/storeFrontRecentlyViewedProductPage","remoteName":"storeFrontRecentlyViewedProducts","localRoute":"storeFrontRecentlyViewedProductPage","required":["is_recently_view_enable"]},"storeFrontTopOrderedProducts":{"remoteUrl":"defaultURL","moduleToLoad":".\/storeFrontTopOrderedProducts","remoteName":"storeFrontTopOrderedProducts","localRoute":"storeFrontTopOrderedProducts","skeletonToLoad":"LoadingWithOutShadow","required":["IS_ADVANCE_DASHBOARD_ENABLE","IS_ADVANCE_DASHBOARD_PAID"]},"storeFrontRefundCredit":{"remoteUrl":"defaultURL","moduleToLoad":".\/storeFrontRefundCredit","remoteName":"storeFrontCredit","localRoute":"storeFrontRefundCredit","skeletonToLoad":"Loading","required":["IS_REFUND_CREDIT_ENABLE"]}}},"multilanguage":"https:\/\/cdn.getflits.com\/locales\/default\/en.json"},"flagSvgUrl":"https:\/\/cdn.shopify.com\/s\/files\/1\/0030\/7491\/6461\/files\/flags.svg?v=1646045459"},"THEME_SETTINGS_132482007194":{"status":false,"message":"Code is not installed"},"THEME_SETTINGS_132495900826":{"status":false,"message":"Code is not installed"},"THEME_SETTINGS_132495999130":{"status":false,"message":"Code is not installed"},"THEME_SETTINGS_132496851098":{"status":false,"message":"Code is not installed"},"THEME_SETTINGS_132512055450":{"status":false,"message":"Code is not installed"},"THEME_SETTINGS_132539973786":{"status":false,"message":"Code is not installed"},"THEME_SETTINGS_132720754842":{"status":false,"message":"Code is not installed"},"THEME_SETTINGS_132853760154":{"status":false,"message":"Code is not installed"},"THEME_SETTINGS_132907860122":{"status":false,"message":"Code is not installed"},"THEME_SETTINGS_132981784730":{"status":false,"message":"Code is not installed"},"THEME_SETTINGS_133471699098":{"status":false,"message":"Code is not installed"},"THEME_SETTINGS_133474582682":{"status":false,"message":"Code is not installed"},"THEME_SETTINGS_133561745562":{"status":false,"message":"Code is not installed"},"THEME_SETTINGS_133667356826":{"status":false,"message":"Code is not installed"},"THEME_SETTINGS_134055788698":{"status":false,"message":"Code is not installed"},"THEME_SETTINGS_134234505370":{"status":false,"message":"Code is not installed"},"THEME_SETTINGS_134264586394":{"status":false,"message":"Code is not installed"},"THEME_SETTINGS_134284083354":{"status":false,"message":"Code is not installed"},"THEME_SETTINGS_134385664154":{"status":false,"message":"Code is not installed"},"THEME_SETTINGS_134511558810":{"status":false,"message":"Code is not installed"},"THEME_SETTINGS_134773702810":{"status":true,"data":{"accountSettings":{"template":2,"isCustomized":false,"colorSettings":{"navigationBGColor":"rgb(255, 255, 255)","navigationTextColor":"rgb(12, 33, 84)","navigationBorderColor":"rgb(255, 255, 255)","contentBGColor":"rgb(255, 255, 255, 0)","contentTextColor":"rgb(0, 0, 0)","primaryButtonBGColor":"rgb(12, 33, 84)","primaryButtonTextColor":"rgb(255, 255, 255)","secondaryButtonBGColor":"rgb(12, 33, 84)","secondaryButtonTextColor":"rgb(12, 33, 84)","badgeBGColor":"rgb(12, 33, 84)","badgeTextColor":"rgb(255, 255, 255)","linkColor":"rgb(12, 33, 84)"},"isAccountPageInJSON":true,"sections":["main-account"],"codeVersion":"2.1.5","themeStoreId":887},"microfront_remotes":{"pages_template":{"404":[{"component":"storeFrontCreditUsage","renderType":"remote"}],"article":[{"component":"storeFrontCreditUsage","renderType":"remote"}],"blog":[{"component":"storeFrontCreditUsage","renderType":"remote"}],"captcha":[{"component":"storeFrontCreditUsage","renderType":"remote"}],"cart":[{"component":"storeFrontCreditUsage","renderType":"remote"}],"collection":[{"component":"storeFrontCreditUsage","renderType":"remote"},{"component":"storeFrontWishListCollection","renderType":"remote"}],"list-collections":[{"component":"storeFrontCreditUsage","renderType":"remote"}],"customers\/account":[{"component":"storeFrontNavigation","renderType":"remote"},{"component":"storeFrontCreditUsage","renderType":"remote"}],"customers\/activate_account":[{"component":"storeFrontCreditUsage","renderType":"remote"}],"customers\/addresses":[{"component":"storeFrontCreditUsage","renderType":"remote"}],"customers\/login":[{"component":"storeFrontSocialLogin","renderType":"remote"}],"customers\/order":[{"component":"storeFrontCreditUsage","renderType":"remote"}],"customers\/register":[{"component":"storeFrontSocialLogin","renderType":"remote"},{"component":"storeFrontReferFriendRegisterPage","renderType":"remote"},{"component":"storeFrontRegisterPageCustomFields","renderType":"remote"}],"customers\/reset_password":[{"component":"storeFrontCreditUsage","renderType":"remote"}],"gift_card":[{"component":"storeFrontCreditUsage","renderType":"remote"}],"index":[{"component":"storeFrontCreditUsage","renderType":"remote"}],"metaobject":[{"component":"storeFrontCreditUsage","renderType":"remote"}],"page":[{"component":"storeFrontCreditUsage","renderType":"remote"}],"password":[{"component":"storeFrontCreditUsage","renderType":"remote"}],"policy":[{"component":"storeFrontCreditUsage","renderType":"remote"}],"product":[{"component":"storeFrontWishList","renderType":"remote"},{"component":"storeFrontRecentlyViewedProductPage","renderType":"remote"},{"component":"storeFrontCreditUsage","renderType":"remote"}],"search":[{"component":"storeFrontCreditUsage","renderType":"remote"}]},"remotes":{"storeFrontNavigation":{"remoteUrl":"defaultURL","moduleToLoad":".\/storeFrontNavigation","remoteName":"storeFrontNavigation","localRoute":"storeFrontNavigation","skeletonToLoad":"SkeletonNavigation","states":[]},"storeFrontRegisterPageCustomFields":{"remoteUrl":"defaultURL","moduleToLoad":".\/storeFrontRegisterPageCustomFields","remoteName":"storeFrontMyProfile","localRoute":"storeFrontMyProfile","required":["IS_CUSTOM_FIELDS_ENABLE"]},"storeFrontMyProfile":{"remoteUrl":"defaultURL","moduleToLoad":".\/storeFrontMyProfile","remoteName":"storeFrontMyProfile","localRoute":"storeFrontMyProfile","skeletonToLoad":"LoadingWithOutShadow","jsonTemplate":[{"component":"MyProfileForm","renderType":"local"}]},"storeFrontChangePassword":{"remoteUrl":"defaultURL","moduleToLoad":".\/storeFrontChangePassword","remoteName":"storeFrontChangePassword","localRoute":"storeFrontChangePassword","skeletonToLoad":"LoadingWithOutShadow","jsonTemplate":[{"component":"ChangePasswordFormComponent","renderType":"local"}]},"storeFrontWishList":{"remoteUrl":"defaultURL","moduleToLoad":".\/storeFrontWishList","remoteName":"storeFrontWishList","localRoute":"storeFrontWishList","required":["IS_WISHLIST_ENABLE","IS_WISHLIST_PAID"]},"storeFrontWishListCollection":{"remoteUrl":"defaultURL","moduleToLoad":".\/storeFrontWishListCollection","remoteName":"storeFrontWishList","localRoute":"storeFrontWishListCollection","required":["IS_WISHLIST_ENABLE","IS_WISHLIST_PAID"]},"storeFrontWishListPage":{"remoteUrl":"defaultURL","moduleToLoad":".\/storeFrontWishListPage","remoteName":"storeFrontWishList","localRoute":"storeFrontWishListPage","skeletonToLoad":"Loading","jsonTemplate":[],"required":["IS_WISHLIST_ENABLE","IS_WISHLIST_PAID"]},"storeFrontCreditUsage":{"remoteUrl":"defaultURL","moduleToLoad":".\/storeFrontCreditUsage","remoteName":"storeFrontCredit","localRoute":"storeFrontCreditUsage","required":["IS_STORE_CREDIT_PAID","is_store_credit_enable"],"jsonTemplate":[]},"storeFrontSocialLogin":{"remoteUrl":"defaultURL","moduleToLoad":".\/storeFrontSocialLogin","remoteName":"storeFrontSocialLogin","localRoute":"storeFrontSocialLogin","jsonTemplate":[],"required":["IS_SOCIAL_LOGIN_PAID","IS_SOCIAL_LOGIN_ENABLE"]},"storeFrontReferFriendRegisterPage":{"remoteUrl":"defaultURL","moduleToLoad":".\/storeFrontReferFriendRegisterPage","remoteName":"storeFrontReferFriend","localRoute":"storeFrontReferFriendRegisterPage","required":["IS_REFER_PROGRAM_ON","IS_STORE_CREDIT_PAID","is_store_credit_enable"]},"storeFrontReferFriend":{"remoteUrl":"defaultURL","moduleToLoad":".\/storeFrontReferFriend","remoteName":"storeFrontReferFriend","localRoute":"storeFrontReferFriend","skeletonToLoad":"Loading","required":["IS_STORE_CREDIT_PAID","IS_REFER_PROGRAM_ON","is_store_credit_enable"]},"storeFrontHowToManageCredit":{"remoteUrl":"defaultURL","moduleToLoad":".\/storeFrontHowToManageCredit","remoteName":"storeFrontHowToManageCredit","localRoute":"storeFrontHowToManageCredit","skeletonToLoad":"Loading","required":["is_store_credit_enable","IS_HOW_TO_EARN_CREDIT_DISPLAY","IS_STORE_CREDIT_PAID"],"jsonTemplate":[{"component":"HowToEarn","name":"edit","label":"flits.navigation.how_to_earn_credit","type":"button"},{"component":"HowToSpent","name":"edit","label":"flits.navigation.how_to_spend_credit","type":"button"},{"component":"FromStoreOwner","name":"edit","label":"flits.navigation.from_admin","type":"button"}]},"storeFrontCredit":{"remoteUrl":"defaultURL","moduleToLoad":".\/storeFrontCredit","remoteName":"storeFrontCredit","localRoute":"storeFrontCredit","skeletonToLoad":"Loading","required":["IS_STORE_CREDIT_PAID","is_store_credit_enable"]},"storeFrontOrder":{"remoteUrl":"defaultURL","moduleToLoad":".\/storeFrontOrder","remoteName":"storeFrontOrder","localRoute":"storeFrontOrder","skeletonToLoad":"Loading"},"storeFrontDeliveryAddress":{"remoteUrl":"defaultURL","moduleToLoad":".\/storeFrontDeliveryAddress","remoteName":"storeFrontDeliveryAddress","localRoute":"storeFrontDeliveryAddress","skeletonToLoad":"LoadingWithOutShadow"},"storeFrontRecentlyViewedProducts":{"remoteUrl":"defaultURL","moduleToLoad":".\/storeFrontRecentlyViewedProducts","remoteName":"storeFrontRecentlyViewedProducts","localRoute":"storeFrontRecentlyViewedProducts","skeletonToLoad":"Loading","required":["is_recently_view_enable"]},"storeFrontRecentlyViewedProductPage":{"remoteUrl":"defaultURL","moduleToLoad":".\/storeFrontRecentlyViewedProductPage","remoteName":"storeFrontRecentlyViewedProducts","localRoute":"storeFrontRecentlyViewedProductPage","required":["is_recently_view_enable"]},"storeFrontTopOrderedProducts":{"remoteUrl":"defaultURL","moduleToLoad":".\/storeFrontTopOrderedProducts","remoteName":"storeFrontTopOrderedProducts","localRoute":"storeFrontTopOrderedProducts","skeletonToLoad":"LoadingWithOutShadow","required":["IS_ADVANCE_DASHBOARD_ENABLE","IS_ADVANCE_DASHBOARD_PAID"]}}},"multilanguage":"https:\/\/cdn.getflits.com\/locales\/default\/en.json"},"flagSvgUrl":"https:\/\/cdn.shopify.com\/s\/files\/1\/0030\/7491\/6461\/files\/flags.svg?v=1646045459"},"THEME_SETTINGS_134937968794":{"status":false,"message":"Code is not installed"},"THEME_SETTINGS_135118192794":{"status":true,"data":{"accountSettings":{"template":2,"isCustomized":false,"colorSettings":{"navigationBGColor":"rgb(255, 255, 255)","navigationTextColor":"rgb(12, 33, 84)","navigationBorderColor":"rgb(255, 255, 255)","contentBGColor":"rgb(255, 255, 255, 0)","contentTextColor":"rgb(0, 0, 0)","primaryButtonBGColor":"rgb(12, 33, 84)","primaryButtonTextColor":"rgb(255, 255, 255)","secondaryButtonBGColor":"rgb(12, 33, 84)","secondaryButtonTextColor":"rgb(12, 33, 84)","badgeBGColor":"rgb(12, 33, 84)","badgeTextColor":"rgb(255, 255, 255)","linkColor":"rgb(12, 33, 84)"},"isAccountPageInJSON":true,"sections":["main-account"],"codeVersion":"2.1.5","themeStoreId":887},"microfront_remotes":{"pages_template":{"404":[{"component":"storeFrontCreditUsage","renderType":"remote"}],"article":[{"component":"storeFrontCreditUsage","renderType":"remote"}],"blog":[{"component":"storeFrontCreditUsage","renderType":"remote"}],"captcha":[{"component":"storeFrontCreditUsage","renderType":"remote"}],"cart":[{"component":"storeFrontCreditUsage","renderType":"remote"}],"collection":[{"component":"storeFrontCreditUsage","renderType":"remote"},{"component":"storeFrontWishListCollection","renderType":"remote"}],"list-collections":[{"component":"storeFrontCreditUsage","renderType":"remote"}],"customers\/account":[{"component":"storeFrontNavigation","renderType":"remote"},{"component":"storeFrontCreditUsage","renderType":"remote"}],"customers\/activate_account":[{"component":"storeFrontCreditUsage","renderType":"remote"}],"customers\/addresses":[{"component":"storeFrontCreditUsage","renderType":"remote"}],"customers\/login":[{"component":"storeFrontSocialLogin","renderType":"remote"}],"customers\/order":[{"component":"storeFrontCreditUsage","renderType":"remote"}],"customers\/register":[{"component":"storeFrontSocialLogin","renderType":"remote"},{"component":"storeFrontReferFriendRegisterPage","renderType":"remote"},{"component":"storeFrontRegisterPageCustomFields","renderType":"remote"}],"customers\/reset_password":[{"component":"storeFrontCreditUsage","renderType":"remote"}],"gift_card":[{"component":"storeFrontCreditUsage","renderType":"remote"}],"index":[{"component":"storeFrontCreditUsage","renderType":"remote"}],"metaobject":[{"component":"storeFrontCreditUsage","renderType":"remote"}],"page":[{"component":"storeFrontCreditUsage","renderType":"remote"}],"password":[{"component":"storeFrontCreditUsage","renderType":"remote"}],"policy":[{"component":"storeFrontCreditUsage","renderType":"remote"}],"product":[{"component":"storeFrontWishList","renderType":"remote"},{"component":"storeFrontRecentlyViewedProductPage","renderType":"remote"},{"component":"storeFrontCreditUsage","renderType":"remote"}],"search":[{"component":"storeFrontCreditUsage","renderType":"remote"}]},"remotes":{"storeFrontNavigation":{"remoteUrl":"defaultURL","moduleToLoad":".\/storeFrontNavigation","remoteName":"storeFrontNavigation","localRoute":"storeFrontNavigation","skeletonToLoad":"SkeletonNavigation","states":[]},"storeFrontRegisterPageCustomFields":{"remoteUrl":"defaultURL","moduleToLoad":".\/storeFrontRegisterPageCustomFields","remoteName":"storeFrontMyProfile","localRoute":"storeFrontMyProfile","required":["IS_CUSTOM_FIELDS_ENABLE"]},"storeFrontMyProfile":{"remoteUrl":"defaultURL","moduleToLoad":".\/storeFrontMyProfile","remoteName":"storeFrontMyProfile","localRoute":"storeFrontMyProfile","skeletonToLoad":"LoadingWithOutShadow","jsonTemplate":[{"component":"MyProfileForm","renderType":"local"}]},"storeFrontChangePassword":{"remoteUrl":"defaultURL","moduleToLoad":".\/storeFrontChangePassword","remoteName":"storeFrontChangePassword","localRoute":"storeFrontChangePassword","skeletonToLoad":"LoadingWithOutShadow","jsonTemplate":[{"component":"ChangePasswordFormComponent","renderType":"local"}]},"storeFrontWishList":{"remoteUrl":"defaultURL","moduleToLoad":".\/storeFrontWishList","remoteName":"storeFrontWishList","localRoute":"storeFrontWishList","required":["IS_WISHLIST_ENABLE","IS_WISHLIST_PAID"]},"storeFrontWishListCollection":{"remoteUrl":"defaultURL","moduleToLoad":".\/storeFrontWishListCollection","remoteName":"storeFrontWishList","localRoute":"storeFrontWishListCollection","required":["IS_WISHLIST_ENABLE","IS_WISHLIST_PAID"]},"storeFrontWishListPage":{"remoteUrl":"defaultURL","moduleToLoad":".\/storeFrontWishListPage","remoteName":"storeFrontWishList","localRoute":"storeFrontWishListPage","skeletonToLoad":"Loading","jsonTemplate":[],"required":["IS_WISHLIST_ENABLE","IS_WISHLIST_PAID"]},"storeFrontCreditUsage":{"remoteUrl":"defaultURL","moduleToLoad":".\/storeFrontCreditUsage","remoteName":"storeFrontCredit","localRoute":"storeFrontCreditUsage","required":["IS_STORE_CREDIT_PAID","is_store_credit_enable"],"jsonTemplate":[]},"storeFrontSocialLogin":{"remoteUrl":"defaultURL","moduleToLoad":".\/storeFrontSocialLogin","remoteName":"storeFrontSocialLogin","localRoute":"storeFrontSocialLogin","jsonTemplate":[],"required":["IS_SOCIAL_LOGIN_PAID","IS_SOCIAL_LOGIN_ENABLE"]},"storeFrontReferFriendRegisterPage":{"remoteUrl":"defaultURL","moduleToLoad":".\/storeFrontReferFriendRegisterPage","remoteName":"storeFrontReferFriend","localRoute":"storeFrontReferFriendRegisterPage","required":["IS_REFER_PROGRAM_ON","IS_STORE_CREDIT_PAID","is_store_credit_enable"]},"storeFrontReferFriend":{"remoteUrl":"defaultURL","moduleToLoad":".\/storeFrontReferFriend","remoteName":"storeFrontReferFriend","localRoute":"storeFrontReferFriend","skeletonToLoad":"Loading","required":["IS_STORE_CREDIT_PAID","IS_REFER_PROGRAM_ON","is_store_credit_enable"]},"storeFrontHowToManageCredit":{"remoteUrl":"defaultURL","moduleToLoad":".\/storeFrontHowToManageCredit","remoteName":"storeFrontHowToManageCredit","localRoute":"storeFrontHowToManageCredit","skeletonToLoad":"Loading","required":["is_store_credit_enable","IS_HOW_TO_EARN_CREDIT_DISPLAY","IS_STORE_CREDIT_PAID"],"jsonTemplate":[{"component":"HowToEarn","name":"edit","label":"flits.navigation.how_to_earn_credit","type":"button"},{"component":"HowToSpent","name":"edit","label":"flits.navigation.how_to_spend_credit","type":"button"},{"component":"FromStoreOwner","name":"edit","label":"flits.navigation.from_admin","type":"button"}]},"storeFrontCredit":{"remoteUrl":"defaultURL","moduleToLoad":".\/storeFrontCredit","remoteName":"storeFrontCredit","localRoute":"storeFrontCredit","skeletonToLoad":"Loading","required":["IS_STORE_CREDIT_PAID","is_store_credit_enable"]},"storeFrontOrder":{"remoteUrl":"defaultURL","moduleToLoad":".\/storeFrontOrder","remoteName":"storeFrontOrder","localRoute":"storeFrontOrder","skeletonToLoad":"Loading"},"storeFrontDeliveryAddress":{"remoteUrl":"defaultURL","moduleToLoad":".\/storeFrontDeliveryAddress","remoteName":"storeFrontDeliveryAddress","localRoute":"storeFrontDeliveryAddress","skeletonToLoad":"LoadingWithOutShadow"},"storeFrontRecentlyViewedProducts":{"remoteUrl":"defaultURL","moduleToLoad":".\/storeFrontRecentlyViewedProducts","remoteName":"storeFrontRecentlyViewedProducts","localRoute":"storeFrontRecentlyViewedProducts","skeletonToLoad":"Loading","required":["is_recently_view_enable"]},"storeFrontRecentlyViewedProductPage":{"remoteUrl":"defaultURL","moduleToLoad":".\/storeFrontRecentlyViewedProductPage","remoteName":"storeFrontRecentlyViewedProducts","localRoute":"storeFrontRecentlyViewedProductPage","required":["is_recently_view_enable"]},"storeFrontTopOrderedProducts":{"remoteUrl":"defaultURL","moduleToLoad":".\/storeFrontTopOrderedProducts","remoteName":"storeFrontTopOrderedProducts","localRoute":"storeFrontTopOrderedProducts","skeletonToLoad":"LoadingWithOutShadow","required":["IS_ADVANCE_DASHBOARD_ENABLE","IS_ADVANCE_DASHBOARD_PAID"]}}},"multilanguage":"https:\/\/cdn.getflits.com\/locales\/default\/en.json"},"flagSvgUrl":"https:\/\/cdn.shopify.com\/s\/files\/1\/0030\/7491\/6461\/files\/flags.svg?v=1646045459"},"THEME_SETTINGS_135302611098":{"status":false,"message":"Code is not installed"},"THEME_SETTINGS_135302676634":{"status":true,"data":{"accountSettings":{"template":2,"isCustomized":false,"colorSettings":{"navigationBGColor":"rgb(255, 255, 255)","navigationTextColor":"rgb(12, 33, 84)","navigationBorderColor":"rgb(255, 255, 255)","contentBGColor":"rgb(255, 255, 255, 0)","contentTextColor":"rgb(0, 0, 0)","primaryButtonBGColor":"rgb(12, 33, 84)","primaryButtonTextColor":"rgb(255, 255, 255)","secondaryButtonBGColor":"rgb(12, 33, 84)","secondaryButtonTextColor":"rgb(12, 33, 84)","badgeBGColor":"rgb(12, 33, 84)","badgeTextColor":"rgb(255, 255, 255)","linkColor":"rgb(12, 33, 84)"},"isAccountPageInJSON":true,"sections":["main-account"],"codeVersion":"2.1.5","themeStoreId":887},"microfront_remotes":{"pages_template":{"404":[{"component":"storeFrontCreditUsage","renderType":"remote"}],"article":[{"component":"storeFrontCreditUsage","renderType":"remote"}],"blog":[{"component":"storeFrontCreditUsage","renderType":"remote"}],"captcha":[{"component":"storeFrontCreditUsage","renderType":"remote"}],"cart":[{"component":"storeFrontCreditUsage","renderType":"remote"}],"collection":[{"component":"storeFrontCreditUsage","renderType":"remote"},{"component":"storeFrontWishListCollection","renderType":"remote"}],"list-collections":[{"component":"storeFrontCreditUsage","renderType":"remote"}],"customers\/account":[{"component":"storeFrontNavigation","renderType":"remote"},{"component":"storeFrontCreditUsage","renderType":"remote"}],"customers\/activate_account":[{"component":"storeFrontCreditUsage","renderType":"remote"}],"customers\/addresses":[{"component":"storeFrontCreditUsage","renderType":"remote"}],"customers\/login":[{"component":"storeFrontSocialLogin","renderType":"remote"}],"customers\/order":[{"component":"storeFrontCreditUsage","renderType":"remote"}],"customers\/register":[{"component":"storeFrontSocialLogin","renderType":"remote"},{"component":"storeFrontReferFriendRegisterPage","renderType":"remote"},{"component":"storeFrontRegisterPageCustomFields","renderType":"remote"}],"customers\/reset_password":[{"component":"storeFrontCreditUsage","renderType":"remote"}],"gift_card":[{"component":"storeFrontCreditUsage","renderType":"remote"}],"index":[{"component":"storeFrontCreditUsage","renderType":"remote"}],"metaobject":[{"component":"storeFrontCreditUsage","renderType":"remote"}],"page":[{"component":"storeFrontCreditUsage","renderType":"remote"}],"password":[{"component":"storeFrontCreditUsage","renderType":"remote"}],"policy":[{"component":"storeFrontCreditUsage","renderType":"remote"}],"product":[{"component":"storeFrontWishList","renderType":"remote"},{"component":"storeFrontRecentlyViewedProductPage","renderType":"remote"},{"component":"storeFrontCreditUsage","renderType":"remote"}],"search":[{"component":"storeFrontCreditUsage","renderType":"remote"}]},"remotes":{"storeFrontNavigation":{"remoteUrl":"defaultURL","moduleToLoad":".\/storeFrontNavigation","remoteName":"storeFrontNavigation","localRoute":"storeFrontNavigation","skeletonToLoad":"SkeletonNavigation","states":[]},"storeFrontRegisterPageCustomFields":{"remoteUrl":"defaultURL","moduleToLoad":".\/storeFrontRegisterPageCustomFields","remoteName":"storeFrontMyProfile","localRoute":"storeFrontMyProfile","required":["IS_CUSTOM_FIELDS_ENABLE"]},"storeFrontMyProfile":{"remoteUrl":"defaultURL","moduleToLoad":".\/storeFrontMyProfile","remoteName":"storeFrontMyProfile","localRoute":"storeFrontMyProfile","skeletonToLoad":"LoadingWithOutShadow","jsonTemplate":[{"component":"MyProfileForm","renderType":"local"}]},"storeFrontChangePassword":{"remoteUrl":"defaultURL","moduleToLoad":".\/storeFrontChangePassword","remoteName":"storeFrontChangePassword","localRoute":"storeFrontChangePassword","skeletonToLoad":"LoadingWithOutShadow","jsonTemplate":[{"component":"ChangePasswordFormComponent","renderType":"local"}]},"storeFrontWishList":{"remoteUrl":"defaultURL","moduleToLoad":".\/storeFrontWishList","remoteName":"storeFrontWishList","localRoute":"storeFrontWishList","required":["IS_WISHLIST_ENABLE","IS_WISHLIST_PAID"]},"storeFrontWishListCollection":{"remoteUrl":"defaultURL","moduleToLoad":".\/storeFrontWishListCollection","remoteName":"storeFrontWishList","localRoute":"storeFrontWishListCollection","required":["IS_WISHLIST_ENABLE","IS_WISHLIST_PAID"]},"storeFrontWishListPage":{"remoteUrl":"defaultURL","moduleToLoad":".\/storeFrontWishListPage","remoteName":"storeFrontWishList","localRoute":"storeFrontWishListPage","skeletonToLoad":"Loading","jsonTemplate":[],"required":["IS_WISHLIST_ENABLE","IS_WISHLIST_PAID"]},"storeFrontCreditUsage":{"remoteUrl":"defaultURL","moduleToLoad":".\/storeFrontCreditUsage","remoteName":"storeFrontCredit","localRoute":"storeFrontCreditUsage","required":["IS_STORE_CREDIT_PAID","is_store_credit_enable"],"jsonTemplate":[]},"storeFrontSocialLogin":{"remoteUrl":"defaultURL","moduleToLoad":".\/storeFrontSocialLogin","remoteName":"storeFrontSocialLogin","localRoute":"storeFrontSocialLogin","jsonTemplate":[],"required":["IS_SOCIAL_LOGIN_PAID","IS_SOCIAL_LOGIN_ENABLE"]},"storeFrontReferFriendRegisterPage":{"remoteUrl":"defaultURL","moduleToLoad":".\/storeFrontReferFriendRegisterPage","remoteName":"storeFrontReferFriend","localRoute":"storeFrontReferFriendRegisterPage","required":["IS_REFER_PROGRAM_ON","IS_STORE_CREDIT_PAID","is_store_credit_enable"]},"storeFrontReferFriend":{"remoteUrl":"defaultURL","moduleToLoad":".\/storeFrontReferFriend","remoteName":"storeFrontReferFriend","localRoute":"storeFrontReferFriend","skeletonToLoad":"Loading","required":["IS_STORE_CREDIT_PAID","IS_REFER_PROGRAM_ON","is_store_credit_enable"]},"storeFrontHowToManageCredit":{"remoteUrl":"defaultURL","moduleToLoad":".\/storeFrontHowToManageCredit","remoteName":"storeFrontHowToManageCredit","localRoute":"storeFrontHowToManageCredit","skeletonToLoad":"Loading","required":["is_store_credit_enable","IS_HOW_TO_EARN_CREDIT_DISPLAY","IS_STORE_CREDIT_PAID"],"jsonTemplate":[{"component":"HowToEarn","name":"edit","label":"flits.navigation.how_to_earn_credit","type":"button"},{"component":"HowToSpent","name":"edit","label":"flits.navigation.how_to_spend_credit","type":"button"},{"component":"FromStoreOwner","name":"edit","label":"flits.navigation.from_admin","type":"button"}]},"storeFrontCredit":{"remoteUrl":"defaultURL","moduleToLoad":".\/storeFrontCredit","remoteName":"storeFrontCredit","localRoute":"storeFrontCredit","skeletonToLoad":"Loading","required":["IS_STORE_CREDIT_PAID","is_store_credit_enable"]},"storeFrontOrder":{"remoteUrl":"defaultURL","moduleToLoad":".\/storeFrontOrder","remoteName":"storeFrontOrder","localRoute":"storeFrontOrder","skeletonToLoad":"Loading"},"storeFrontDeliveryAddress":{"remoteUrl":"defaultURL","moduleToLoad":".\/storeFrontDeliveryAddress","remoteName":"storeFrontDeliveryAddress","localRoute":"storeFrontDeliveryAddress","skeletonToLoad":"LoadingWithOutShadow"},"storeFrontRecentlyViewedProducts":{"remoteUrl":"defaultURL","moduleToLoad":".\/storeFrontRecentlyViewedProducts","remoteName":"storeFrontRecentlyViewedProducts","localRoute":"storeFrontRecentlyViewedProducts","skeletonToLoad":"Loading","required":["is_recently_view_enable"]},"storeFrontRecentlyViewedProductPage":{"remoteUrl":"defaultURL","moduleToLoad":".\/storeFrontRecentlyViewedProductPage","remoteName":"storeFrontRecentlyViewedProducts","localRoute":"storeFrontRecentlyViewedProductPage","required":["is_recently_view_enable"]},"storeFrontTopOrderedProducts":{"remoteUrl":"defaultURL","moduleToLoad":".\/storeFrontTopOrderedProducts","remoteName":"storeFrontTopOrderedProducts","localRoute":"storeFrontTopOrderedProducts","skeletonToLoad":"LoadingWithOutShadow","required":["IS_ADVANCE_DASHBOARD_ENABLE","IS_ADVANCE_DASHBOARD_PAID"]}}},"multilanguage":"https:\/\/cdn.getflits.com\/locales\/default\/en.json"},"flagSvgUrl":"https:\/\/cdn.shopify.com\/s\/files\/1\/0030\/7491\/6461\/files\/flags.svg?v=1646045459"},"THEME_SETTINGS_135477231770":{"status":false,"message":"Code is not installed"},"THEME_SETTINGS_135679672474":{"status":true,"data":{"accountSettings":{"template":2,"isCustomized":false,"colorSettings":{"navigationBGColor":"rgb(255, 255, 255)","navigationTextColor":"rgb(12, 33, 84)","navigationBorderColor":"rgb(255, 255, 255)","contentBGColor":"rgb(255, 255, 255, 0)","contentTextColor":"rgb(0, 0, 0)","primaryButtonBGColor":"rgb(12, 33, 84)","primaryButtonTextColor":"rgb(255, 255, 255)","secondaryButtonBGColor":"rgb(12, 33, 84)","secondaryButtonTextColor":"rgb(12, 33, 84)","badgeBGColor":"rgb(12, 33, 84)","badgeTextColor":"rgb(255, 255, 255)","linkColor":"rgb(12, 33, 84)"},"isAccountPageInJSON":true,"sections":["main-account"],"codeVersion":"2.1.5","themeStoreId":887},"microfront_remotes":{"pages_template":{"404":[{"component":"storeFrontCreditUsage","renderType":"remote"}],"article":[{"component":"storeFrontCreditUsage","renderType":"remote"}],"blog":[{"component":"storeFrontCreditUsage","renderType":"remote"}],"captcha":[{"component":"storeFrontCreditUsage","renderType":"remote"}],"cart":[{"component":"storeFrontCreditUsage","renderType":"remote"}],"collection":[{"component":"storeFrontCreditUsage","renderType":"remote"},{"component":"storeFrontWishListCollection","renderType":"remote"}],"list-collections":[{"component":"storeFrontCreditUsage","renderType":"remote"}],"customers\/account":[{"component":"storeFrontNavigation","renderType":"remote"},{"component":"storeFrontCreditUsage","renderType":"remote"}],"customers\/activate_account":[{"component":"storeFrontCreditUsage","renderType":"remote"}],"customers\/addresses":[{"component":"storeFrontCreditUsage","renderType":"remote"}],"customers\/login":[{"component":"storeFrontSocialLogin","renderType":"remote"}],"customers\/order":[{"component":"storeFrontCreditUsage","renderType":"remote"}],"customers\/register":[{"component":"storeFrontSocialLogin","renderType":"remote"},{"component":"storeFrontReferFriendRegisterPage","renderType":"remote"},{"component":"storeFrontRegisterPageCustomFields","renderType":"remote"}],"customers\/reset_password":[{"component":"storeFrontCreditUsage","renderType":"remote"}],"gift_card":[{"component":"storeFrontCreditUsage","renderType":"remote"}],"index":[{"component":"storeFrontCreditUsage","renderType":"remote"}],"metaobject":[{"component":"storeFrontCreditUsage","renderType":"remote"}],"page":[{"component":"storeFrontCreditUsage","renderType":"remote"}],"password":[{"component":"storeFrontCreditUsage","renderType":"remote"}],"policy":[{"component":"storeFrontCreditUsage","renderType":"remote"}],"product":[{"component":"storeFrontWishList","renderType":"remote"},{"component":"storeFrontRecentlyViewedProductPage","renderType":"remote"},{"component":"storeFrontCreditUsage","renderType":"remote"}],"search":[{"component":"storeFrontCreditUsage","renderType":"remote"}]},"remotes":{"storeFrontNavigation":{"remoteUrl":"defaultURL","moduleToLoad":".\/storeFrontNavigation","remoteName":"storeFrontNavigation","localRoute":"storeFrontNavigation","skeletonToLoad":"SkeletonNavigation","states":[]},"storeFrontRegisterPageCustomFields":{"remoteUrl":"defaultURL","moduleToLoad":".\/storeFrontRegisterPageCustomFields","remoteName":"storeFrontMyProfile","localRoute":"storeFrontMyProfile","required":["IS_CUSTOM_FIELDS_ENABLE"]},"storeFrontMyProfile":{"remoteUrl":"defaultURL","moduleToLoad":".\/storeFrontMyProfile","remoteName":"storeFrontMyProfile","localRoute":"storeFrontMyProfile","skeletonToLoad":"LoadingWithOutShadow","jsonTemplate":[{"component":"MyProfileForm","renderType":"local"}]},"storeFrontChangePassword":{"remoteUrl":"defaultURL","moduleToLoad":".\/storeFrontChangePassword","remoteName":"storeFrontChangePassword","localRoute":"storeFrontChangePassword","skeletonToLoad":"LoadingWithOutShadow","jsonTemplate":[{"component":"ChangePasswordFormComponent","renderType":"local"}]},"storeFrontWishList":{"remoteUrl":"defaultURL","moduleToLoad":".\/storeFrontWishList","remoteName":"storeFrontWishList","localRoute":"storeFrontWishList","required":["IS_WISHLIST_ENABLE","IS_WISHLIST_PAID"]},"storeFrontWishListCollection":{"remoteUrl":"defaultURL","moduleToLoad":".\/storeFrontWishListCollection","remoteName":"storeFrontWishList","localRoute":"storeFrontWishListCollection","required":["IS_WISHLIST_ENABLE","IS_WISHLIST_PAID"]},"storeFrontWishListPage":{"remoteUrl":"defaultURL","moduleToLoad":".\/storeFrontWishListPage","remoteName":"storeFrontWishList","localRoute":"storeFrontWishListPage","skeletonToLoad":"Loading","jsonTemplate":[],"required":["IS_WISHLIST_ENABLE","IS_WISHLIST_PAID"]},"storeFrontCreditUsage":{"remoteUrl":"defaultURL","moduleToLoad":".\/storeFrontCreditUsage","remoteName":"storeFrontCredit","localRoute":"storeFrontCreditUsage","required":["IS_STORE_CREDIT_PAID","is_store_credit_enable"],"jsonTemplate":[]},"storeFrontSocialLogin":{"remoteUrl":"defaultURL","moduleToLoad":".\/storeFrontSocialLogin","remoteName":"storeFrontSocialLogin","localRoute":"storeFrontSocialLogin","jsonTemplate":[],"required":["IS_SOCIAL_LOGIN_PAID","IS_SOCIAL_LOGIN_ENABLE"]},"storeFrontReferFriendRegisterPage":{"remoteUrl":"defaultURL","moduleToLoad":".\/storeFrontReferFriendRegisterPage","remoteName":"storeFrontReferFriend","localRoute":"storeFrontReferFriendRegisterPage","required":["IS_REFER_PROGRAM_ON","IS_STORE_CREDIT_PAID","is_store_credit_enable"]},"storeFrontReferFriend":{"remoteUrl":"defaultURL","moduleToLoad":".\/storeFrontReferFriend","remoteName":"storeFrontReferFriend","localRoute":"storeFrontReferFriend","skeletonToLoad":"Loading","required":["IS_STORE_CREDIT_PAID","IS_REFER_PROGRAM_ON","is_store_credit_enable"]},"storeFrontHowToManageCredit":{"remoteUrl":"defaultURL","moduleToLoad":".\/storeFrontHowToManageCredit","remoteName":"storeFrontHowToManageCredit","localRoute":"storeFrontHowToManageCredit","skeletonToLoad":"Loading","required":["is_store_credit_enable","IS_HOW_TO_EARN_CREDIT_DISPLAY","IS_STORE_CREDIT_PAID"],"jsonTemplate":[{"component":"HowToEarn","name":"edit","label":"flits.navigation.how_to_earn_credit","type":"button"},{"component":"HowToSpent","name":"edit","label":"flits.navigation.how_to_spend_credit","type":"button"},{"component":"FromStoreOwner","name":"edit","label":"flits.navigation.from_admin","type":"button"}]},"storeFrontCredit":{"remoteUrl":"defaultURL","moduleToLoad":".\/storeFrontCredit","remoteName":"storeFrontCredit","localRoute":"storeFrontCredit","skeletonToLoad":"Loading","required":["IS_STORE_CREDIT_PAID","is_store_credit_enable"]},"storeFrontOrder":{"remoteUrl":"defaultURL","moduleToLoad":".\/storeFrontOrder","remoteName":"storeFrontOrder","localRoute":"storeFrontOrder","skeletonToLoad":"Loading"},"storeFrontDeliveryAddress":{"remoteUrl":"defaultURL","moduleToLoad":".\/storeFrontDeliveryAddress","remoteName":"storeFrontDeliveryAddress","localRoute":"storeFrontDeliveryAddress","skeletonToLoad":"LoadingWithOutShadow"},"storeFrontRecentlyViewedProducts":{"remoteUrl":"defaultURL","moduleToLoad":".\/storeFrontRecentlyViewedProducts","remoteName":"storeFrontRecentlyViewedProducts","localRoute":"storeFrontRecentlyViewedProducts","skeletonToLoad":"Loading","required":["is_recently_view_enable"]},"storeFrontRecentlyViewedProductPage":{"remoteUrl":"defaultURL","moduleToLoad":".\/storeFrontRecentlyViewedProductPage","remoteName":"storeFrontRecentlyViewedProducts","localRoute":"storeFrontRecentlyViewedProductPage","required":["is_recently_view_enable"]},"storeFrontTopOrderedProducts":{"remoteUrl":"defaultURL","moduleToLoad":".\/storeFrontTopOrderedProducts","remoteName":"storeFrontTopOrderedProducts","localRoute":"storeFrontTopOrderedProducts","skeletonToLoad":"LoadingWithOutShadow","required":["IS_ADVANCE_DASHBOARD_ENABLE","IS_ADVANCE_DASHBOARD_PAID"]}}},"multilanguage":"https:\/\/cdn.getflits.com\/locales\/default\/en.json"},"flagSvgUrl":"https:\/\/cdn.shopify.com\/s\/files\/1\/0030\/7491\/6461\/files\/flags.svg?v=1646045459"},"THEME_SETTINGS_135733903514":{"status":false,"message":"Code is not installed"},"THEME_SETTINGS_135826866330":{"status":false,"message":"Code is not installed"},"THEME_SETTINGS_136102707354":{"status":false,"message":"Code is not installed"},"THEME_SETTINGS_136358035610":{"status":false,"message":"Code is not installed"},"THEME_SETTINGS_136376418458":{"status":false,"message":"Code is not installed"},"THEME_SETTINGS_136676769946":{"status":true,"data":{"accountSettings":{"template":2,"isCustomized":false,"colorSettings":{"navigationBGColor":"rgb(255, 255, 255)","navigationTextColor":"rgb(12, 33, 84)","navigationBorderColor":"rgb(255, 255, 255)","contentBGColor":"rgb(255, 255, 255, 0)","contentTextColor":"rgb(0, 0, 0)","primaryButtonBGColor":"rgb(12, 33, 84)","primaryButtonTextColor":"rgb(255, 255, 255)","secondaryButtonBGColor":"rgb(12, 33, 84)","secondaryButtonTextColor":"rgb(12, 33, 84)","badgeBGColor":"rgb(12, 33, 84)","badgeTextColor":"rgb(255, 255, 255)","linkColor":"rgb(12, 33, 84)"},"isAccountPageInJSON":false,"sections":[],"codeVersion":"4.0.0","themeStoreId":null},"microfront_remotes":{"pages_template":{"404":[{"component":"storeFrontCreditUsage","renderType":"remote"}],"article":[{"component":"storeFrontCreditUsage","renderType":"remote"}],"blog":[{"component":"storeFrontCreditUsage","renderType":"remote"}],"captcha":[{"component":"storeFrontCreditUsage","renderType":"remote"}],"cart":[{"component":"storeFrontCreditUsage","renderType":"remote"}],"collection":[{"component":"storeFrontCreditUsage","renderType":"remote"},{"component":"storeFrontWishListCollection","renderType":"remote"}],"list-collections":[{"component":"storeFrontCreditUsage","renderType":"remote"}],"customers\/account":[{"component":"storeFrontNavigation","renderType":"remote"},{"component":"storeFrontCreditUsage","renderType":"remote"}],"customers\/activate_account":[{"component":"storeFrontCreditUsage","renderType":"remote"}],"customers\/addresses":[{"component":"storeFrontCreditUsage","renderType":"remote"}],"customers\/login":[{"component":"storeFrontSocialLogin","renderType":"remote"}],"customers\/order":[{"component":"storeFrontCreditUsage","renderType":"remote"}],"customers\/register":[{"component":"storeFrontSocialLogin","renderType":"remote"},{"component":"storeFrontReferFriendRegisterPage","renderType":"remote"},{"component":"storeFrontRegisterPageCustomFields","renderType":"remote"}],"customers\/reset_password":[{"component":"storeFrontCreditUsage","renderType":"remote"}],"gift_card":[{"component":"storeFrontCreditUsage","renderType":"remote"}],"index":[{"component":"storeFrontCreditUsage","renderType":"remote"}],"metaobject":[{"component":"storeFrontCreditUsage","renderType":"remote"}],"page":[{"component":"storeFrontCreditUsage","renderType":"remote"}],"password":[{"component":"storeFrontCreditUsage","renderType":"remote"}],"policy":[{"component":"storeFrontCreditUsage","renderType":"remote"}],"product":[{"component":"storeFrontWishList","renderType":"remote"},{"component":"storeFrontRecentlyViewedProductPage","renderType":"remote"},{"component":"storeFrontCreditUsage","renderType":"remote"}],"search":[{"component":"storeFrontCreditUsage","renderType":"remote"}]},"remotes":{"storeFrontNavigation":{"remoteUrl":"defaultURL","moduleToLoad":".\/storeFrontNavigation","remoteName":"storeFrontNavigation","localRoute":"storeFrontNavigation","skeletonToLoad":"SkeletonNavigation","states":[]},"storeFrontRegisterPageCustomFields":{"remoteUrl":"defaultURL","moduleToLoad":".\/storeFrontRegisterPageCustomFields","remoteName":"storeFrontMyProfile","localRoute":"storeFrontMyProfile","required":["IS_CUSTOM_FIELDS_ENABLE"]},"storeFrontMyProfile":{"remoteUrl":"defaultURL","moduleToLoad":".\/storeFrontMyProfile","remoteName":"storeFrontMyProfile","localRoute":"storeFrontMyProfile","skeletonToLoad":"LoadingWithOutShadow","jsonTemplate":[{"component":"MyProfileForm","renderType":"local"}]},"storeFrontChangePassword":{"remoteUrl":"defaultURL","moduleToLoad":".\/storeFrontChangePassword","remoteName":"storeFrontChangePassword","localRoute":"storeFrontChangePassword","skeletonToLoad":"LoadingWithOutShadow","jsonTemplate":[{"component":"ChangePasswordFormComponent","renderType":"local"}]},"storeFrontWishList":{"remoteUrl":"defaultURL","moduleToLoad":".\/storeFrontWishList","remoteName":"storeFrontWishList","localRoute":"storeFrontWishList","required":["IS_WISHLIST_ENABLE","IS_WISHLIST_PAID"]},"storeFrontWishListCollection":{"remoteUrl":"defaultURL","moduleToLoad":".\/storeFrontWishListCollection","remoteName":"storeFrontWishList","localRoute":"storeFrontWishListCollection","required":["IS_WISHLIST_ENABLE","IS_WISHLIST_PAID"]},"storeFrontWishListPage":{"remoteUrl":"defaultURL","moduleToLoad":".\/storeFrontWishListPage","remoteName":"storeFrontWishList","localRoute":"storeFrontWishListPage","skeletonToLoad":"Loading","jsonTemplate":[],"required":["IS_WISHLIST_ENABLE","IS_WISHLIST_PAID"]},"storeFrontCreditUsage":{"remoteUrl":"defaultURL","moduleToLoad":".\/storeFrontCreditUsage","remoteName":"storeFrontCredit","localRoute":"storeFrontCreditUsage","required":["IS_STORE_CREDIT_PAID","is_store_credit_enable"],"requiredArray":[["IS_STORE_CREDIT_PAID","is_store_credit_enable"],["IS_REFUND_CREDIT_ENABLE"]],"jsonTemplate":[]},"storeFrontSocialLogin":{"remoteUrl":"defaultURL","moduleToLoad":".\/storeFrontSocialLogin","remoteName":"storeFrontSocialLogin","localRoute":"storeFrontSocialLogin","jsonTemplate":[],"required":["IS_SOCIAL_LOGIN_PAID","IS_SOCIAL_LOGIN_ENABLE"]},"storeFrontReferFriendRegisterPage":{"remoteUrl":"defaultURL","moduleToLoad":".\/storeFrontReferFriendRegisterPage","remoteName":"storeFrontReferFriend","localRoute":"storeFrontReferFriendRegisterPage","required":["IS_REFER_PROGRAM_ON","IS_STORE_CREDIT_PAID","is_store_credit_enable"]},"storeFrontReferFriend":{"remoteUrl":"defaultURL","moduleToLoad":".\/storeFrontReferFriend","remoteName":"storeFrontReferFriend","localRoute":"storeFrontReferFriend","skeletonToLoad":"Loading","required":["IS_STORE_CREDIT_PAID","IS_REFER_PROGRAM_ON","is_store_credit_enable"]},"storeFrontHowToManageCredit":{"remoteUrl":"defaultURL","moduleToLoad":".\/storeFrontHowToManageCredit","remoteName":"storeFrontHowToManageCredit","localRoute":"storeFrontHowToManageCredit","skeletonToLoad":"Loading","required":["is_store_credit_enable","IS_HOW_TO_EARN_CREDIT_DISPLAY","IS_STORE_CREDIT_PAID"],"jsonTemplate":[{"component":"HowToEarn","name":"edit","label":"flits.navigation.how_to_earn_credit","type":"button"},{"component":"HowToSpent","name":"edit","label":"flits.navigation.how_to_spend_credit","type":"button"},{"component":"FromStoreOwner","name":"edit","label":"flits.navigation.from_admin","type":"button"}]},"storeFrontCredit":{"remoteUrl":"defaultURL","moduleToLoad":".\/storeFrontCredit","remoteName":"storeFrontCredit","localRoute":"storeFrontCredit","skeletonToLoad":"Loading","required":["IS_STORE_CREDIT_PAID","is_store_credit_enable"]},"storeFrontOrder":{"remoteUrl":"defaultURL","moduleToLoad":".\/storeFrontOrder","remoteName":"storeFrontOrder","localRoute":"storeFrontOrder","skeletonToLoad":"Loading"},"storeFrontDeliveryAddress":{"remoteUrl":"defaultURL","moduleToLoad":".\/storeFrontDeliveryAddress","remoteName":"storeFrontDeliveryAddress","localRoute":"storeFrontDeliveryAddress","skeletonToLoad":"LoadingWithOutShadow"},"storeFrontRecentlyViewedProducts":{"remoteUrl":"defaultURL","moduleToLoad":".\/storeFrontRecentlyViewedProducts","remoteName":"storeFrontRecentlyViewedProducts","localRoute":"storeFrontRecentlyViewedProducts","skeletonToLoad":"Loading","required":["is_recently_view_enable"]},"storeFrontRecentlyViewedProductPage":{"remoteUrl":"defaultURL","moduleToLoad":".\/storeFrontRecentlyViewedProductPage","remoteName":"storeFrontRecentlyViewedProducts","localRoute":"storeFrontRecentlyViewedProductPage","required":["is_recently_view_enable"]},"storeFrontTopOrderedProducts":{"remoteUrl":"defaultURL","moduleToLoad":".\/storeFrontTopOrderedProducts","remoteName":"storeFrontTopOrderedProducts","localRoute":"storeFrontTopOrderedProducts","skeletonToLoad":"LoadingWithOutShadow","required":["IS_ADVANCE_DASHBOARD_ENABLE","IS_ADVANCE_DASHBOARD_PAID"]},"storeFrontRefundCredit":{"remoteUrl":"defaultURL","moduleToLoad":".\/storeFrontRefundCredit","remoteName":"storeFrontCredit","localRoute":"storeFrontRefundCredit","skeletonToLoad":"Loading","required":["IS_REFUND_CREDIT_ENABLE"]}}},"multilanguage":"https:\/\/cdn.getflits.com\/locales\/default\/en.json"},"flagSvgUrl":"https:\/\/cdn.shopify.com\/s\/files\/1\/0030\/7491\/6461\/files\/flags.svg?v=1646045459"},"THEME_SETTINGS_136678506650":{"status":false,"message":"Code is not installed"},"THEME_SETTINGS_136685781146":{"status":true,"data":{"accountSettings":{"template":2,"isCustomized":false,"colorSettings":{"navigationBGColor":"rgb(255, 255, 255)","navigationTextColor":"rgb(12, 33, 84)","navigationBorderColor":"rgb(255, 255, 255)","contentBGColor":"rgb(255, 255, 255, 0)","contentTextColor":"rgb(0, 0, 0)","primaryButtonBGColor":"rgb(12, 33, 84)","primaryButtonTextColor":"rgb(255, 255, 255)","secondaryButtonBGColor":"rgb(12, 33, 84)","secondaryButtonTextColor":"rgb(12, 33, 84)","badgeBGColor":"rgb(12, 33, 84)","badgeTextColor":"rgb(255, 255, 255)","linkColor":"rgb(12, 33, 84)"},"isAccountPageInJSON":true,"sections":["main-account"],"codeVersion":"2.1.5","themeStoreId":887},"microfront_remotes":{"pages_template":{"404":[{"component":"storeFrontCreditUsage","renderType":"remote"}],"article":[{"component":"storeFrontCreditUsage","renderType":"remote"}],"blog":[{"component":"storeFrontCreditUsage","renderType":"remote"}],"captcha":[{"component":"storeFrontCreditUsage","renderType":"remote"}],"cart":[{"component":"storeFrontCreditUsage","renderType":"remote"}],"collection":[{"component":"storeFrontCreditUsage","renderType":"remote"},{"component":"storeFrontWishListCollection","renderType":"remote"}],"list-collections":[{"component":"storeFrontCreditUsage","renderType":"remote"}],"customers\/account":[{"component":"storeFrontNavigation","renderType":"remote"},{"component":"storeFrontCreditUsage","renderType":"remote"}],"customers\/activate_account":[{"component":"storeFrontCreditUsage","renderType":"remote"}],"customers\/addresses":[{"component":"storeFrontCreditUsage","renderType":"remote"}],"customers\/login":[{"component":"storeFrontSocialLogin","renderType":"remote"}],"customers\/order":[{"component":"storeFrontCreditUsage","renderType":"remote"}],"customers\/register":[{"component":"storeFrontSocialLogin","renderType":"remote"},{"component":"storeFrontReferFriendRegisterPage","renderType":"remote"},{"component":"storeFrontRegisterPageCustomFields","renderType":"remote"}],"customers\/reset_password":[{"component":"storeFrontCreditUsage","renderType":"remote"}],"gift_card":[{"component":"storeFrontCreditUsage","renderType":"remote"}],"index":[{"component":"storeFrontCreditUsage","renderType":"remote"}],"metaobject":[{"component":"storeFrontCreditUsage","renderType":"remote"}],"page":[{"component":"storeFrontCreditUsage","renderType":"remote"}],"password":[{"component":"storeFrontCreditUsage","renderType":"remote"}],"policy":[{"component":"storeFrontCreditUsage","renderType":"remote"}],"product":[{"component":"storeFrontWishList","renderType":"remote"},{"component":"storeFrontRecentlyViewedProductPage","renderType":"remote"},{"component":"storeFrontCreditUsage","renderType":"remote"}],"search":[{"component":"storeFrontCreditUsage","renderType":"remote"}]},"remotes":{"storeFrontNavigation":{"remoteUrl":"defaultURL","moduleToLoad":".\/storeFrontNavigation","remoteName":"storeFrontNavigation","localRoute":"storeFrontNavigation","skeletonToLoad":"SkeletonNavigation","states":[]},"storeFrontRegisterPageCustomFields":{"remoteUrl":"defaultURL","moduleToLoad":".\/storeFrontRegisterPageCustomFields","remoteName":"storeFrontMyProfile","localRoute":"storeFrontMyProfile","required":["IS_CUSTOM_FIELDS_ENABLE"]},"storeFrontMyProfile":{"remoteUrl":"defaultURL","moduleToLoad":".\/storeFrontMyProfile","remoteName":"storeFrontMyProfile","localRoute":"storeFrontMyProfile","skeletonToLoad":"LoadingWithOutShadow","jsonTemplate":[{"component":"MyProfileForm","renderType":"local"}]},"storeFrontChangePassword":{"remoteUrl":"defaultURL","moduleToLoad":".\/storeFrontChangePassword","remoteName":"storeFrontChangePassword","localRoute":"storeFrontChangePassword","skeletonToLoad":"LoadingWithOutShadow","jsonTemplate":[{"component":"ChangePasswordFormComponent","renderType":"local"}]},"storeFrontWishList":{"remoteUrl":"defaultURL","moduleToLoad":".\/storeFrontWishList","remoteName":"storeFrontWishList","localRoute":"storeFrontWishList","required":["IS_WISHLIST_ENABLE","IS_WISHLIST_PAID"]},"storeFrontWishListCollection":{"remoteUrl":"defaultURL","moduleToLoad":".\/storeFrontWishListCollection","remoteName":"storeFrontWishList","localRoute":"storeFrontWishListCollection","required":["IS_WISHLIST_ENABLE","IS_WISHLIST_PAID"]},"storeFrontWishListPage":{"remoteUrl":"defaultURL","moduleToLoad":".\/storeFrontWishListPage","remoteName":"storeFrontWishList","localRoute":"storeFrontWishListPage","skeletonToLoad":"Loading","jsonTemplate":[],"required":["IS_WISHLIST_ENABLE","IS_WISHLIST_PAID"]},"storeFrontCreditUsage":{"remoteUrl":"defaultURL","moduleToLoad":".\/storeFrontCreditUsage","remoteName":"storeFrontCredit","localRoute":"storeFrontCreditUsage","required":["IS_STORE_CREDIT_PAID","is_store_credit_enable"],"jsonTemplate":[]},"storeFrontSocialLogin":{"remoteUrl":"defaultURL","moduleToLoad":".\/storeFrontSocialLogin","remoteName":"storeFrontSocialLogin","localRoute":"storeFrontSocialLogin","jsonTemplate":[],"required":["IS_SOCIAL_LOGIN_PAID","IS_SOCIAL_LOGIN_ENABLE"]},"storeFrontReferFriendRegisterPage":{"remoteUrl":"defaultURL","moduleToLoad":".\/storeFrontReferFriendRegisterPage","remoteName":"storeFrontReferFriend","localRoute":"storeFrontReferFriendRegisterPage","required":["IS_REFER_PROGRAM_ON","IS_STORE_CREDIT_PAID","is_store_credit_enable"]},"storeFrontReferFriend":{"remoteUrl":"defaultURL","moduleToLoad":".\/storeFrontReferFriend","remoteName":"storeFrontReferFriend","localRoute":"storeFrontReferFriend","skeletonToLoad":"Loading","required":["IS_STORE_CREDIT_PAID","IS_REFER_PROGRAM_ON","is_store_credit_enable"]},"storeFrontHowToManageCredit":{"remoteUrl":"defaultURL","moduleToLoad":".\/storeFrontHowToManageCredit","remoteName":"storeFrontHowToManageCredit","localRoute":"storeFrontHowToManageCredit","skeletonToLoad":"Loading","required":["is_store_credit_enable","IS_HOW_TO_EARN_CREDIT_DISPLAY","IS_STORE_CREDIT_PAID"],"jsonTemplate":[{"component":"HowToEarn","name":"edit","label":"flits.navigation.how_to_earn_credit","type":"button"},{"component":"HowToSpent","name":"edit","label":"flits.navigation.how_to_spend_credit","type":"button"},{"component":"FromStoreOwner","name":"edit","label":"flits.navigation.from_admin","type":"button"}]},"storeFrontCredit":{"remoteUrl":"defaultURL","moduleToLoad":".\/storeFrontCredit","remoteName":"storeFrontCredit","localRoute":"storeFrontCredit","skeletonToLoad":"Loading","required":["IS_STORE_CREDIT_PAID","is_store_credit_enable"]},"storeFrontOrder":{"remoteUrl":"defaultURL","moduleToLoad":".\/storeFrontOrder","remoteName":"storeFrontOrder","localRoute":"storeFrontOrder","skeletonToLoad":"Loading"},"storeFrontDeliveryAddress":{"remoteUrl":"defaultURL","moduleToLoad":".\/storeFrontDeliveryAddress","remoteName":"storeFrontDeliveryAddress","localRoute":"storeFrontDeliveryAddress","skeletonToLoad":"LoadingWithOutShadow"},"storeFrontRecentlyViewedProducts":{"remoteUrl":"defaultURL","moduleToLoad":".\/storeFrontRecentlyViewedProducts","remoteName":"storeFrontRecentlyViewedProducts","localRoute":"storeFrontRecentlyViewedProducts","skeletonToLoad":"Loading","required":["is_recently_view_enable"]},"storeFrontRecentlyViewedProductPage":{"remoteUrl":"defaultURL","moduleToLoad":".\/storeFrontRecentlyViewedProductPage","remoteName":"storeFrontRecentlyViewedProducts","localRoute":"storeFrontRecentlyViewedProductPage","required":["is_recently_view_enable"]},"storeFrontTopOrderedProducts":{"remoteUrl":"defaultURL","moduleToLoad":".\/storeFrontTopOrderedProducts","remoteName":"storeFrontTopOrderedProducts","localRoute":"storeFrontTopOrderedProducts","skeletonToLoad":"LoadingWithOutShadow","required":["IS_ADVANCE_DASHBOARD_ENABLE","IS_ADVANCE_DASHBOARD_PAID"]}}},"multilanguage":"https:\/\/cdn.getflits.com\/locales\/default\/en.json"},"flagSvgUrl":"https:\/\/cdn.shopify.com\/s\/files\/1\/0030\/7491\/6461\/files\/flags.svg?v=1646045459"},"THEME_SETTINGS_136686305434":{"status":false,"message":"Code is not installed"},"THEME_SETTINGS_136814395546":{"status":false,"message":"Code is not installed"},"THEME_SETTINGS_136815575194":{"status":false,"message":"Code is not installed"},"THEME_SETTINGS_136965718170":{"status":false,"message":"Code is not installed"},"THEME_SETTINGS_137129328794":{"status":false,"message":"Code is not installed"},"THEME_SETTINGS_137529360538":{"status":false,"message":"Code is not installed"},"THEME_SETTINGS_137706897562":{"status":true,"data":{"accountSettings":{"template":2,"isCustomized":false,"colorSettings":{"navigationBGColor":"rgb(255, 255, 255)","navigationTextColor":"rgb(12, 33, 84)","navigationBorderColor":"rgb(255, 255, 255)","contentBGColor":"rgb(255, 255, 255, 0)","contentTextColor":"rgb(0, 0, 0)","primaryButtonBGColor":"rgb(12, 33, 84)","primaryButtonTextColor":"rgb(255, 255, 255)","secondaryButtonBGColor":"rgb(12, 33, 84)","secondaryButtonTextColor":"rgb(12, 33, 84)","badgeBGColor":"rgb(12, 33, 84)","badgeTextColor":"rgb(255, 255, 255)","linkColor":"rgb(12, 33, 84)"},"isAccountPageInJSON":true,"sections":["main-account"],"codeVersion":"2.1.5","themeStoreId":887},"microfront_remotes":{"pages_template":{"404":[{"component":"storeFrontCreditUsage","renderType":"remote"}],"article":[{"component":"storeFrontCreditUsage","renderType":"remote"}],"blog":[{"component":"storeFrontCreditUsage","renderType":"remote"}],"captcha":[{"component":"storeFrontCreditUsage","renderType":"remote"}],"cart":[{"component":"storeFrontCreditUsage","renderType":"remote"}],"collection":[{"component":"storeFrontCreditUsage","renderType":"remote"},{"component":"storeFrontWishListCollection","renderType":"remote"}],"list-collections":[{"component":"storeFrontCreditUsage","renderType":"remote"}],"customers\/account":[{"component":"storeFrontNavigation","renderType":"remote"},{"component":"storeFrontCreditUsage","renderType":"remote"}],"customers\/activate_account":[{"component":"storeFrontCreditUsage","renderType":"remote"}],"customers\/addresses":[{"component":"storeFrontCreditUsage","renderType":"remote"}],"customers\/login":[{"component":"storeFrontSocialLogin","renderType":"remote"}],"customers\/order":[{"component":"storeFrontCreditUsage","renderType":"remote"}],"customers\/register":[{"component":"storeFrontSocialLogin","renderType":"remote"},{"component":"storeFrontReferFriendRegisterPage","renderType":"remote"},{"component":"storeFrontRegisterPageCustomFields","renderType":"remote"}],"customers\/reset_password":[{"component":"storeFrontCreditUsage","renderType":"remote"}],"gift_card":[{"component":"storeFrontCreditUsage","renderType":"remote"}],"index":[{"component":"storeFrontCreditUsage","renderType":"remote"}],"metaobject":[{"component":"storeFrontCreditUsage","renderType":"remote"}],"page":[{"component":"storeFrontCreditUsage","renderType":"remote"}],"password":[{"component":"storeFrontCreditUsage","renderType":"remote"}],"policy":[{"component":"storeFrontCreditUsage","renderType":"remote"}],"product":[{"component":"storeFrontWishList","renderType":"remote"},{"component":"storeFrontRecentlyViewedProductPage","renderType":"remote"},{"component":"storeFrontCreditUsage","renderType":"remote"}],"search":[{"component":"storeFrontCreditUsage","renderType":"remote"}]},"remotes":{"storeFrontNavigation":{"remoteUrl":"defaultURL","moduleToLoad":".\/storeFrontNavigation","remoteName":"storeFrontNavigation","localRoute":"storeFrontNavigation","skeletonToLoad":"SkeletonNavigation","states":[]},"storeFrontRegisterPageCustomFields":{"remoteUrl":"defaultURL","moduleToLoad":".\/storeFrontRegisterPageCustomFields","remoteName":"storeFrontMyProfile","localRoute":"storeFrontMyProfile","required":["IS_CUSTOM_FIELDS_ENABLE"]},"storeFrontMyProfile":{"remoteUrl":"defaultURL","moduleToLoad":".\/storeFrontMyProfile","remoteName":"storeFrontMyProfile","localRoute":"storeFrontMyProfile","skeletonToLoad":"LoadingWithOutShadow","jsonTemplate":[{"component":"MyProfileForm","renderType":"local"}]},"storeFrontChangePassword":{"remoteUrl":"defaultURL","moduleToLoad":".\/storeFrontChangePassword","remoteName":"storeFrontChangePassword","localRoute":"storeFrontChangePassword","skeletonToLoad":"LoadingWithOutShadow","jsonTemplate":[{"component":"ChangePasswordFormComponent","renderType":"local"}]},"storeFrontWishList":{"remoteUrl":"defaultURL","moduleToLoad":".\/storeFrontWishList","remoteName":"storeFrontWishList","localRoute":"storeFrontWishList","required":["IS_WISHLIST_ENABLE","IS_WISHLIST_PAID"]},"storeFrontWishListCollection":{"remoteUrl":"defaultURL","moduleToLoad":".\/storeFrontWishListCollection","remoteName":"storeFrontWishList","localRoute":"storeFrontWishListCollection","required":["IS_WISHLIST_ENABLE","IS_WISHLIST_PAID"]},"storeFrontWishListPage":{"remoteUrl":"defaultURL","moduleToLoad":".\/storeFrontWishListPage","remoteName":"storeFrontWishList","localRoute":"storeFrontWishListPage","skeletonToLoad":"Loading","jsonTemplate":[],"required":["IS_WISHLIST_ENABLE","IS_WISHLIST_PAID"]},"storeFrontCreditUsage":{"remoteUrl":"defaultURL","moduleToLoad":".\/storeFrontCreditUsage","remoteName":"storeFrontCredit","localRoute":"storeFrontCreditUsage","required":["IS_STORE_CREDIT_PAID","is_store_credit_enable"],"requiredArray":[["IS_STORE_CREDIT_PAID","is_store_credit_enable"],["IS_REFUND_CREDIT_ENABLE"]],"jsonTemplate":[]},"storeFrontSocialLogin":{"remoteUrl":"defaultURL","moduleToLoad":".\/storeFrontSocialLogin","remoteName":"storeFrontSocialLogin","localRoute":"storeFrontSocialLogin","jsonTemplate":[],"required":["IS_SOCIAL_LOGIN_PAID","IS_SOCIAL_LOGIN_ENABLE"]},"storeFrontReferFriendRegisterPage":{"remoteUrl":"defaultURL","moduleToLoad":".\/storeFrontReferFriendRegisterPage","remoteName":"storeFrontReferFriend","localRoute":"storeFrontReferFriendRegisterPage","required":["IS_REFER_PROGRAM_ON","IS_STORE_CREDIT_PAID","is_store_credit_enable"]},"storeFrontReferFriend":{"remoteUrl":"defaultURL","moduleToLoad":".\/storeFrontReferFriend","remoteName":"storeFrontReferFriend","localRoute":"storeFrontReferFriend","skeletonToLoad":"Loading","required":["IS_STORE_CREDIT_PAID","IS_REFER_PROGRAM_ON","is_store_credit_enable"]},"storeFrontHowToManageCredit":{"remoteUrl":"defaultURL","moduleToLoad":".\/storeFrontHowToManageCredit","remoteName":"storeFrontHowToManageCredit","localRoute":"storeFrontHowToManageCredit","skeletonToLoad":"Loading","required":["is_store_credit_enable","IS_HOW_TO_EARN_CREDIT_DISPLAY","IS_STORE_CREDIT_PAID"],"jsonTemplate":[{"component":"HowToEarn","name":"edit","label":"flits.navigation.how_to_earn_credit","type":"button"},{"component":"HowToSpent","name":"edit","label":"flits.navigation.how_to_spend_credit","type":"button"},{"component":"FromStoreOwner","name":"edit","label":"flits.navigation.from_admin","type":"button"}]},"storeFrontCredit":{"remoteUrl":"defaultURL","moduleToLoad":".\/storeFrontCredit","remoteName":"storeFrontCredit","localRoute":"storeFrontCredit","skeletonToLoad":"Loading","required":["IS_STORE_CREDIT_PAID","is_store_credit_enable"]},"storeFrontOrder":{"remoteUrl":"defaultURL","moduleToLoad":".\/storeFrontOrder","remoteName":"storeFrontOrder","localRoute":"storeFrontOrder","skeletonToLoad":"Loading"},"storeFrontDeliveryAddress":{"remoteUrl":"defaultURL","moduleToLoad":".\/storeFrontDeliveryAddress","remoteName":"storeFrontDeliveryAddress","localRoute":"storeFrontDeliveryAddress","skeletonToLoad":"LoadingWithOutShadow"},"storeFrontRecentlyViewedProducts":{"remoteUrl":"defaultURL","moduleToLoad":".\/storeFrontRecentlyViewedProducts","remoteName":"storeFrontRecentlyViewedProducts","localRoute":"storeFrontRecentlyViewedProducts","skeletonToLoad":"Loading","required":["is_recently_view_enable"]},"storeFrontRecentlyViewedProductPage":{"remoteUrl":"defaultURL","moduleToLoad":".\/storeFrontRecentlyViewedProductPage","remoteName":"storeFrontRecentlyViewedProducts","localRoute":"storeFrontRecentlyViewedProductPage","required":["is_recently_view_enable"]},"storeFrontTopOrderedProducts":{"remoteUrl":"defaultURL","moduleToLoad":".\/storeFrontTopOrderedProducts","remoteName":"storeFrontTopOrderedProducts","localRoute":"storeFrontTopOrderedProducts","skeletonToLoad":"LoadingWithOutShadow","required":["IS_ADVANCE_DASHBOARD_ENABLE","IS_ADVANCE_DASHBOARD_PAID"]},"storeFrontRefundCredit":{"remoteUrl":"defaultURL","moduleToLoad":".\/storeFrontRefundCredit","remoteName":"storeFrontCredit","localRoute":"storeFrontRefundCredit","skeletonToLoad":"Loading","required":["IS_REFUND_CREDIT_ENABLE"]}}},"multilanguage":"https:\/\/cdn.getflits.com\/locales\/default\/en.json"},"flagSvgUrl":"https:\/\/cdn.shopify.com\/s\/files\/1\/0030\/7491\/6461\/files\/flags.svg?v=1646045459"},"THEME_SETTINGS_137863659674":{"status":true,"data":{"accountSettings":{"template":2,"isCustomized":false,"colorSettings":{"navigationBGColor":"rgb(255, 255, 255)","navigationTextColor":"rgb(12, 33, 84)","navigationBorderColor":"rgb(255, 255, 255)","contentBGColor":"rgb(255, 255, 255, 0)","contentTextColor":"rgb(0, 0, 0)","primaryButtonBGColor":"rgb(12, 33, 84)","primaryButtonTextColor":"rgb(255, 255, 255)","secondaryButtonBGColor":"rgb(12, 33, 84)","secondaryButtonTextColor":"rgb(12, 33, 84)","badgeBGColor":"rgb(12, 33, 84)","badgeTextColor":"rgb(255, 255, 255)","linkColor":"rgb(12, 33, 84)"},"isAccountPageInJSON":true,"sections":["main-account"],"codeVersion":"2.1.5","themeStoreId":887},"microfront_remotes":{"pages_template":{"404":[{"component":"storeFrontCreditUsage","renderType":"remote"}],"article":[{"component":"storeFrontCreditUsage","renderType":"remote"}],"blog":[{"component":"storeFrontCreditUsage","renderType":"remote"}],"captcha":[{"component":"storeFrontCreditUsage","renderType":"remote"}],"cart":[{"component":"storeFrontCreditUsage","renderType":"remote"}],"collection":[{"component":"storeFrontCreditUsage","renderType":"remote"},{"component":"storeFrontWishListCollection","renderType":"remote"}],"list-collections":[{"component":"storeFrontCreditUsage","renderType":"remote"}],"customers\/account":[{"component":"storeFrontNavigation","renderType":"remote"},{"component":"storeFrontCreditUsage","renderType":"remote"}],"customers\/activate_account":[{"component":"storeFrontCreditUsage","renderType":"remote"}],"customers\/addresses":[{"component":"storeFrontCreditUsage","renderType":"remote"}],"customers\/login":[{"component":"storeFrontSocialLogin","renderType":"remote"}],"customers\/order":[{"component":"storeFrontCreditUsage","renderType":"remote"}],"customers\/register":[{"component":"storeFrontSocialLogin","renderType":"remote"},{"component":"storeFrontReferFriendRegisterPage","renderType":"remote"},{"component":"storeFrontRegisterPageCustomFields","renderType":"remote"}],"customers\/reset_password":[{"component":"storeFrontCreditUsage","renderType":"remote"}],"gift_card":[{"component":"storeFrontCreditUsage","renderType":"remote"}],"index":[{"component":"storeFrontCreditUsage","renderType":"remote"}],"metaobject":[{"component":"storeFrontCreditUsage","renderType":"remote"}],"page":[{"component":"storeFrontCreditUsage","renderType":"remote"}],"password":[{"component":"storeFrontCreditUsage","renderType":"remote"}],"policy":[{"component":"storeFrontCreditUsage","renderType":"remote"}],"product":[{"component":"storeFrontWishList","renderType":"remote"},{"component":"storeFrontRecentlyViewedProductPage","renderType":"remote"},{"component":"storeFrontCreditUsage","renderType":"remote"}],"search":[{"component":"storeFrontCreditUsage","renderType":"remote"}]},"remotes":{"storeFrontNavigation":{"remoteUrl":"defaultURL","moduleToLoad":".\/storeFrontNavigation","remoteName":"storeFrontNavigation","localRoute":"storeFrontNavigation","skeletonToLoad":"SkeletonNavigation","states":[]},"storeFrontRegisterPageCustomFields":{"remoteUrl":"defaultURL","moduleToLoad":".\/storeFrontRegisterPageCustomFields","remoteName":"storeFrontMyProfile","localRoute":"storeFrontMyProfile","required":["IS_CUSTOM_FIELDS_ENABLE"]},"storeFrontMyProfile":{"remoteUrl":"defaultURL","moduleToLoad":".\/storeFrontMyProfile","remoteName":"storeFrontMyProfile","localRoute":"storeFrontMyProfile","skeletonToLoad":"LoadingWithOutShadow","jsonTemplate":[{"component":"MyProfileForm","renderType":"local"}]},"storeFrontChangePassword":{"remoteUrl":"defaultURL","moduleToLoad":".\/storeFrontChangePassword","remoteName":"storeFrontChangePassword","localRoute":"storeFrontChangePassword","skeletonToLoad":"LoadingWithOutShadow","jsonTemplate":[{"component":"ChangePasswordFormComponent","renderType":"local"}]},"storeFrontWishList":{"remoteUrl":"defaultURL","moduleToLoad":".\/storeFrontWishList","remoteName":"storeFrontWishList","localRoute":"storeFrontWishList","required":["IS_WISHLIST_ENABLE","IS_WISHLIST_PAID"]},"storeFrontWishListCollection":{"remoteUrl":"defaultURL","moduleToLoad":".\/storeFrontWishListCollection","remoteName":"storeFrontWishList","localRoute":"storeFrontWishListCollection","required":["IS_WISHLIST_ENABLE","IS_WISHLIST_PAID"]},"storeFrontWishListPage":{"remoteUrl":"defaultURL","moduleToLoad":".\/storeFrontWishListPage","remoteName":"storeFrontWishList","localRoute":"storeFrontWishListPage","skeletonToLoad":"Loading","jsonTemplate":[],"required":["IS_WISHLIST_ENABLE","IS_WISHLIST_PAID"]},"storeFrontCreditUsage":{"remoteUrl":"defaultURL","moduleToLoad":".\/storeFrontCreditUsage","remoteName":"storeFrontCredit","localRoute":"storeFrontCreditUsage","required":["IS_STORE_CREDIT_PAID","is_store_credit_enable"],"requiredArray":[["IS_STORE_CREDIT_PAID","is_store_credit_enable"],["IS_REFUND_CREDIT_ENABLE"]],"jsonTemplate":[]},"storeFrontSocialLogin":{"remoteUrl":"defaultURL","moduleToLoad":".\/storeFrontSocialLogin","remoteName":"storeFrontSocialLogin","localRoute":"storeFrontSocialLogin","jsonTemplate":[],"required":["IS_SOCIAL_LOGIN_PAID","IS_SOCIAL_LOGIN_ENABLE"]},"storeFrontReferFriendRegisterPage":{"remoteUrl":"defaultURL","moduleToLoad":".\/storeFrontReferFriendRegisterPage","remoteName":"storeFrontReferFriend","localRoute":"storeFrontReferFriendRegisterPage","required":["IS_REFER_PROGRAM_ON","IS_STORE_CREDIT_PAID","is_store_credit_enable"]},"storeFrontReferFriend":{"remoteUrl":"defaultURL","moduleToLoad":".\/storeFrontReferFriend","remoteName":"storeFrontReferFriend","localRoute":"storeFrontReferFriend","skeletonToLoad":"Loading","required":["IS_STORE_CREDIT_PAID","IS_REFER_PROGRAM_ON","is_store_credit_enable"]},"storeFrontHowToManageCredit":{"remoteUrl":"defaultURL","moduleToLoad":".\/storeFrontHowToManageCredit","remoteName":"storeFrontHowToManageCredit","localRoute":"storeFrontHowToManageCredit","skeletonToLoad":"Loading","required":["is_store_credit_enable","IS_HOW_TO_EARN_CREDIT_DISPLAY","IS_STORE_CREDIT_PAID"],"jsonTemplate":[{"component":"HowToEarn","name":"edit","label":"flits.navigation.how_to_earn_credit","type":"button"},{"component":"HowToSpent","name":"edit","label":"flits.navigation.how_to_spend_credit","type":"button"},{"component":"FromStoreOwner","name":"edit","label":"flits.navigation.from_admin","type":"button"}]},"storeFrontCredit":{"remoteUrl":"defaultURL","moduleToLoad":".\/storeFrontCredit","remoteName":"storeFrontCredit","localRoute":"storeFrontCredit","skeletonToLoad":"Loading","required":["IS_STORE_CREDIT_PAID","is_store_credit_enable"]},"storeFrontOrder":{"remoteUrl":"defaultURL","moduleToLoad":".\/storeFrontOrder","remoteName":"storeFrontOrder","localRoute":"storeFrontOrder","skeletonToLoad":"Loading"},"storeFrontDeliveryAddress":{"remoteUrl":"defaultURL","moduleToLoad":".\/storeFrontDeliveryAddress","remoteName":"storeFrontDeliveryAddress","localRoute":"storeFrontDeliveryAddress","skeletonToLoad":"LoadingWithOutShadow"},"storeFrontRecentlyViewedProducts":{"remoteUrl":"defaultURL","moduleToLoad":".\/storeFrontRecentlyViewedProducts","remoteName":"storeFrontRecentlyViewedProducts","localRoute":"storeFrontRecentlyViewedProducts","skeletonToLoad":"Loading","required":["is_recently_view_enable"]},"storeFrontRecentlyViewedProductPage":{"remoteUrl":"defaultURL","moduleToLoad":".\/storeFrontRecentlyViewedProductPage","remoteName":"storeFrontRecentlyViewedProducts","localRoute":"storeFrontRecentlyViewedProductPage","required":["is_recently_view_enable"]},"storeFrontTopOrderedProducts":{"remoteUrl":"defaultURL","moduleToLoad":".\/storeFrontTopOrderedProducts","remoteName":"storeFrontTopOrderedProducts","localRoute":"storeFrontTopOrderedProducts","skeletonToLoad":"LoadingWithOutShadow","required":["IS_ADVANCE_DASHBOARD_ENABLE","IS_ADVANCE_DASHBOARD_PAID"]},"storeFrontRefundCredit":{"remoteUrl":"defaultURL","moduleToLoad":".\/storeFrontRefundCredit","remoteName":"storeFrontCredit","localRoute":"storeFrontRefundCredit","skeletonToLoad":"Loading","required":["IS_REFUND_CREDIT_ENABLE"]}}},"multilanguage":"https:\/\/cdn.getflits.com\/locales\/default\/en.json"},"flagSvgUrl":"https:\/\/cdn.shopify.com\/s\/files\/1\/0030\/7491\/6461\/files\/flags.svg?v=1646045459"},"THEME_SETTINGS_137935585434":{"status":true,"data":{"accountSettings":{"template":2,"isCustomized":false,"colorSettings":{"navigationBGColor":"rgb(255, 255, 255)","navigationTextColor":"rgb(12, 33, 84)","navigationBorderColor":"rgb(255, 255, 255)","contentBGColor":"rgb(255, 255, 255, 0)","contentTextColor":"rgb(0, 0, 0)","primaryButtonBGColor":"rgb(12, 33, 84)","primaryButtonTextColor":"rgb(255, 255, 255)","secondaryButtonBGColor":"rgb(12, 33, 84)","secondaryButtonTextColor":"rgb(12, 33, 84)","badgeBGColor":"rgb(12, 33, 84)","badgeTextColor":"rgb(255, 255, 255)","linkColor":"rgb(12, 33, 84)"},"isAccountPageInJSON":true,"sections":["main-account"],"codeVersion":"2.1.5","themeStoreId":887},"microfront_remotes":{"pages_template":{"404":[{"component":"storeFrontCreditUsage","renderType":"remote"}],"article":[{"component":"storeFrontCreditUsage","renderType":"remote"}],"blog":[{"component":"storeFrontCreditUsage","renderType":"remote"}],"captcha":[{"component":"storeFrontCreditUsage","renderType":"remote"}],"cart":[{"component":"storeFrontCreditUsage","renderType":"remote"}],"collection":[{"component":"storeFrontCreditUsage","renderType":"remote"},{"component":"storeFrontWishListCollection","renderType":"remote"}],"list-collections":[{"component":"storeFrontCreditUsage","renderType":"remote"}],"customers\/account":[{"component":"storeFrontNavigation","renderType":"remote"},{"component":"storeFrontCreditUsage","renderType":"remote"}],"customers\/activate_account":[{"component":"storeFrontCreditUsage","renderType":"remote"}],"customers\/addresses":[{"component":"storeFrontCreditUsage","renderType":"remote"}],"customers\/login":[{"component":"storeFrontSocialLogin","renderType":"remote"}],"customers\/order":[{"component":"storeFrontCreditUsage","renderType":"remote"}],"customers\/register":[{"component":"storeFrontSocialLogin","renderType":"remote"},{"component":"storeFrontReferFriendRegisterPage","renderType":"remote"},{"component":"storeFrontRegisterPageCustomFields","renderType":"remote"}],"customers\/reset_password":[{"component":"storeFrontCreditUsage","renderType":"remote"}],"gift_card":[{"component":"storeFrontCreditUsage","renderType":"remote"}],"index":[{"component":"storeFrontCreditUsage","renderType":"remote"}],"metaobject":[{"component":"storeFrontCreditUsage","renderType":"remote"}],"page":[{"component":"storeFrontCreditUsage","renderType":"remote"}],"password":[{"component":"storeFrontCreditUsage","renderType":"remote"}],"policy":[{"component":"storeFrontCreditUsage","renderType":"remote"}],"product":[{"component":"storeFrontWishList","renderType":"remote"},{"component":"storeFrontRecentlyViewedProductPage","renderType":"remote"},{"component":"storeFrontCreditUsage","renderType":"remote"}],"search":[{"component":"storeFrontCreditUsage","renderType":"remote"}]},"remotes":{"storeFrontNavigation":{"remoteUrl":"defaultURL","moduleToLoad":".\/storeFrontNavigation","remoteName":"storeFrontNavigation","localRoute":"storeFrontNavigation","skeletonToLoad":"SkeletonNavigation","states":[]},"storeFrontRegisterPageCustomFields":{"remoteUrl":"defaultURL","moduleToLoad":".\/storeFrontRegisterPageCustomFields","remoteName":"storeFrontMyProfile","localRoute":"storeFrontMyProfile","required":["IS_CUSTOM_FIELDS_ENABLE"]},"storeFrontMyProfile":{"remoteUrl":"defaultURL","moduleToLoad":".\/storeFrontMyProfile","remoteName":"storeFrontMyProfile","localRoute":"storeFrontMyProfile","skeletonToLoad":"LoadingWithOutShadow","jsonTemplate":[{"component":"MyProfileForm","renderType":"local"}]},"storeFrontChangePassword":{"remoteUrl":"defaultURL","moduleToLoad":".\/storeFrontChangePassword","remoteName":"storeFrontChangePassword","localRoute":"storeFrontChangePassword","skeletonToLoad":"LoadingWithOutShadow","jsonTemplate":[{"component":"ChangePasswordFormComponent","renderType":"local"}]},"storeFrontWishList":{"remoteUrl":"defaultURL","moduleToLoad":".\/storeFrontWishList","remoteName":"storeFrontWishList","localRoute":"storeFrontWishList","required":["IS_WISHLIST_ENABLE","IS_WISHLIST_PAID"]},"storeFrontWishListCollection":{"remoteUrl":"defaultURL","moduleToLoad":".\/storeFrontWishListCollection","remoteName":"storeFrontWishList","localRoute":"storeFrontWishListCollection","required":["IS_WISHLIST_ENABLE","IS_WISHLIST_PAID"]},"storeFrontWishListPage":{"remoteUrl":"defaultURL","moduleToLoad":".\/storeFrontWishListPage","remoteName":"storeFrontWishList","localRoute":"storeFrontWishListPage","skeletonToLoad":"Loading","jsonTemplate":[],"required":["IS_WISHLIST_ENABLE","IS_WISHLIST_PAID"]},"storeFrontCreditUsage":{"remoteUrl":"defaultURL","moduleToLoad":".\/storeFrontCreditUsage","remoteName":"storeFrontCredit","localRoute":"storeFrontCreditUsage","required":["IS_STORE_CREDIT_PAID","is_store_credit_enable"],"requiredArray":[["IS_STORE_CREDIT_PAID","is_store_credit_enable"],["IS_REFUND_CREDIT_ENABLE"]],"jsonTemplate":[]},"storeFrontSocialLogin":{"remoteUrl":"defaultURL","moduleToLoad":".\/storeFrontSocialLogin","remoteName":"storeFrontSocialLogin","localRoute":"storeFrontSocialLogin","jsonTemplate":[],"required":["IS_SOCIAL_LOGIN_PAID","IS_SOCIAL_LOGIN_ENABLE"]},"storeFrontReferFriendRegisterPage":{"remoteUrl":"defaultURL","moduleToLoad":".\/storeFrontReferFriendRegisterPage","remoteName":"storeFrontReferFriend","localRoute":"storeFrontReferFriendRegisterPage","required":["IS_REFER_PROGRAM_ON","IS_STORE_CREDIT_PAID","is_store_credit_enable"]},"storeFrontReferFriend":{"remoteUrl":"defaultURL","moduleToLoad":".\/storeFrontReferFriend","remoteName":"storeFrontReferFriend","localRoute":"storeFrontReferFriend","skeletonToLoad":"Loading","required":["IS_STORE_CREDIT_PAID","IS_REFER_PROGRAM_ON","is_store_credit_enable"]},"storeFrontHowToManageCredit":{"remoteUrl":"defaultURL","moduleToLoad":".\/storeFrontHowToManageCredit","remoteName":"storeFrontHowToManageCredit","localRoute":"storeFrontHowToManageCredit","skeletonToLoad":"Loading","required":["is_store_credit_enable","IS_HOW_TO_EARN_CREDIT_DISPLAY","IS_STORE_CREDIT_PAID"],"jsonTemplate":[{"component":"HowToEarn","name":"edit","label":"flits.navigation.how_to_earn_credit","type":"button"},{"component":"HowToSpent","name":"edit","label":"flits.navigation.how_to_spend_credit","type":"button"},{"component":"FromStoreOwner","name":"edit","label":"flits.navigation.from_admin","type":"button"}]},"storeFrontCredit":{"remoteUrl":"defaultURL","moduleToLoad":".\/storeFrontCredit","remoteName":"storeFrontCredit","localRoute":"storeFrontCredit","skeletonToLoad":"Loading","required":["IS_STORE_CREDIT_PAID","is_store_credit_enable"]},"storeFrontOrder":{"remoteUrl":"defaultURL","moduleToLoad":".\/storeFrontOrder","remoteName":"storeFrontOrder","localRoute":"storeFrontOrder","skeletonToLoad":"Loading"},"storeFrontDeliveryAddress":{"remoteUrl":"defaultURL","moduleToLoad":".\/storeFrontDeliveryAddress","remoteName":"storeFrontDeliveryAddress","localRoute":"storeFrontDeliveryAddress","skeletonToLoad":"LoadingWithOutShadow"},"storeFrontRecentlyViewedProducts":{"remoteUrl":"defaultURL","moduleToLoad":".\/storeFrontRecentlyViewedProducts","remoteName":"storeFrontRecentlyViewedProducts","localRoute":"storeFrontRecentlyViewedProducts","skeletonToLoad":"Loading","required":["is_recently_view_enable"]},"storeFrontRecentlyViewedProductPage":{"remoteUrl":"defaultURL","moduleToLoad":".\/storeFrontRecentlyViewedProductPage","remoteName":"storeFrontRecentlyViewedProducts","localRoute":"storeFrontRecentlyViewedProductPage","required":["is_recently_view_enable"]},"storeFrontTopOrderedProducts":{"remoteUrl":"defaultURL","moduleToLoad":".\/storeFrontTopOrderedProducts","remoteName":"storeFrontTopOrderedProducts","localRoute":"storeFrontTopOrderedProducts","skeletonToLoad":"LoadingWithOutShadow","required":["IS_ADVANCE_DASHBOARD_ENABLE","IS_ADVANCE_DASHBOARD_PAID"]},"storeFrontRefundCredit":{"remoteUrl":"defaultURL","moduleToLoad":".\/storeFrontRefundCredit","remoteName":"storeFrontCredit","localRoute":"storeFrontRefundCredit","skeletonToLoad":"Loading","required":["IS_REFUND_CREDIT_ENABLE"]}}},"multilanguage":"https:\/\/cdn.getflits.com\/locales\/default\/en.json"},"flagSvgUrl":"https:\/\/cdn.shopify.com\/s\/files\/1\/0030\/7491\/6461\/files\/flags.svg?v=1646045459"},"THEME_SETTINGS_138004103322":{"status":false,"message":"Code is not installed"},"THEME_SETTINGS_138046636186":{"status":false,"message":"Code is not installed"},"THEME_SETTINGS_138048372890":{"status":false,"message":"Code is not installed"},"THEME_SETTINGS_138130129050":{"status":false,"message":"Code is not installed"},"THEME_SETTINGS_138372808858":{"status":false,"message":"Code is not installed"},"THEME_SETTINGS_138467082394":{"status":false,"message":"Code is not installed"},"THEME_SETTINGS_138510860442":{"status":false,"message":"Code is not installed"},"THEME_SETTINGS_138592813210":{"status":false,"message":"Code is not installed"},"THEME_SETTINGS_138596614298":{"status":false,"message":"Code is not installed"},"THEME_SETTINGS_138675060890":{"status":false,"message":"Code is not installed"},"THEME_SETTINGS_138707992730":{"status":false,"message":"Code is not installed"},"THEME_SETTINGS_138719887514":{"status":false,"message":"Code is not installed"},"THEME_SETTINGS_138770448538":{"status":false,"message":"Code is not installed"},"THEME_SETTINGS_138771005594":{"status":false,"message":"Code is not installed"},"THEME_SETTINGS_138816225434":{"status":false,"message":"Code is not installed"},"THEME_SETTINGS_138830413978":{"status":true,"data":{"accountSettings":{"template":2,"isCustomized":false,"colorSettings":{"navigationBGColor":"rgb(255, 255, 255)","navigationTextColor":"rgb(12, 33, 84)","navigationBorderColor":"rgb(255, 255, 255)","contentBGColor":"rgb(255, 255, 255, 0)","contentTextColor":"rgb(0, 0, 0)","primaryButtonBGColor":"rgb(12, 33, 84)","primaryButtonTextColor":"rgb(255, 255, 255)","secondaryButtonBGColor":"rgb(12, 33, 84)","secondaryButtonTextColor":"rgb(12, 33, 84)","badgeBGColor":"rgb(12, 33, 84)","badgeTextColor":"rgb(255, 255, 255)","linkColor":"rgb(12, 33, 84)"},"isAccountPageInJSON":true,"sections":["main-account"],"codeVersion":"2.1.5","themeStoreId":887},"microfront_remotes":{"pages_template":{"404":[{"component":"storeFrontCreditUsage","renderType":"remote"}],"article":[{"component":"storeFrontCreditUsage","renderType":"remote"}],"blog":[{"component":"storeFrontCreditUsage","renderType":"remote"}],"captcha":[{"component":"storeFrontCreditUsage","renderType":"remote"}],"cart":[{"component":"storeFrontCreditUsage","renderType":"remote"}],"collection":[{"component":"storeFrontCreditUsage","renderType":"remote"},{"component":"storeFrontWishListCollection","renderType":"remote"}],"list-collections":[{"component":"storeFrontCreditUsage","renderType":"remote"}],"customers\/account":[{"component":"storeFrontNavigation","renderType":"remote"},{"component":"storeFrontCreditUsage","renderType":"remote"}],"customers\/activate_account":[{"component":"storeFrontCreditUsage","renderType":"remote"}],"customers\/addresses":[{"component":"storeFrontCreditUsage","renderType":"remote"}],"customers\/login":[{"component":"storeFrontSocialLogin","renderType":"remote"}],"customers\/order":[{"component":"storeFrontCreditUsage","renderType":"remote"}],"customers\/register":[{"component":"storeFrontSocialLogin","renderType":"remote"},{"component":"storeFrontReferFriendRegisterPage","renderType":"remote"},{"component":"storeFrontRegisterPageCustomFields","renderType":"remote"}],"customers\/reset_password":[{"component":"storeFrontCreditUsage","renderType":"remote"}],"gift_card":[{"component":"storeFrontCreditUsage","renderType":"remote"}],"index":[{"component":"storeFrontCreditUsage","renderType":"remote"}],"metaobject":[{"component":"storeFrontCreditUsage","renderType":"remote"}],"page":[{"component":"storeFrontCreditUsage","renderType":"remote"}],"password":[{"component":"storeFrontCreditUsage","renderType":"remote"}],"policy":[{"component":"storeFrontCreditUsage","renderType":"remote"}],"product":[{"component":"storeFrontWishList","renderType":"remote"},{"component":"storeFrontRecentlyViewedProductPage","renderType":"remote"},{"component":"storeFrontCreditUsage","renderType":"remote"}],"search":[{"component":"storeFrontCreditUsage","renderType":"remote"}]},"remotes":{"storeFrontNavigation":{"remoteUrl":"defaultURL","moduleToLoad":".\/storeFrontNavigation","remoteName":"storeFrontNavigation","localRoute":"storeFrontNavigation","skeletonToLoad":"SkeletonNavigation","states":[]},"storeFrontRegisterPageCustomFields":{"remoteUrl":"defaultURL","moduleToLoad":".\/storeFrontRegisterPageCustomFields","remoteName":"storeFrontMyProfile","localRoute":"storeFrontMyProfile","required":["IS_CUSTOM_FIELDS_ENABLE"]},"storeFrontMyProfile":{"remoteUrl":"defaultURL","moduleToLoad":".\/storeFrontMyProfile","remoteName":"storeFrontMyProfile","localRoute":"storeFrontMyProfile","skeletonToLoad":"LoadingWithOutShadow","jsonTemplate":[{"component":"MyProfileForm","renderType":"local"}]},"storeFrontChangePassword":{"remoteUrl":"defaultURL","moduleToLoad":".\/storeFrontChangePassword","remoteName":"storeFrontChangePassword","localRoute":"storeFrontChangePassword","skeletonToLoad":"LoadingWithOutShadow","jsonTemplate":[{"component":"ChangePasswordFormComponent","renderType":"local"}]},"storeFrontWishList":{"remoteUrl":"defaultURL","moduleToLoad":".\/storeFrontWishList","remoteName":"storeFrontWishList","localRoute":"storeFrontWishList","required":["IS_WISHLIST_ENABLE","IS_WISHLIST_PAID"]},"storeFrontWishListCollection":{"remoteUrl":"defaultURL","moduleToLoad":".\/storeFrontWishListCollection","remoteName":"storeFrontWishList","localRoute":"storeFrontWishListCollection","required":["IS_WISHLIST_ENABLE","IS_WISHLIST_PAID"]},"storeFrontWishListPage":{"remoteUrl":"defaultURL","moduleToLoad":".\/storeFrontWishListPage","remoteName":"storeFrontWishList","localRoute":"storeFrontWishListPage","skeletonToLoad":"Loading","jsonTemplate":[],"required":["IS_WISHLIST_ENABLE","IS_WISHLIST_PAID"]},"storeFrontCreditUsage":{"remoteUrl":"defaultURL","moduleToLoad":".\/storeFrontCreditUsage","remoteName":"storeFrontCredit","localRoute":"storeFrontCreditUsage","required":["IS_STORE_CREDIT_PAID","is_store_credit_enable"],"requiredArray":[["IS_STORE_CREDIT_PAID","is_store_credit_enable"],["IS_REFUND_CREDIT_ENABLE"]],"jsonTemplate":[]},"storeFrontSocialLogin":{"remoteUrl":"defaultURL","moduleToLoad":".\/storeFrontSocialLogin","remoteName":"storeFrontSocialLogin","localRoute":"storeFrontSocialLogin","jsonTemplate":[],"required":["IS_SOCIAL_LOGIN_PAID","IS_SOCIAL_LOGIN_ENABLE"]},"storeFrontReferFriendRegisterPage":{"remoteUrl":"defaultURL","moduleToLoad":".\/storeFrontReferFriendRegisterPage","remoteName":"storeFrontReferFriend","localRoute":"storeFrontReferFriendRegisterPage","required":["IS_REFER_PROGRAM_ON","IS_STORE_CREDIT_PAID","is_store_credit_enable"]},"storeFrontReferFriend":{"remoteUrl":"defaultURL","moduleToLoad":".\/storeFrontReferFriend","remoteName":"storeFrontReferFriend","localRoute":"storeFrontReferFriend","skeletonToLoad":"Loading","required":["IS_STORE_CREDIT_PAID","IS_REFER_PROGRAM_ON","is_store_credit_enable"]},"storeFrontHowToManageCredit":{"remoteUrl":"defaultURL","moduleToLoad":".\/storeFrontHowToManageCredit","remoteName":"storeFrontHowToManageCredit","localRoute":"storeFrontHowToManageCredit","skeletonToLoad":"Loading","required":["is_store_credit_enable","IS_HOW_TO_EARN_CREDIT_DISPLAY","IS_STORE_CREDIT_PAID"],"jsonTemplate":[{"component":"HowToEarn","name":"edit","label":"flits.navigation.how_to_earn_credit","type":"button"},{"component":"HowToSpent","name":"edit","label":"flits.navigation.how_to_spend_credit","type":"button"},{"component":"FromStoreOwner","name":"edit","label":"flits.navigation.from_admin","type":"button"}]},"storeFrontCredit":{"remoteUrl":"defaultURL","moduleToLoad":".\/storeFrontCredit","remoteName":"storeFrontCredit","localRoute":"storeFrontCredit","skeletonToLoad":"Loading","required":["IS_STORE_CREDIT_PAID","is_store_credit_enable"]},"storeFrontOrder":{"remoteUrl":"defaultURL","moduleToLoad":".\/storeFrontOrder","remoteName":"storeFrontOrder","localRoute":"storeFrontOrder","skeletonToLoad":"Loading"},"storeFrontDeliveryAddress":{"remoteUrl":"defaultURL","moduleToLoad":".\/storeFrontDeliveryAddress","remoteName":"storeFrontDeliveryAddress","localRoute":"storeFrontDeliveryAddress","skeletonToLoad":"LoadingWithOutShadow"},"storeFrontRecentlyViewedProducts":{"remoteUrl":"defaultURL","moduleToLoad":".\/storeFrontRecentlyViewedProducts","remoteName":"storeFrontRecentlyViewedProducts","localRoute":"storeFrontRecentlyViewedProducts","skeletonToLoad":"Loading","required":["is_recently_view_enable"]},"storeFrontRecentlyViewedProductPage":{"remoteUrl":"defaultURL","moduleToLoad":".\/storeFrontRecentlyViewedProductPage","remoteName":"storeFrontRecentlyViewedProducts","localRoute":"storeFrontRecentlyViewedProductPage","required":["is_recently_view_enable"]},"storeFrontTopOrderedProducts":{"remoteUrl":"defaultURL","moduleToLoad":".\/storeFrontTopOrderedProducts","remoteName":"storeFrontTopOrderedProducts","localRoute":"storeFrontTopOrderedProducts","skeletonToLoad":"LoadingWithOutShadow","required":["IS_ADVANCE_DASHBOARD_ENABLE","IS_ADVANCE_DASHBOARD_PAID"]},"storeFrontRefundCredit":{"remoteUrl":"defaultURL","moduleToLoad":".\/storeFrontRefundCredit","remoteName":"storeFrontCredit","localRoute":"storeFrontRefundCredit","skeletonToLoad":"Loading","required":["IS_REFUND_CREDIT_ENABLE"]}}},"multilanguage":"https:\/\/cdn.getflits.com\/locales\/default\/en.json"},"flagSvgUrl":"https:\/\/cdn.shopify.com\/s\/files\/1\/0030\/7491\/6461\/files\/flags.svg?v=1646045459"},"THEME_SETTINGS_138853613722":{"status":false,"message":"Code is not installed"},"THEME_SETTINGS_138854334618":{"status":false,"message":"Code is not installed"},"THEME_SETTINGS_138870653082":{"status":false,"message":"Code is not installed"},"THEME_SETTINGS_138887659674":{"status":false,"message":"Code is not installed"},"THEME_SETTINGS_138901094554":{"status":false,"message":"Code is not installed"},"THEME_SETTINGS_138946838682":{"status":false,"message":"Code is not installed"},"THEME_SETTINGS_138995990682":{"status":false,"message":"Code is not installed"},"THEME_SETTINGS_139009654938":{"status":false,"message":"Code is not installed"},"THEME_SETTINGS_139138039962":{"status":false,"message":"Code is not installed"},"THEME_SETTINGS_139140432026":{"status":false,"message":"Code is not installed"},"THEME_SETTINGS_139154129050":{"status":false,"message":"Code is not installed"},"THEME_SETTINGS_139177164954":{"status":false,"message":"Code is not installed"},"THEME_SETTINGS_139181686938":{"status":false,"message":"Code is not installed"},"THEME_SETTINGS_139342741658":{"status":false,"message":"Code is not installed"},"THEME_SETTINGS_139370496154":{"status":false,"message":"Code is not installed"},"THEME_SETTINGS_139375542426":{"status":false,"message":"Code is not installed"},"THEME_SETTINGS_139470078106":{"status":false,"message":"Code is not installed"},"THEME_SETTINGS_139510743194":{"status":false,"message":"Code is not installed"},"THEME_SETTINGS_139627528346":{"status":false,"message":"Code is not installed"},"THEME_SETTINGS_139652595866":{"status":false,"message":"Code is not installed"},"THEME_SETTINGS_139674779802":{"status":false,"message":"Code is not installed"},"THEME_SETTINGS_139677237402":{"status":false,"message":"Code is not installed"},"THEME_SETTINGS_139751948442":{"status":false,"message":"Code is not installed"},"THEME_SETTINGS_139792679066":{"status":false,"message":"Code is not installed"},"THEME_SETTINGS_139793432730":{"status":true,"data":{"accountSettings":{"template":2,"isCustomized":false,"colorSettings":{"navigationBGColor":"rgb(13, 94, 168)","navigationTextColor":"rgb(240, 228, 228)","navigationBorderColor":"rgb(13, 94, 168)","contentBGColor":"rgb(255, 255, 255, 0)","contentTextColor":"rgb(0, 0, 0)","primaryButtonBGColor":"rgb(15, 141, 27)","primaryButtonTextColor":"rgb(255, 255, 255)","secondaryButtonBGColor":"rgb(15, 141, 27)","secondaryButtonTextColor":"rgb(15, 141, 27)","badgeBGColor":"rgb(15, 141, 27)","badgeTextColor":"rgb(255, 255, 255)","linkColor":"rgb(12, 33, 84)"},"isAccountPageInJSON":false,"sections":[],"codeVersion":"4.5.1","themeStoreId":null},"microfront_remotes":{"pages_template":{"404":[{"component":"storeFrontCreditUsage","renderType":"remote"}],"article":[{"component":"storeFrontCreditUsage","renderType":"remote"}],"blog":[{"component":"storeFrontCreditUsage","renderType":"remote"}],"captcha":[{"component":"storeFrontCreditUsage","renderType":"remote"}],"cart":[{"component":"storeFrontCreditUsage","renderType":"remote"}],"collection":[{"component":"storeFrontCreditUsage","renderType":"remote"},{"component":"storeFrontWishListCollection","renderType":"remote"}],"list-collections":[{"component":"storeFrontCreditUsage","renderType":"remote"}],"customers\/account":[{"component":"storeFrontNavigation","renderType":"remote"},{"component":"storeFrontCreditUsage","renderType":"remote"}],"customers\/activate_account":[{"component":"storeFrontCreditUsage","renderType":"remote"}],"customers\/addresses":[{"component":"storeFrontCreditUsage","renderType":"remote"}],"customers\/login":[{"component":"storeFrontSocialLogin","renderType":"remote"}],"customers\/order":[{"component":"storeFrontCreditUsage","renderType":"remote"}],"customers\/register":[{"component":"storeFrontSocialLogin","renderType":"remote"},{"component":"storeFrontReferFriendRegisterPage","renderType":"remote"},{"component":"storeFrontRegisterPageCustomFields","renderType":"remote"}],"customers\/reset_password":[{"component":"storeFrontCreditUsage","renderType":"remote"}],"gift_card":[{"component":"storeFrontCreditUsage","renderType":"remote"}],"index":[{"component":"storeFrontCreditUsage","renderType":"remote"}],"metaobject":[{"component":"storeFrontCreditUsage","renderType":"remote"}],"page":[{"component":"storeFrontCreditUsage","renderType":"remote"}],"password":[{"component":"storeFrontCreditUsage","renderType":"remote"}],"policy":[{"component":"storeFrontCreditUsage","renderType":"remote"}],"product":[{"component":"storeFrontWishList","renderType":"remote"},{"component":"storeFrontRecentlyViewedProductPage","renderType":"remote"},{"component":"storeFrontCreditUsage","renderType":"remote"}],"search":[{"component":"storeFrontCreditUsage","renderType":"remote"}]},"remotes":{"storeFrontNavigation":{"remoteUrl":"defaultURL","moduleToLoad":".\/storeFrontNavigation","remoteName":"storeFrontNavigation","localRoute":"storeFrontNavigation","skeletonToLoad":"SkeletonNavigation","states":[]},"storeFrontRegisterPageCustomFields":{"remoteUrl":"defaultURL","moduleToLoad":".\/storeFrontRegisterPageCustomFields","remoteName":"storeFrontMyProfile","localRoute":"storeFrontMyProfile","required":["IS_CUSTOM_FIELDS_ENABLE"]},"storeFrontMyProfile":{"remoteUrl":"defaultURL","moduleToLoad":".\/storeFrontMyProfile","remoteName":"storeFrontMyProfile","localRoute":"storeFrontMyProfile","skeletonToLoad":"LoadingWithOutShadow","jsonTemplate":[{"component":"MyProfileForm","renderType":"local"}]},"storeFrontChangePassword":{"remoteUrl":"defaultURL","moduleToLoad":".\/storeFrontChangePassword","remoteName":"storeFrontChangePassword","localRoute":"storeFrontChangePassword","skeletonToLoad":"LoadingWithOutShadow","jsonTemplate":[{"component":"ChangePasswordFormComponent","renderType":"local"}]},"storeFrontWishList":{"remoteUrl":"defaultURL","moduleToLoad":".\/storeFrontWishList","remoteName":"storeFrontWishList","localRoute":"storeFrontWishList","required":["IS_WISHLIST_ENABLE","IS_WISHLIST_PAID"]},"storeFrontWishListCollection":{"remoteUrl":"defaultURL","moduleToLoad":".\/storeFrontWishListCollection","remoteName":"storeFrontWishList","localRoute":"storeFrontWishListCollection","required":["IS_WISHLIST_ENABLE","IS_WISHLIST_PAID"]},"storeFrontWishListPage":{"remoteUrl":"defaultURL","moduleToLoad":".\/storeFrontWishListPage","remoteName":"storeFrontWishList","localRoute":"storeFrontWishListPage","skeletonToLoad":"Loading","jsonTemplate":[],"required":["IS_WISHLIST_ENABLE","IS_WISHLIST_PAID"]},"storeFrontCreditUsage":{"remoteUrl":"defaultURL","moduleToLoad":".\/storeFrontCreditUsage","remoteName":"storeFrontCredit","localRoute":"storeFrontCreditUsage","required":["IS_STORE_CREDIT_PAID","is_store_credit_enable"],"requiredArray":[["IS_STORE_CREDIT_PAID","is_store_credit_enable"],["IS_REFUND_CREDIT_ENABLE"]],"jsonTemplate":[]},"storeFrontSocialLogin":{"remoteUrl":"defaultURL","moduleToLoad":".\/storeFrontSocialLogin","remoteName":"storeFrontSocialLogin","localRoute":"storeFrontSocialLogin","jsonTemplate":[],"required":["IS_SOCIAL_LOGIN_PAID","IS_SOCIAL_LOGIN_ENABLE"]},"storeFrontReferFriendRegisterPage":{"remoteUrl":"defaultURL","moduleToLoad":".\/storeFrontReferFriendRegisterPage","remoteName":"storeFrontReferFriend","localRoute":"storeFrontReferFriendRegisterPage","required":["IS_REFER_PROGRAM_ON","IS_STORE_CREDIT_PAID","is_store_credit_enable"]},"storeFrontReferFriend":{"remoteUrl":"defaultURL","moduleToLoad":".\/storeFrontReferFriend","remoteName":"storeFrontReferFriend","localRoute":"storeFrontReferFriend","skeletonToLoad":"Loading","required":["IS_STORE_CREDIT_PAID","IS_REFER_PROGRAM_ON","is_store_credit_enable"]},"storeFrontHowToManageCredit":{"remoteUrl":"defaultURL","moduleToLoad":".\/storeFrontHowToManageCredit","remoteName":"storeFrontHowToManageCredit","localRoute":"storeFrontHowToManageCredit","skeletonToLoad":"Loading","required":["is_store_credit_enable","IS_HOW_TO_EARN_CREDIT_DISPLAY","IS_STORE_CREDIT_PAID"],"jsonTemplate":[{"component":"HowToEarn","name":"edit","label":"flits.navigation.how_to_earn_credit","type":"button"},{"component":"HowToSpent","name":"edit","label":"flits.navigation.how_to_spend_credit","type":"button"},{"component":"FromStoreOwner","name":"edit","label":"flits.navigation.from_admin","type":"button"}]},"storeFrontCredit":{"remoteUrl":"defaultURL","moduleToLoad":".\/storeFrontCredit","remoteName":"storeFrontCredit","localRoute":"storeFrontCredit","skeletonToLoad":"Loading","required":["IS_STORE_CREDIT_PAID","is_store_credit_enable"]},"storeFrontOrder":{"remoteUrl":"defaultURL","moduleToLoad":".\/storeFrontOrder","remoteName":"storeFrontOrder","localRoute":"storeFrontOrder","skeletonToLoad":"Loading"},"storeFrontDeliveryAddress":{"remoteUrl":"defaultURL","moduleToLoad":".\/storeFrontDeliveryAddress","remoteName":"storeFrontDeliveryAddress","localRoute":"storeFrontDeliveryAddress","skeletonToLoad":"LoadingWithOutShadow"},"storeFrontRecentlyViewedProducts":{"remoteUrl":"defaultURL","moduleToLoad":".\/storeFrontRecentlyViewedProducts","remoteName":"storeFrontRecentlyViewedProducts","localRoute":"storeFrontRecentlyViewedProducts","skeletonToLoad":"Loading","required":["is_recently_view_enable"]},"storeFrontRecentlyViewedProductPage":{"remoteUrl":"defaultURL","moduleToLoad":".\/storeFrontRecentlyViewedProductPage","remoteName":"storeFrontRecentlyViewedProducts","localRoute":"storeFrontRecentlyViewedProductPage","required":["is_recently_view_enable"]},"storeFrontTopOrderedProducts":{"remoteUrl":"defaultURL","moduleToLoad":".\/storeFrontTopOrderedProducts","remoteName":"storeFrontTopOrderedProducts","localRoute":"storeFrontTopOrderedProducts","skeletonToLoad":"LoadingWithOutShadow","required":["IS_ADVANCE_DASHBOARD_ENABLE","IS_ADVANCE_DASHBOARD_PAID"]},"storeFrontRefundCredit":{"remoteUrl":"defaultURL","moduleToLoad":".\/storeFrontRefundCredit","remoteName":"storeFrontCredit","localRoute":"storeFrontRefundCredit","skeletonToLoad":"Loading","required":["IS_REFUND_CREDIT_ENABLE"]}}},"multilanguage":"https:\/\/cdn.getflits.com\/locales\/default\/en.json"},"flagSvgUrl":"https:\/\/cdn.shopify.com\/s\/files\/1\/0030\/7491\/6461\/files\/flags.svg?v=1646045459"},"THEME_SETTINGS_139820728474":{"status":false,"message":"Code is not installed"},"THEME_SETTINGS_139892359322":{"status":false,"message":"Code is not installed"},"THEME_SETTINGS_139955699866":{"status":true,"data":{"accountSettings":{"template":2,"isCustomized":false,"colorSettings":{"navigationBGColor":"rgb(255, 255, 255)","navigationTextColor":"rgb(12, 33, 84)","navigationBorderColor":"rgb(255, 255, 255)","contentBGColor":"rgb(255, 255, 255, 0)","contentTextColor":"rgb(0, 0, 0)","primaryButtonBGColor":"rgb(12, 33, 84)","primaryButtonTextColor":"rgb(255, 255, 255)","secondaryButtonBGColor":"rgb(12, 33, 84)","secondaryButtonTextColor":"rgb(12, 33, 84)","badgeBGColor":"rgb(12, 33, 84)","badgeTextColor":"rgb(255, 255, 255)","linkColor":"rgb(12, 33, 84)"},"isAccountPageInJSON":true,"sections":["main-account"],"codeVersion":"2.1.5","themeStoreId":887},"microfront_remotes":{"pages_template":{"404":[{"component":"storeFrontCreditUsage","renderType":"remote"}],"article":[{"component":"storeFrontCreditUsage","renderType":"remote"}],"blog":[{"component":"storeFrontCreditUsage","renderType":"remote"}],"captcha":[{"component":"storeFrontCreditUsage","renderType":"remote"}],"cart":[{"component":"storeFrontCreditUsage","renderType":"remote"}],"collection":[{"component":"storeFrontCreditUsage","renderType":"remote"},{"component":"storeFrontWishListCollection","renderType":"remote"}],"list-collections":[{"component":"storeFrontCreditUsage","renderType":"remote"}],"customers\/account":[{"component":"storeFrontNavigation","renderType":"remote"},{"component":"storeFrontCreditUsage","renderType":"remote"}],"customers\/activate_account":[{"component":"storeFrontCreditUsage","renderType":"remote"}],"customers\/addresses":[{"component":"storeFrontCreditUsage","renderType":"remote"}],"customers\/login":[{"component":"storeFrontSocialLogin","renderType":"remote"}],"customers\/order":[{"component":"storeFrontCreditUsage","renderType":"remote"}],"customers\/register":[{"component":"storeFrontSocialLogin","renderType":"remote"},{"component":"storeFrontReferFriendRegisterPage","renderType":"remote"},{"component":"storeFrontRegisterPageCustomFields","renderType":"remote"}],"customers\/reset_password":[{"component":"storeFrontCreditUsage","renderType":"remote"}],"gift_card":[{"component":"storeFrontCreditUsage","renderType":"remote"}],"index":[{"component":"storeFrontCreditUsage","renderType":"remote"}],"metaobject":[{"component":"storeFrontCreditUsage","renderType":"remote"}],"page":[{"component":"storeFrontCreditUsage","renderType":"remote"}],"password":[{"component":"storeFrontCreditUsage","renderType":"remote"}],"policy":[{"component":"storeFrontCreditUsage","renderType":"remote"}],"product":[{"component":"storeFrontWishList","renderType":"remote"},{"component":"storeFrontRecentlyViewedProductPage","renderType":"remote"},{"component":"storeFrontCreditUsage","renderType":"remote"}],"search":[{"component":"storeFrontCreditUsage","renderType":"remote"}]},"remotes":{"storeFrontNavigation":{"remoteUrl":"defaultURL","moduleToLoad":".\/storeFrontNavigation","remoteName":"storeFrontNavigation","localRoute":"storeFrontNavigation","skeletonToLoad":"SkeletonNavigation","states":[]},"storeFrontRegisterPageCustomFields":{"remoteUrl":"defaultURL","moduleToLoad":".\/storeFrontRegisterPageCustomFields","remoteName":"storeFrontMyProfile","localRoute":"storeFrontMyProfile","required":["IS_CUSTOM_FIELDS_ENABLE"]},"storeFrontMyProfile":{"remoteUrl":"defaultURL","moduleToLoad":".\/storeFrontMyProfile","remoteName":"storeFrontMyProfile","localRoute":"storeFrontMyProfile","skeletonToLoad":"LoadingWithOutShadow","jsonTemplate":[{"component":"MyProfileForm","renderType":"local"}]},"storeFrontChangePassword":{"remoteUrl":"defaultURL","moduleToLoad":".\/storeFrontChangePassword","remoteName":"storeFrontChangePassword","localRoute":"storeFrontChangePassword","skeletonToLoad":"LoadingWithOutShadow","jsonTemplate":[{"component":"ChangePasswordFormComponent","renderType":"local"}]},"storeFrontWishList":{"remoteUrl":"defaultURL","moduleToLoad":".\/storeFrontWishList","remoteName":"storeFrontWishList","localRoute":"storeFrontWishList","required":["IS_WISHLIST_ENABLE","IS_WISHLIST_PAID"]},"storeFrontWishListCollection":{"remoteUrl":"defaultURL","moduleToLoad":".\/storeFrontWishListCollection","remoteName":"storeFrontWishList","localRoute":"storeFrontWishListCollection","required":["IS_WISHLIST_ENABLE","IS_WISHLIST_PAID"]},"storeFrontWishListPage":{"remoteUrl":"defaultURL","moduleToLoad":".\/storeFrontWishListPage","remoteName":"storeFrontWishList","localRoute":"storeFrontWishListPage","skeletonToLoad":"Loading","jsonTemplate":[],"required":["IS_WISHLIST_ENABLE","IS_WISHLIST_PAID"]},"storeFrontCreditUsage":{"remoteUrl":"defaultURL","moduleToLoad":".\/storeFrontCreditUsage","remoteName":"storeFrontCredit","localRoute":"storeFrontCreditUsage","required":["IS_STORE_CREDIT_PAID","is_store_credit_enable"],"requiredArray":[["IS_STORE_CREDIT_PAID","is_store_credit_enable"],["IS_REFUND_CREDIT_ENABLE"]],"jsonTemplate":[]},"storeFrontSocialLogin":{"remoteUrl":"defaultURL","moduleToLoad":".\/storeFrontSocialLogin","remoteName":"storeFrontSocialLogin","localRoute":"storeFrontSocialLogin","jsonTemplate":[],"required":["IS_SOCIAL_LOGIN_PAID","IS_SOCIAL_LOGIN_ENABLE"]},"storeFrontReferFriendRegisterPage":{"remoteUrl":"defaultURL","moduleToLoad":".\/storeFrontReferFriendRegisterPage","remoteName":"storeFrontReferFriend","localRoute":"storeFrontReferFriendRegisterPage","required":["IS_REFER_PROGRAM_ON","IS_STORE_CREDIT_PAID","is_store_credit_enable"]},"storeFrontReferFriend":{"remoteUrl":"defaultURL","moduleToLoad":".\/storeFrontReferFriend","remoteName":"storeFrontReferFriend","localRoute":"storeFrontReferFriend","skeletonToLoad":"Loading","required":["IS_STORE_CREDIT_PAID","IS_REFER_PROGRAM_ON","is_store_credit_enable"]},"storeFrontHowToManageCredit":{"remoteUrl":"defaultURL","moduleToLoad":".\/storeFrontHowToManageCredit","remoteName":"storeFrontHowToManageCredit","localRoute":"storeFrontHowToManageCredit","skeletonToLoad":"Loading","required":["is_store_credit_enable","IS_HOW_TO_EARN_CREDIT_DISPLAY","IS_STORE_CREDIT_PAID"],"jsonTemplate":[{"component":"HowToEarn","name":"edit","label":"flits.navigation.how_to_earn_credit","type":"button"},{"component":"HowToSpent","name":"edit","label":"flits.navigation.how_to_spend_credit","type":"button"},{"component":"FromStoreOwner","name":"edit","label":"flits.navigation.from_admin","type":"button"}]},"storeFrontCredit":{"remoteUrl":"defaultURL","moduleToLoad":".\/storeFrontCredit","remoteName":"storeFrontCredit","localRoute":"storeFrontCredit","skeletonToLoad":"Loading","required":["IS_STORE_CREDIT_PAID","is_store_credit_enable"]},"storeFrontOrder":{"remoteUrl":"defaultURL","moduleToLoad":".\/storeFrontOrder","remoteName":"storeFrontOrder","localRoute":"storeFrontOrder","skeletonToLoad":"Loading"},"storeFrontDeliveryAddress":{"remoteUrl":"defaultURL","moduleToLoad":".\/storeFrontDeliveryAddress","remoteName":"storeFrontDeliveryAddress","localRoute":"storeFrontDeliveryAddress","skeletonToLoad":"LoadingWithOutShadow"},"storeFrontRecentlyViewedProducts":{"remoteUrl":"defaultURL","moduleToLoad":".\/storeFrontRecentlyViewedProducts","remoteName":"storeFrontRecentlyViewedProducts","localRoute":"storeFrontRecentlyViewedProducts","skeletonToLoad":"Loading","required":["is_recently_view_enable"]},"storeFrontRecentlyViewedProductPage":{"remoteUrl":"defaultURL","moduleToLoad":".\/storeFrontRecentlyViewedProductPage","remoteName":"storeFrontRecentlyViewedProducts","localRoute":"storeFrontRecentlyViewedProductPage","required":["is_recently_view_enable"]},"storeFrontTopOrderedProducts":{"remoteUrl":"defaultURL","moduleToLoad":".\/storeFrontTopOrderedProducts","remoteName":"storeFrontTopOrderedProducts","localRoute":"storeFrontTopOrderedProducts","skeletonToLoad":"LoadingWithOutShadow","required":["IS_ADVANCE_DASHBOARD_ENABLE","IS_ADVANCE_DASHBOARD_PAID"]},"storeFrontRefundCredit":{"remoteUrl":"defaultURL","moduleToLoad":".\/storeFrontRefundCredit","remoteName":"storeFrontCredit","localRoute":"storeFrontRefundCredit","skeletonToLoad":"Loading","required":["IS_REFUND_CREDIT_ENABLE"]}}},"multilanguage":"https:\/\/cdn.getflits.com\/locales\/default\/en.json"},"flagSvgUrl":"https:\/\/cdn.shopify.com\/s\/files\/1\/0030\/7491\/6461\/files\/flags.svg?v=1646045459"},"THEME_SETTINGS_140000067738":{"status":false,"message":"Code is not installed"},"THEME_SETTINGS_140025921690":{"status":false,"message":"Code is not installed"},"THEME_SETTINGS_140065669274":{"status":false,"message":"Code is not installed"},"THEME_SETTINGS_140067438746":{"status":false,"message":"Code is not installed"},"THEME_SETTINGS_140134645914":{"status":false,"message":"Code is not installed"},"THEME_SETTINGS_140184912026":{"status":false,"message":"Code is not installed"},"THEME_SETTINGS_140231147674":{"status":false,"message":"Code is not installed"},"THEME_SETTINGS_140277383322":{"status":true,"data":{"accountSettings":{"template":2,"isCustomized":false,"colorSettings":{"navigationBGColor":"rgb(255, 255, 255)","navigationTextColor":"rgb(12, 33, 84)","navigationBorderColor":"rgb(255, 255, 255)","contentBGColor":"rgb(255, 255, 255, 0)","contentTextColor":"rgb(0, 0, 0)","primaryButtonBGColor":"rgb(12, 33, 84)","primaryButtonTextColor":"rgb(255, 255, 255)","secondaryButtonBGColor":"rgb(12, 33, 84)","secondaryButtonTextColor":"rgb(12, 33, 84)","badgeBGColor":"rgb(12, 33, 84)","badgeTextColor":"rgb(255, 255, 255)","linkColor":"rgb(12, 33, 84)"},"isAccountPageInJSON":true,"sections":["main-account"],"codeVersion":"2.1.5","themeStoreId":887},"microfront_remotes":{"pages_template":{"404":[{"component":"storeFrontCreditUsage","renderType":"remote"}],"article":[{"component":"storeFrontCreditUsage","renderType":"remote"}],"blog":[{"component":"storeFrontCreditUsage","renderType":"remote"}],"captcha":[{"component":"storeFrontCreditUsage","renderType":"remote"}],"cart":[{"component":"storeFrontCreditUsage","renderType":"remote"}],"collection":[{"component":"storeFrontCreditUsage","renderType":"remote"},{"component":"storeFrontWishListCollection","renderType":"remote"}],"list-collections":[{"component":"storeFrontCreditUsage","renderType":"remote"}],"customers\/account":[{"component":"storeFrontNavigation","renderType":"remote"},{"component":"storeFrontCreditUsage","renderType":"remote"}],"customers\/activate_account":[{"component":"storeFrontCreditUsage","renderType":"remote"}],"customers\/addresses":[{"component":"storeFrontCreditUsage","renderType":"remote"}],"customers\/login":[{"component":"storeFrontSocialLogin","renderType":"remote"}],"customers\/order":[{"component":"storeFrontCreditUsage","renderType":"remote"}],"customers\/register":[{"component":"storeFrontSocialLogin","renderType":"remote"},{"component":"storeFrontReferFriendRegisterPage","renderType":"remote"},{"component":"storeFrontRegisterPageCustomFields","renderType":"remote"}],"customers\/reset_password":[{"component":"storeFrontCreditUsage","renderType":"remote"}],"gift_card":[{"component":"storeFrontCreditUsage","renderType":"remote"}],"index":[{"component":"storeFrontCreditUsage","renderType":"remote"}],"metaobject":[{"component":"storeFrontCreditUsage","renderType":"remote"}],"page":[{"component":"storeFrontCreditUsage","renderType":"remote"}],"password":[{"component":"storeFrontCreditUsage","renderType":"remote"}],"policy":[{"component":"storeFrontCreditUsage","renderType":"remote"}],"product":[{"component":"storeFrontWishList","renderType":"remote"},{"component":"storeFrontRecentlyViewedProductPage","renderType":"remote"},{"component":"storeFrontCreditUsage","renderType":"remote"}],"search":[{"component":"storeFrontCreditUsage","renderType":"remote"}]},"remotes":{"storeFrontNavigation":{"remoteUrl":"defaultURL","moduleToLoad":".\/storeFrontNavigation","remoteName":"storeFrontNavigation","localRoute":"storeFrontNavigation","skeletonToLoad":"SkeletonNavigation","states":[]},"storeFrontRegisterPageCustomFields":{"remoteUrl":"defaultURL","moduleToLoad":".\/storeFrontRegisterPageCustomFields","remoteName":"storeFrontMyProfile","localRoute":"storeFrontMyProfile","required":["IS_CUSTOM_FIELDS_ENABLE"]},"storeFrontMyProfile":{"remoteUrl":"defaultURL","moduleToLoad":".\/storeFrontMyProfile","remoteName":"storeFrontMyProfile","localRoute":"storeFrontMyProfile","skeletonToLoad":"LoadingWithOutShadow","jsonTemplate":[{"component":"MyProfileForm","renderType":"local"}]},"storeFrontChangePassword":{"remoteUrl":"defaultURL","moduleToLoad":".\/storeFrontChangePassword","remoteName":"storeFrontChangePassword","localRoute":"storeFrontChangePassword","skeletonToLoad":"LoadingWithOutShadow","jsonTemplate":[{"component":"ChangePasswordFormComponent","renderType":"local"}]},"storeFrontWishList":{"remoteUrl":"defaultURL","moduleToLoad":".\/storeFrontWishList","remoteName":"storeFrontWishList","localRoute":"storeFrontWishList","required":["IS_WISHLIST_ENABLE","IS_WISHLIST_PAID"]},"storeFrontWishListCollection":{"remoteUrl":"defaultURL","moduleToLoad":".\/storeFrontWishListCollection","remoteName":"storeFrontWishList","localRoute":"storeFrontWishListCollection","required":["IS_WISHLIST_ENABLE","IS_WISHLIST_PAID"]},"storeFrontWishListPage":{"remoteUrl":"defaultURL","moduleToLoad":".\/storeFrontWishListPage","remoteName":"storeFrontWishList","localRoute":"storeFrontWishListPage","skeletonToLoad":"Loading","jsonTemplate":[],"required":["IS_WISHLIST_ENABLE","IS_WISHLIST_PAID"]},"storeFrontCreditUsage":{"remoteUrl":"defaultURL","moduleToLoad":".\/storeFrontCreditUsage","remoteName":"storeFrontCredit","localRoute":"storeFrontCreditUsage","required":["IS_STORE_CREDIT_PAID","is_store_credit_enable"],"requiredArray":[["IS_STORE_CREDIT_PAID","is_store_credit_enable"],["IS_REFUND_CREDIT_ENABLE"]],"jsonTemplate":[]},"storeFrontSocialLogin":{"remoteUrl":"defaultURL","moduleToLoad":".\/storeFrontSocialLogin","remoteName":"storeFrontSocialLogin","localRoute":"storeFrontSocialLogin","jsonTemplate":[],"required":["IS_SOCIAL_LOGIN_PAID","IS_SOCIAL_LOGIN_ENABLE"]},"storeFrontReferFriendRegisterPage":{"remoteUrl":"defaultURL","moduleToLoad":".\/storeFrontReferFriendRegisterPage","remoteName":"storeFrontReferFriend","localRoute":"storeFrontReferFriendRegisterPage","required":["IS_REFER_PROGRAM_ON","IS_STORE_CREDIT_PAID","is_store_credit_enable"]},"storeFrontReferFriend":{"remoteUrl":"defaultURL","moduleToLoad":".\/storeFrontReferFriend","remoteName":"storeFrontReferFriend","localRoute":"storeFrontReferFriend","skeletonToLoad":"Loading","required":["IS_STORE_CREDIT_PAID","IS_REFER_PROGRAM_ON","is_store_credit_enable"]},"storeFrontHowToManageCredit":{"remoteUrl":"defaultURL","moduleToLoad":".\/storeFrontHowToManageCredit","remoteName":"storeFrontHowToManageCredit","localRoute":"storeFrontHowToManageCredit","skeletonToLoad":"Loading","required":["is_store_credit_enable","IS_HOW_TO_EARN_CREDIT_DISPLAY","IS_STORE_CREDIT_PAID"],"jsonTemplate":[{"component":"HowToEarn","name":"edit","label":"flits.navigation.how_to_earn_credit","type":"button"},{"component":"HowToSpent","name":"edit","label":"flits.navigation.how_to_spend_credit","type":"button"},{"component":"FromStoreOwner","name":"edit","label":"flits.navigation.from_admin","type":"button"}]},"storeFrontCredit":{"remoteUrl":"defaultURL","moduleToLoad":".\/storeFrontCredit","remoteName":"storeFrontCredit","localRoute":"storeFrontCredit","skeletonToLoad":"Loading","required":["IS_STORE_CREDIT_PAID","is_store_credit_enable"]},"storeFrontOrder":{"remoteUrl":"defaultURL","moduleToLoad":".\/storeFrontOrder","remoteName":"storeFrontOrder","localRoute":"storeFrontOrder","skeletonToLoad":"Loading"},"storeFrontDeliveryAddress":{"remoteUrl":"defaultURL","moduleToLoad":".\/storeFrontDeliveryAddress","remoteName":"storeFrontDeliveryAddress","localRoute":"storeFrontDeliveryAddress","skeletonToLoad":"LoadingWithOutShadow"},"storeFrontRecentlyViewedProducts":{"remoteUrl":"defaultURL","moduleToLoad":".\/storeFrontRecentlyViewedProducts","remoteName":"storeFrontRecentlyViewedProducts","localRoute":"storeFrontRecentlyViewedProducts","skeletonToLoad":"Loading","required":["is_recently_view_enable"]},"storeFrontRecentlyViewedProductPage":{"remoteUrl":"defaultURL","moduleToLoad":".\/storeFrontRecentlyViewedProductPage","remoteName":"storeFrontRecentlyViewedProducts","localRoute":"storeFrontRecentlyViewedProductPage","required":["is_recently_view_enable"]},"storeFrontTopOrderedProducts":{"remoteUrl":"defaultURL","moduleToLoad":".\/storeFrontTopOrderedProducts","remoteName":"storeFrontTopOrderedProducts","localRoute":"storeFrontTopOrderedProducts","skeletonToLoad":"LoadingWithOutShadow","required":["IS_ADVANCE_DASHBOARD_ENABLE","IS_ADVANCE_DASHBOARD_PAID"]},"storeFrontRefundCredit":{"remoteUrl":"defaultURL","moduleToLoad":".\/storeFrontRefundCredit","remoteName":"storeFrontCredit","localRoute":"storeFrontRefundCredit","skeletonToLoad":"Loading","required":["IS_REFUND_CREDIT_ENABLE"]}}},"multilanguage":"https:\/\/cdn.getflits.com\/locales\/default\/en.json"},"flagSvgUrl":"https:\/\/cdn.shopify.com\/s\/files\/1\/0030\/7491\/6461\/files\/flags.svg?v=1646045459"},"THEME_SETTINGS_140279120026":{"status":false,"message":"Code is not installed"},"THEME_SETTINGS_140299108506":{"status":false,"message":"Code is not installed"},"THEME_SETTINGS_140437029018":{"status":false,"message":"Code is not installed"},"THEME_SETTINGS_140464128154":{"status":true,"data":{"accountSettings":{"template":2,"isCustomized":false,"colorSettings":{"navigationBGColor":"rgb(255, 255, 255)","navigationTextColor":"rgb(12, 33, 84)","navigationBorderColor":"rgb(255, 255, 255)","contentBGColor":"rgb(255, 255, 255, 0)","contentTextColor":"rgb(0, 0, 0)","primaryButtonBGColor":"rgb(12, 33, 84)","primaryButtonTextColor":"rgb(255, 255, 255)","secondaryButtonBGColor":"rgb(12, 33, 84)","secondaryButtonTextColor":"rgb(12, 33, 84)","badgeBGColor":"rgb(12, 33, 84)","badgeTextColor":"rgb(255, 255, 255)","linkColor":"rgb(12, 33, 84)"},"isAccountPageInJSON":true,"sections":["main-account"],"codeVersion":"2.1.5","themeStoreId":887},"microfront_remotes":{"pages_template":{"404":[{"component":"storeFrontCreditUsage","renderType":"remote"}],"article":[{"component":"storeFrontCreditUsage","renderType":"remote"}],"blog":[{"component":"storeFrontCreditUsage","renderType":"remote"}],"captcha":[{"component":"storeFrontCreditUsage","renderType":"remote"}],"cart":[{"component":"storeFrontCreditUsage","renderType":"remote"}],"collection":[{"component":"storeFrontCreditUsage","renderType":"remote"},{"component":"storeFrontWishListCollection","renderType":"remote"}],"list-collections":[{"component":"storeFrontCreditUsage","renderType":"remote"}],"customers\/account":[{"component":"storeFrontNavigation","renderType":"remote"},{"component":"storeFrontCreditUsage","renderType":"remote"}],"customers\/activate_account":[{"component":"storeFrontCreditUsage","renderType":"remote"}],"customers\/addresses":[{"component":"storeFrontCreditUsage","renderType":"remote"}],"customers\/login":[{"component":"storeFrontSocialLogin","renderType":"remote"}],"customers\/order":[{"component":"storeFrontCreditUsage","renderType":"remote"}],"customers\/register":[{"component":"storeFrontSocialLogin","renderType":"remote"},{"component":"storeFrontReferFriendRegisterPage","renderType":"remote"},{"component":"storeFrontRegisterPageCustomFields","renderType":"remote"}],"customers\/reset_password":[{"component":"storeFrontCreditUsage","renderType":"remote"}],"gift_card":[{"component":"storeFrontCreditUsage","renderType":"remote"}],"index":[{"component":"storeFrontCreditUsage","renderType":"remote"}],"metaobject":[{"component":"storeFrontCreditUsage","renderType":"remote"}],"page":[{"component":"storeFrontCreditUsage","renderType":"remote"}],"password":[{"component":"storeFrontCreditUsage","renderType":"remote"}],"policy":[{"component":"storeFrontCreditUsage","renderType":"remote"}],"product":[{"component":"storeFrontWishList","renderType":"remote"},{"component":"storeFrontRecentlyViewedProductPage","renderType":"remote"},{"component":"storeFrontCreditUsage","renderType":"remote"}],"search":[{"component":"storeFrontCreditUsage","renderType":"remote"}]},"remotes":{"storeFrontNavigation":{"remoteUrl":"defaultURL","moduleToLoad":".\/storeFrontNavigation","remoteName":"storeFrontNavigation","localRoute":"storeFrontNavigation","skeletonToLoad":"SkeletonNavigation","states":[]},"storeFrontRegisterPageCustomFields":{"remoteUrl":"defaultURL","moduleToLoad":".\/storeFrontRegisterPageCustomFields","remoteName":"storeFrontMyProfile","localRoute":"storeFrontMyProfile","required":["IS_CUSTOM_FIELDS_ENABLE"]},"storeFrontMyProfile":{"remoteUrl":"defaultURL","moduleToLoad":".\/storeFrontMyProfile","remoteName":"storeFrontMyProfile","localRoute":"storeFrontMyProfile","skeletonToLoad":"LoadingWithOutShadow","jsonTemplate":[{"component":"MyProfileForm","renderType":"local"}]},"storeFrontChangePassword":{"remoteUrl":"defaultURL","moduleToLoad":".\/storeFrontChangePassword","remoteName":"storeFrontChangePassword","localRoute":"storeFrontChangePassword","skeletonToLoad":"LoadingWithOutShadow","jsonTemplate":[{"component":"ChangePasswordFormComponent","renderType":"local"}]},"storeFrontWishList":{"remoteUrl":"defaultURL","moduleToLoad":".\/storeFrontWishList","remoteName":"storeFrontWishList","localRoute":"storeFrontWishList","required":["IS_WISHLIST_ENABLE","IS_WISHLIST_PAID"]},"storeFrontWishListCollection":{"remoteUrl":"defaultURL","moduleToLoad":".\/storeFrontWishListCollection","remoteName":"storeFrontWishList","localRoute":"storeFrontWishListCollection","required":["IS_WISHLIST_ENABLE","IS_WISHLIST_PAID"]},"storeFrontWishListPage":{"remoteUrl":"defaultURL","moduleToLoad":".\/storeFrontWishListPage","remoteName":"storeFrontWishList","localRoute":"storeFrontWishListPage","skeletonToLoad":"Loading","jsonTemplate":[],"required":["IS_WISHLIST_ENABLE","IS_WISHLIST_PAID"]},"storeFrontCreditUsage":{"remoteUrl":"defaultURL","moduleToLoad":".\/storeFrontCreditUsage","remoteName":"storeFrontCredit","localRoute":"storeFrontCreditUsage","required":["IS_STORE_CREDIT_PAID","is_store_credit_enable"],"requiredArray":[["IS_STORE_CREDIT_PAID","is_store_credit_enable"],["IS_REFUND_CREDIT_ENABLE"]],"jsonTemplate":[]},"storeFrontSocialLogin":{"remoteUrl":"defaultURL","moduleToLoad":".\/storeFrontSocialLogin","remoteName":"storeFrontSocialLogin","localRoute":"storeFrontSocialLogin","jsonTemplate":[],"required":["IS_SOCIAL_LOGIN_PAID","IS_SOCIAL_LOGIN_ENABLE"]},"storeFrontReferFriendRegisterPage":{"remoteUrl":"defaultURL","moduleToLoad":".\/storeFrontReferFriendRegisterPage","remoteName":"storeFrontReferFriend","localRoute":"storeFrontReferFriendRegisterPage","required":["IS_REFER_PROGRAM_ON","IS_STORE_CREDIT_PAID","is_store_credit_enable"]},"storeFrontReferFriend":{"remoteUrl":"defaultURL","moduleToLoad":".\/storeFrontReferFriend","remoteName":"storeFrontReferFriend","localRoute":"storeFrontReferFriend","skeletonToLoad":"Loading","required":["IS_STORE_CREDIT_PAID","IS_REFER_PROGRAM_ON","is_store_credit_enable"]},"storeFrontHowToManageCredit":{"remoteUrl":"defaultURL","moduleToLoad":".\/storeFrontHowToManageCredit","remoteName":"storeFrontHowToManageCredit","localRoute":"storeFrontHowToManageCredit","skeletonToLoad":"Loading","required":["is_store_credit_enable","IS_HOW_TO_EARN_CREDIT_DISPLAY","IS_STORE_CREDIT_PAID"],"jsonTemplate":[{"component":"HowToEarn","name":"edit","label":"flits.navigation.how_to_earn_credit","type":"button"},{"component":"HowToSpent","name":"edit","label":"flits.navigation.how_to_spend_credit","type":"button"},{"component":"FromStoreOwner","name":"edit","label":"flits.navigation.from_admin","type":"button"}]},"storeFrontCredit":{"remoteUrl":"defaultURL","moduleToLoad":".\/storeFrontCredit","remoteName":"storeFrontCredit","localRoute":"storeFrontCredit","skeletonToLoad":"Loading","required":["IS_STORE_CREDIT_PAID","is_store_credit_enable"]},"storeFrontOrder":{"remoteUrl":"defaultURL","moduleToLoad":".\/storeFrontOrder","remoteName":"storeFrontOrder","localRoute":"storeFrontOrder","skeletonToLoad":"Loading"},"storeFrontDeliveryAddress":{"remoteUrl":"defaultURL","moduleToLoad":".\/storeFrontDeliveryAddress","remoteName":"storeFrontDeliveryAddress","localRoute":"storeFrontDeliveryAddress","skeletonToLoad":"LoadingWithOutShadow"},"storeFrontRecentlyViewedProducts":{"remoteUrl":"defaultURL","moduleToLoad":".\/storeFrontRecentlyViewedProducts","remoteName":"storeFrontRecentlyViewedProducts","localRoute":"storeFrontRecentlyViewedProducts","skeletonToLoad":"Loading","required":["is_recently_view_enable"]},"storeFrontRecentlyViewedProductPage":{"remoteUrl":"defaultURL","moduleToLoad":".\/storeFrontRecentlyViewedProductPage","remoteName":"storeFrontRecentlyViewedProducts","localRoute":"storeFrontRecentlyViewedProductPage","required":["is_recently_view_enable"]},"storeFrontTopOrderedProducts":{"remoteUrl":"defaultURL","moduleToLoad":".\/storeFrontTopOrderedProducts","remoteName":"storeFrontTopOrderedProducts","localRoute":"storeFrontTopOrderedProducts","skeletonToLoad":"LoadingWithOutShadow","required":["IS_ADVANCE_DASHBOARD_ENABLE","IS_ADVANCE_DASHBOARD_PAID"]},"storeFrontRefundCredit":{"remoteUrl":"defaultURL","moduleToLoad":".\/storeFrontRefundCredit","remoteName":"storeFrontCredit","localRoute":"storeFrontRefundCredit","skeletonToLoad":"Loading","required":["IS_REFUND_CREDIT_ENABLE"]}}},"multilanguage":"https:\/\/cdn.getflits.com\/locales\/default\/en.json"},"flagSvgUrl":"https:\/\/cdn.shopify.com\/s\/files\/1\/0030\/7491\/6461\/files\/flags.svg?v=1646045459"},"THEME_SETTINGS_140487491738":{"status":false,"message":"Code is not installed"},"THEME_SETTINGS_140512526490":{"status":false,"message":"Code is not installed"},"THEME_SETTINGS_140608864410":{"status":false,"message":"Code is not installed"},"THEME_SETTINGS_140625805466":{"status":true,"data":{"accountSettings":{"template":2,"isCustomized":false,"colorSettings":{"navigationBGColor":"rgb(255, 255, 255)","navigationTextColor":"rgb(12, 33, 84)","navigationBorderColor":"rgb(255, 255, 255)","contentBGColor":"rgb(255, 255, 255, 0)","contentTextColor":"rgb(0, 0, 0)","primaryButtonBGColor":"rgb(12, 33, 84)","primaryButtonTextColor":"rgb(255, 255, 255)","secondaryButtonBGColor":"rgb(12, 33, 84)","secondaryButtonTextColor":"rgb(12, 33, 84)","badgeBGColor":"rgb(12, 33, 84)","badgeTextColor":"rgb(255, 255, 255)","linkColor":"rgb(12, 33, 84)"},"isAccountPageInJSON":true,"sections":["main-account"],"codeVersion":"2.1.5","themeStoreId":887},"microfront_remotes":{"pages_template":{"404":[{"component":"storeFrontCreditUsage","renderType":"remote"}],"article":[{"component":"storeFrontCreditUsage","renderType":"remote"}],"blog":[{"component":"storeFrontCreditUsage","renderType":"remote"}],"captcha":[{"component":"storeFrontCreditUsage","renderType":"remote"}],"cart":[{"component":"storeFrontCreditUsage","renderType":"remote"}],"collection":[{"component":"storeFrontCreditUsage","renderType":"remote"},{"component":"storeFrontWishListCollection","renderType":"remote"}],"list-collections":[{"component":"storeFrontCreditUsage","renderType":"remote"}],"customers\/account":[{"component":"storeFrontNavigation","renderType":"remote"},{"component":"storeFrontCreditUsage","renderType":"remote"}],"customers\/activate_account":[{"component":"storeFrontCreditUsage","renderType":"remote"}],"customers\/addresses":[{"component":"storeFrontCreditUsage","renderType":"remote"}],"customers\/login":[{"component":"storeFrontSocialLogin","renderType":"remote"}],"customers\/order":[{"component":"storeFrontCreditUsage","renderType":"remote"}],"customers\/register":[{"component":"storeFrontSocialLogin","renderType":"remote"},{"component":"storeFrontReferFriendRegisterPage","renderType":"remote"},{"component":"storeFrontRegisterPageCustomFields","renderType":"remote"}],"customers\/reset_password":[{"component":"storeFrontCreditUsage","renderType":"remote"}],"gift_card":[{"component":"storeFrontCreditUsage","renderType":"remote"}],"index":[{"component":"storeFrontCreditUsage","renderType":"remote"}],"metaobject":[{"component":"storeFrontCreditUsage","renderType":"remote"}],"page":[{"component":"storeFrontCreditUsage","renderType":"remote"}],"password":[{"component":"storeFrontCreditUsage","renderType":"remote"}],"policy":[{"component":"storeFrontCreditUsage","renderType":"remote"}],"product":[{"component":"storeFrontWishList","renderType":"remote"},{"component":"storeFrontRecentlyViewedProductPage","renderType":"remote"},{"component":"storeFrontCreditUsage","renderType":"remote"}],"search":[{"component":"storeFrontCreditUsage","renderType":"remote"}]},"remotes":{"storeFrontNavigation":{"remoteUrl":"defaultURL","moduleToLoad":".\/storeFrontNavigation","remoteName":"storeFrontNavigation","localRoute":"storeFrontNavigation","skeletonToLoad":"SkeletonNavigation","states":[]},"storeFrontRegisterPageCustomFields":{"remoteUrl":"defaultURL","moduleToLoad":".\/storeFrontRegisterPageCustomFields","remoteName":"storeFrontMyProfile","localRoute":"storeFrontMyProfile","required":["IS_CUSTOM_FIELDS_ENABLE"]},"storeFrontMyProfile":{"remoteUrl":"defaultURL","moduleToLoad":".\/storeFrontMyProfile","remoteName":"storeFrontMyProfile","localRoute":"storeFrontMyProfile","skeletonToLoad":"LoadingWithOutShadow","jsonTemplate":[{"component":"MyProfileForm","renderType":"local"}]},"storeFrontChangePassword":{"remoteUrl":"defaultURL","moduleToLoad":".\/storeFrontChangePassword","remoteName":"storeFrontChangePassword","localRoute":"storeFrontChangePassword","skeletonToLoad":"LoadingWithOutShadow","jsonTemplate":[{"component":"ChangePasswordFormComponent","renderType":"local"}]},"storeFrontWishList":{"remoteUrl":"defaultURL","moduleToLoad":".\/storeFrontWishList","remoteName":"storeFrontWishList","localRoute":"storeFrontWishList","required":["IS_WISHLIST_ENABLE","IS_WISHLIST_PAID"]},"storeFrontWishListCollection":{"remoteUrl":"defaultURL","moduleToLoad":".\/storeFrontWishListCollection","remoteName":"storeFrontWishList","localRoute":"storeFrontWishListCollection","required":["IS_WISHLIST_ENABLE","IS_WISHLIST_PAID"]},"storeFrontWishListPage":{"remoteUrl":"defaultURL","moduleToLoad":".\/storeFrontWishListPage","remoteName":"storeFrontWishList","localRoute":"storeFrontWishListPage","skeletonToLoad":"Loading","jsonTemplate":[],"required":["IS_WISHLIST_ENABLE","IS_WISHLIST_PAID"]},"storeFrontCreditUsage":{"remoteUrl":"defaultURL","moduleToLoad":".\/storeFrontCreditUsage","remoteName":"storeFrontCredit","localRoute":"storeFrontCreditUsage","required":["IS_STORE_CREDIT_PAID","is_store_credit_enable"],"requiredArray":[["IS_STORE_CREDIT_PAID","is_store_credit_enable"],["IS_REFUND_CREDIT_ENABLE"]],"jsonTemplate":[]},"storeFrontSocialLogin":{"remoteUrl":"defaultURL","moduleToLoad":".\/storeFrontSocialLogin","remoteName":"storeFrontSocialLogin","localRoute":"storeFrontSocialLogin","jsonTemplate":[],"required":["IS_SOCIAL_LOGIN_PAID","IS_SOCIAL_LOGIN_ENABLE"]},"storeFrontReferFriendRegisterPage":{"remoteUrl":"defaultURL","moduleToLoad":".\/storeFrontReferFriendRegisterPage","remoteName":"storeFrontReferFriend","localRoute":"storeFrontReferFriendRegisterPage","required":["IS_REFER_PROGRAM_ON","IS_STORE_CREDIT_PAID","is_store_credit_enable"]},"storeFrontReferFriend":{"remoteUrl":"defaultURL","moduleToLoad":".\/storeFrontReferFriend","remoteName":"storeFrontReferFriend","localRoute":"storeFrontReferFriend","skeletonToLoad":"Loading","required":["IS_STORE_CREDIT_PAID","IS_REFER_PROGRAM_ON","is_store_credit_enable"]},"storeFrontHowToManageCredit":{"remoteUrl":"defaultURL","moduleToLoad":".\/storeFrontHowToManageCredit","remoteName":"storeFrontHowToManageCredit","localRoute":"storeFrontHowToManageCredit","skeletonToLoad":"Loading","required":["is_store_credit_enable","IS_HOW_TO_EARN_CREDIT_DISPLAY","IS_STORE_CREDIT_PAID"],"jsonTemplate":[{"component":"HowToEarn","name":"edit","label":"flits.navigation.how_to_earn_credit","type":"button"},{"component":"HowToSpent","name":"edit","label":"flits.navigation.how_to_spend_credit","type":"button"},{"component":"FromStoreOwner","name":"edit","label":"flits.navigation.from_admin","type":"button"}]},"storeFrontCredit":{"remoteUrl":"defaultURL","moduleToLoad":".\/storeFrontCredit","remoteName":"storeFrontCredit","localRoute":"storeFrontCredit","skeletonToLoad":"Loading","required":["IS_STORE_CREDIT_PAID","is_store_credit_enable"]},"storeFrontOrder":{"remoteUrl":"defaultURL","moduleToLoad":".\/storeFrontOrder","remoteName":"storeFrontOrder","localRoute":"storeFrontOrder","skeletonToLoad":"Loading"},"storeFrontDeliveryAddress":{"remoteUrl":"defaultURL","moduleToLoad":".\/storeFrontDeliveryAddress","remoteName":"storeFrontDeliveryAddress","localRoute":"storeFrontDeliveryAddress","skeletonToLoad":"LoadingWithOutShadow"},"storeFrontRecentlyViewedProducts":{"remoteUrl":"defaultURL","moduleToLoad":".\/storeFrontRecentlyViewedProducts","remoteName":"storeFrontRecentlyViewedProducts","localRoute":"storeFrontRecentlyViewedProducts","skeletonToLoad":"Loading","required":["is_recently_view_enable"]},"storeFrontRecentlyViewedProductPage":{"remoteUrl":"defaultURL","moduleToLoad":".\/storeFrontRecentlyViewedProductPage","remoteName":"storeFrontRecentlyViewedProducts","localRoute":"storeFrontRecentlyViewedProductPage","required":["is_recently_view_enable"]},"storeFrontTopOrderedProducts":{"remoteUrl":"defaultURL","moduleToLoad":".\/storeFrontTopOrderedProducts","remoteName":"storeFrontTopOrderedProducts","localRoute":"storeFrontTopOrderedProducts","skeletonToLoad":"LoadingWithOutShadow","required":["IS_ADVANCE_DASHBOARD_ENABLE","IS_ADVANCE_DASHBOARD_PAID"]},"storeFrontRefundCredit":{"remoteUrl":"defaultURL","moduleToLoad":".\/storeFrontRefundCredit","remoteName":"storeFrontCredit","localRoute":"storeFrontRefundCredit","skeletonToLoad":"Loading","required":["IS_REFUND_CREDIT_ENABLE"]}}},"multilanguage":"https:\/\/cdn.getflits.com\/locales\/default\/en.json"},"flagSvgUrl":"https:\/\/cdn.shopify.com\/s\/files\/1\/0030\/7491\/6461\/files\/flags.svg?v=1646045459"},"THEME_SETTINGS_140828999834":{"status":false,"message":"Code is not installed"},"THEME_SETTINGS_140881756314":{"status":false,"message":"Code is not installed"},"THEME_SETTINGS_140885229722":{"status":false,"message":"Code is not installed"},"THEME_SETTINGS_141018431642":{"status":false,"message":"Code is not installed"},"THEME_SETTINGS_141054738586":{"status":false,"message":"Code is not installed"},"total_pages":0,"WSL_AFTER_BTN_BORDER_COLOR":"#F7F5FA","WSL_AFTER_BTN_COLOR":"#080707","WSL_AFTER_BTN_TEXT":"Added to Wishlist","WSL_AFTER_BTN_TEXT_COLOR":"#F5FAF9","WSL_AFTER_HEART_COLOR":"#FC0303","WSL_BEFORE_BTN_BORDER_COLOR":"#000000","WSL_BEFORE_BTN_COLOR":"#FCFCFC","WSL_BEFORE_BTN_TEXT":"Add to Wishlist","WSL_BEFORE_BTN_TEXT_COLOR":"#F5020F","WSL_BEFORE_HEART_COLOR":"#000000","WSL_BTN_TYPE":"1","WSL_CODE_AUTOMATIC":"1","WSL_COUNT_ENABLE":"1","WSL_DEFAULT_AFTER_HEART_COLOR":"#FC2803","WSL_DEFAULT_BEFORE_HEART_COLOR":"#080708"},
locals: {},
romCache: true,
cacheTime: 5
};
window.flitsObjects.accountPage = {};
window.flitsObjects.allCssJs = {
flitsCss:{
name:"flitsCss",
url:"https://cdn.shopify.com/extensions/269c798b-a99b-49e0-974a-9cb3e65387f4/flits-50/assets/flits-order-status-page.css",
requestPageType:["all"],
relatedTo:"GENERAL",
loadBasedOnMetafields:[],
},
orderStatusPageJs:{
name:"orderStatusPageJs",
url:"https://cdn.shopify.com/extensions/269c798b-a99b-49e0-974a-9cb3e65387f4/flits-50/assets/flits_order_status_page.js",
requestPageType:["all"],
relatedTo:"ORDER_STATUS_PAGE",
loadBasedOnMetafields:[],
}
};
window.flitsObjects.storeData = {
request:{
host:"www.bombayshavingcompany.com",
page_type: "article",
path:"/blogs/body-hair-removal/how-to-shave-your-head-at-home",
},
template:{
directory: "",
name: "article",
suffix: "",
},
theme:{
id:"",
name:"",
},
jsonSettingsPath:"",
product:null,
cart: {"note":null,"attributes":{},"original_total_price":0,"total_price":0,"total_discount":0,"total_weight":0.0,"item_count":0,"items":[],"requires_shipping":false,"currency":"INR","items_subtotal_price":0,"cart_level_discount_applications":[],"checkout_charge_amount":0},
shop_currency: 'INR',
money_format: '₹{{amount_no_decimals}}',
customer_id: '',
customer_email: '',
customer_accepts_marketing: '',
customer_orders_count: '',
customer_last_order_name: '',
customer_last_order_id: '',
};
window.flitsObjects.global.Metafields.customer_id = -1 ;
window.flitsObjects.storeData.customer_id = -1 ;


